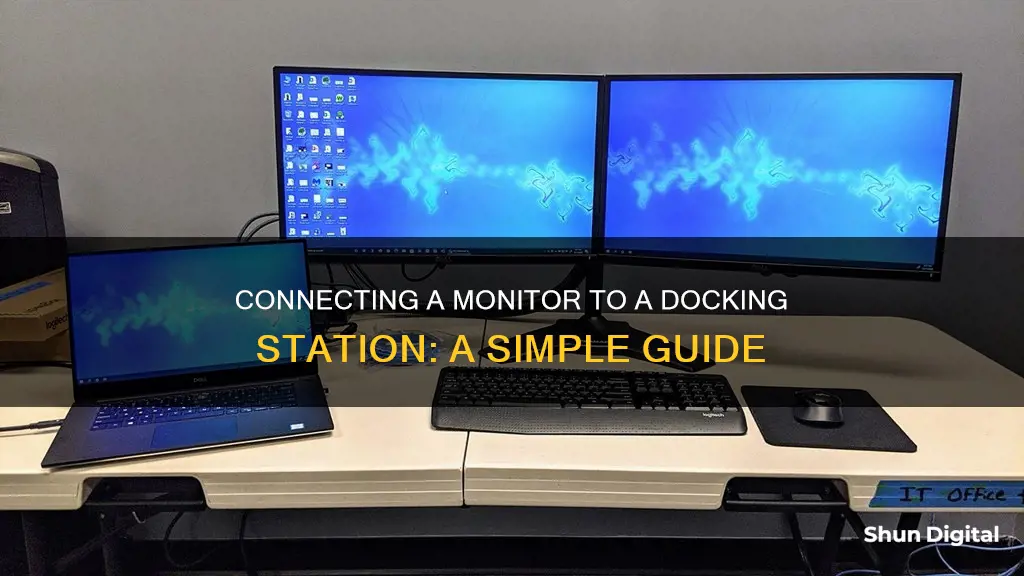
If you're looking to connect a monitor to a docking station, you've come to the right place. This article will walk you through the process step-by-step, offering a comprehensive guide to achieving your desired setup. By combining a docking station with your laptop, you can enjoy the benefits of a desktop computer while retaining the portability of your laptop. This setup is ideal for those who need to connect multiple devices and peripherals but are limited by the number of ports on their laptop. With a docking station, you can centralize all your connections in one spot, minimizing cable clutter and maximizing functionality.
What You'll Learn

Connect the power cable to the monitor
To connect the power cable to the monitor, start by locating the power cord of the monitor. The power cord is the cable that supplies electricity to the monitor, and it usually has a standard plug that fits into an electrical outlet. Once you've identified the power cord, follow these steps:
- Plug the power cord into a wall outlet: Ensure the outlet is easily accessible and close to the monitor's location. The power cord should be firmly inserted into the outlet to avoid accidental disconnection.
- Connect the power cord to the monitor: Find the power input port on the monitor, which is usually located at the back or side of the monitor. Align the connector of the power cord with the input port and securely attach it.
- Power on the monitor: After connecting the power cord, locate the power button on the monitor and turn it on. The power button is typically located on the front or side of the monitor. Press or toggle it to turn on the monitor.
- Check the power status: Once the monitor is turned on, verify that it is receiving power by checking for a power indicator light. This light is usually located near the power button and may be a small LED that illuminates when the monitor is powered on.
- Adjust power settings: If necessary, adjust the power settings of the monitor to suit your preferences. This includes settings such as brightness, contrast, and power-saving modes. These settings can usually be accessed through buttons or menus on the monitor itself.
- Test the connection: To ensure the power connection is secure and functioning properly, try performing a simple test. You can turn the monitor off and then back on to see if it responds accordingly. Additionally, try unplugging and replugging the power cord to ensure a firm connection.
By following these steps, you will be able to successfully connect the power cable to the monitor, ensuring it receives the necessary electrical power for proper functionality.
Setting Up Your ASUS Monitor: A Step-by-Step Guide
You may want to see also

Connect the monitor to the docking station
To connect a monitor to a docking station, you will need to follow a few simple steps. Firstly, ensure that you have the correct cables to connect your monitor to the docking station. Common connections include HDMI, DisplayPort, USB-C, or USB-A. If you are using a USB-C or USB-A docking station, you will need a port that supports DisplayPort Alt Mode.
Once you have the correct cables, follow these steps:
Step 1: Connect the Monitor to the Docking Station
If your docking station has a separate power cable, connect this first, then connect the monitor to the docking station using the HDMI, DisplayPort, or USB-C cable. Be sure to also connect the power cable of the monitor to a power source.
Step 2: Connect the Docking Station to Your Laptop
Connect the docking station to your laptop using the appropriate cable, such as USB-C or USB-A. Ensure that the docking station is connected to the correct port on your laptop.
Step 3: Power on the Docking Station
Connect the power adapter to the docking station and to a power source, such as a wall outlet.
Step 4: Connect Other Accessories
You may also want to connect other peripherals to your setup, such as a keyboard, mouse, or Ethernet cable. These can typically be plugged into the USB ports on the docking station.
By following these steps, you should be able to successfully connect your monitor to a docking station and have a functional setup.
Hooking Up Multiple Monitors to Your Surface Pro: A Step-by-Step Guide
You may want to see also

Connect the docking station to your laptop
Connecting a docking station to your laptop is a straightforward process, but there are a few things to keep in mind. Firstly, ensure that the docking station is compatible with your laptop. Docking stations come with different types of interfaces such as USB-C, Thunderbolt 3, USB 3.0, or WiGig (wireless). Check that your laptop has the correct port for the docking station.
Once you have confirmed compatibility, follow these steps:
Step 1: Install DisplayLink Software (if applicable)
If you have purchased a DisplayLink docking station, it is important to install the matching DisplayLink drivers before connecting the dock to your laptop. This step can be skipped if you do not have a DisplayLink docking station.
Step 2: Connect the Docking Station to Your Laptop
With most laptops, you will connect your docking station via USB-C. Simply plug the USB-C cable of the docking station into your laptop. For MacBook users, you can also connect to the Thunderbolt 3 ports, allowing you to expand your laptop ports.
Step 3: Connect the Power Cable (if applicable)
Some docking stations have a separate power cable. If your docking station requires power, be sure to connect it to a power source using the provided power adapter. This will ensure optimal performance.
Step 4: Connect Other Accessories (if desired)
After connecting your laptop to the docking station, you may want to connect other peripherals such as a mouse, keyboard, or Ethernet cable. These can be easily connected to the available ports on the docking station.
By following these steps, you will successfully connect your docking station to your laptop, allowing you to expand your laptop's capabilities and create a more versatile workspace.
Discovering Your Monitor's Native Resolution: A Quick Guide
You may want to see also

Identify compatible ports
To connect a monitor to a docking station, you need to identify the compatible ports on both devices. This process involves checking the available ports on your monitor and docking station and ensuring they match for a successful connection. Here is a detailed guide to help you identify compatible ports:
Identify the Ports on Your Monitor
The first step is to familiarise yourself with the ports available on your monitor. Look at the back or sides of your monitor to locate the input ports. Common ports found on modern monitors include HDMI, DisplayPort, USB-C, DVI, and VGA. Take note of the type and number of each port available.
Identify the Ports on Your Docking Station
Next, you need to identify the ports on your docking station. Docking stations typically offer a variety of port options, but the specific ports available will depend on the model. Common ports found on docking stations include USB-C, USB 3.0, Thunderbolt 3, DisplayPort, and HDMI. Again, make a note of the types and numbers of each port.
Match the Monitor and Docking Station Ports
Once you have identified the ports on both the monitor and the docking station, it's time to match them. Compatible ports will have the same shape and size, ensuring a secure physical connection. For example, if your monitor has an HDMI port, you will need to connect it to an HDMI port on the docking station using an HDMI cable.
It's important to note that not all USB ports can transmit video signals. If you are using a USB connection, ensure that the port on your laptop supports DisplayPort Alt Mode, which is necessary for transmitting video signals. If not, you may need to use an HDMI or DisplayPort connection for video transmission.
Additionally, some ports may have specific compatibility requirements. For example, Thunderbolt 3 ports require a Thunderbolt 3 cable or a USB-C cable that supports Thunderbolt 3. Always refer to the user manual or product specifications to understand the unique requirements of each port.
Use Adaptors or Converters if Necessary
If your monitor and docking station have incompatible ports, you may need to use adaptors or converters to establish a successful connection. For example, if your monitor only has a VGA port but your docking station only has HDMI ports, you would need an HDMI-to-VGA adaptor or converter cable.
By carefully identifying and matching compatible ports, you can ensure a seamless connection between your monitor and docking station, avoiding common issues such as a lack of video signal.
Identifying Your ASUS Monitor: A Step-by-Step Guide
You may want to see also

Connect other accessories
Once you have connected your monitor to the docking station and the docking station to your laptop, you can start to connect other accessories.
If you are using a Bluetooth keyboard and mouse, you will need to pair them with your laptop. The docking station does not have an integrated Bluetooth receiver, so if a USB dongle was provided with your keyboard and mouse, connect this to the docking station.
You can then connect other external USB devices, such as a printer, external webcam, or USB drive, to the docking station.
Finally, connect the power cable to the docking station. Dell recommends using the power adapter provided with the docking station for optimal performance.
How to Connect Motion Detectors to Monitors
You may want to see also
Frequently asked questions
First, connect the monitor to the docking station. Then, connect the docking station to your laptop.
You can use an HDMI, DisplayPort, or USB-C cable.
Not every USB port can transmit an image signal. Try the other USB ports on your laptop first. If they don't work either, your laptop might not support DisplayPort Alt Mode. In that case, connect your monitor to an HDMI or DisplayPort connector on your laptop, using a cable converter if necessary.
Dell docking stations have different types of docking interfaces, including E-port, D-port, Thunderbolt 3, USB-C, USB 3.0, and WiGig (wireless). Make sure you're using a compatible docking station with your laptop.
You may need to connect a keyboard and/or mouse to your setup. These peripherals are typically plugged into the USB ports.


