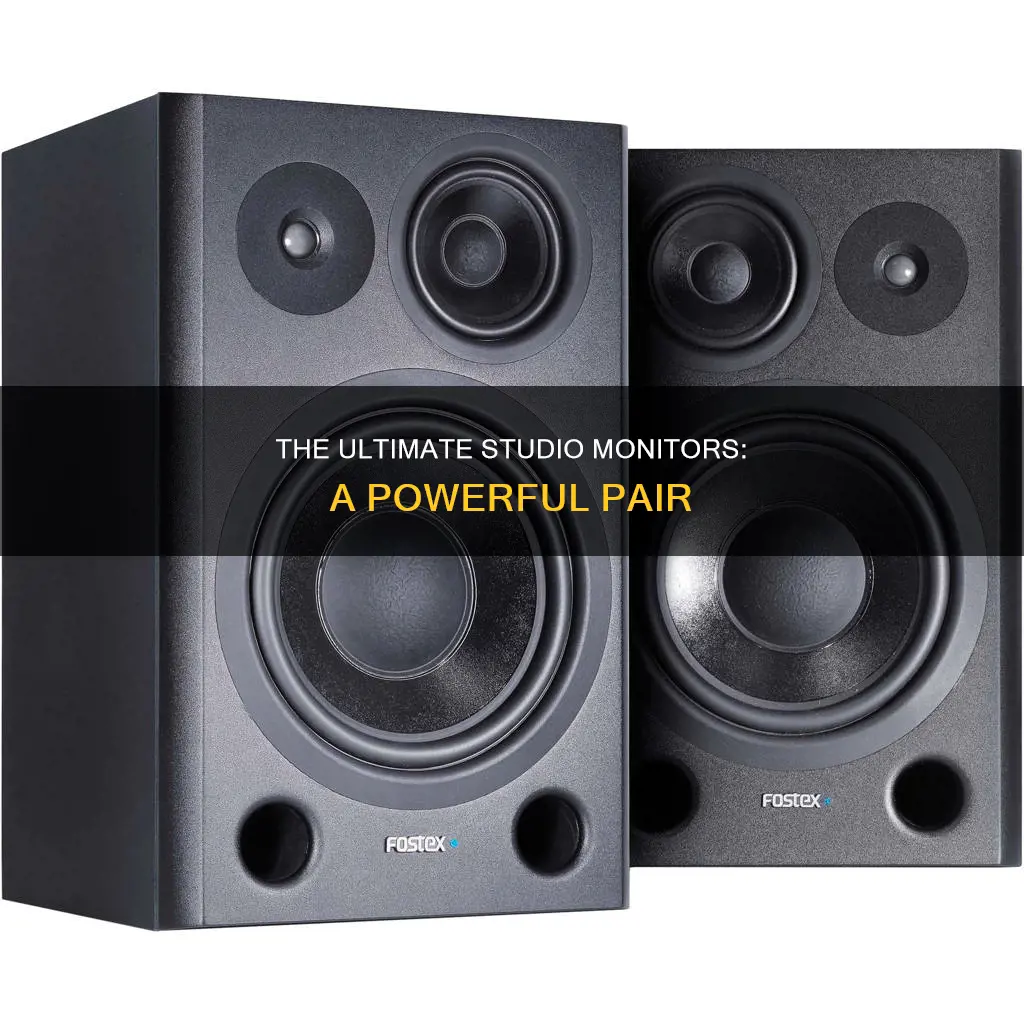
Studio monitors are speakers designed to provide music professionals with complete clarity of sound during recording. They come in two varieties: powered (or active) and unpowered (or passive). Powered monitors have a built-in amplifier and simply need to be plugged into a power outlet and an audio source, making them a good choice for hobby studios or audiophiles. Unpowered monitors, on the other hand, require an external amplifier and are preferred by discerning professionals for their ability to minimise interference and buzz. Studio monitors also come in various sizes, with small nearfield monitors and larger tri-amped models being the most common. When choosing a pair of studio monitors, it's important to consider the size of your studio, the type of music you'll be working with, and your budget.
| Characteristics | Values |
|---|---|
| Purpose | To reproduce sound with complete clarity to ensure the recording will sound great on high-fi audio systems |
| Types | Powered (active) and unpowered (passive) |
| Connection | Powered monitors can be plugged into a power outlet and an audio source; unpowered monitors need an external amplifier |
| Size | Should be chosen based on the size of the studio and the type of music being recorded |
| Sales | Some monitors are sold individually, while others are sold in pairs |
What You'll Learn

Active vs. passive studio monitors
Studio monitors are speakers designed to provide an accurate and precise representation of sound. They are commonly used in recording studios, radio stations, and other professional audio environments for mixing music, dialogue, and sound effects. Studio monitors come in two main varieties: active (or powered) and passive (or unpowered).
Active studio monitors have built-in amplifiers, making them simple to set up and use. They are often favoured for their convenience and performance, with the built-in amplifiers specifically designed and tuned for optimal sound quality. The internal amplifier also ensures a direct connection between the amp and drivers, resulting in optimised power distribution and protection. Additionally, active monitors may offer user-adjustable EQ tweaks, which can be helpful for matching the speaker's output to the room's acoustics. However, one disadvantage of active monitors is that they may be more challenging to upgrade, as both the speaker and amplifier would need to be replaced together.
Passive studio monitors, on the other hand, require an external amplifier to function. This offers users more flexibility, as they can choose and upgrade their amplifier separately from the speakers. Passive monitors are often considered to provide pristine sound, and their lack of built-in electronics may contribute to this reputation. They are also usually more affordable than active monitors, making them a popular choice for beginners. However, passive monitors require additional equipment and may occupy more space due to the external amplifier.
When deciding between active and passive studio monitors, it is essential to consider your specific needs, preferences, and budget. Active monitors are ideal for those seeking a straightforward, plug-and-play solution, while passive monitors offer customisation and upgrade flexibility. Additionally, the size of the monitors and the room they will be used in should be taken into account, as well as the desired level of sound quality and the intended use of the monitors.
Monitoring Home Wi-Fi Data Usage: Tips for Beginners
You may want to see also

Speaker size
Studio monitors come in a variety of sizes, from small near-field monitors to larger tri-amped models. The size of the woofer determines the range and clarity of the bass and lower midrange frequencies. For example, a 5" cone at a lower price point may suffer in low-end production, whereas an 8" woofer will be better suited for a wider range of frequencies.
When choosing the size of your studio monitors, it is important to consider the size of your studio. If you are mixing in a small space, smaller monitors will provide more accurate results. The size of the monitors should also be considered in relation to the power of the amplifier. A higher wattage will produce more definition and dynamic range, not just overall volume.
The size of the studio monitor will also depend on its intended use. If you are mixing sound for TV or motion pictures, a multi-speaker monitoring setup with a subwoofer is recommended. If you are mixing music that most people will listen to on their iPods or in their cars, a stereo pair of studio monitors will be sufficient.
In addition, the size of the monitors should be appropriate for the music you are producing. If your music has a lot of low-end frequencies, larger monitors with bigger woofers will be needed to deliver punchy bass.
Finally, it is worth noting that the placement of the studio monitors is crucial for optimal sound. They should be placed so that they form an equilateral triangle with your head when seated in the mix position.
Updating ASUS Monitor Drivers: A Simple Step-by-Step Guide
You may want to see also

Amplifiers
Studio monitors are speakers that reproduce sound with complete clarity, ensuring that every note and vocal is just right. They are designed to provide accurate details to mix engineers so they can make critical mixing decisions. Studio monitors come in a variety of configurations, including active and passive monitors. Active monitors, also known as powered monitors, have built-in amplifiers, while passive monitors require external amplifiers.
Passive monitors, also known as unpowered monitors, require an external power amplifier to function. They are less common today than active monitors but are preferred by some engineers for their pristine sound. Passive monitors do not have onboard electronics, which may contribute to their reputation for high-quality sound. They can also be more expensive due to the need for a separate amplifier.
Active monitors, on the other hand, have built-in amplifiers, making them easy to set up and more common in home studios. They typically feature multiple amplifiers, each optimised for a specific driver, ensuring ideal power delivery. They may also include simple equalizers and gain controls for adjusting frequency imbalances in the room. More advanced models even have sophisticated DSP (digital signal processing) to compensate for complex room acoustics.
When choosing an amplifier for your studio monitors, there are several factors to consider. Firstly, the number of amplifiers used is important – professional products will have separate amps for each driver in a two-way monitor. Other specifications to consider include THD (Total Harmonic Distortion), RMS and Peak Wattage (higher wattage generally means a wider dynamic range), and Signal-to-Noise Ratio. It is also essential to ensure that the amplifier has the correct inputs and outputs to match your audio interface and cables.
Some popular brands offering studio monitor amplifiers include Amphion, ATC Loudspeakers, Avantone, Crown, and SPL Audio.
Identifying Your LG Ultrawide Monitor: A Step-by-Step Guide
You may want to see also

Stereo setup
When setting up a pair of studio monitors for stereo, the most important thing to consider is the height and angle of the monitors. The high-frequency drivers of the speakers should be at the listener's ear height. This ensures the ears receive more direct sound, resulting in a richer and more detailed listening experience. This principle also applies to the angle of the monitors.
If the monitors are not angled towards the listener's ears, they will pick up more reflections from other surfaces in the room. This combined sound gives a less accurate picture, making it harder to mix. The monitors should be placed 8 to 12 inches away from walls and corners to prevent reflections from the front walls.
Consider the two speakers as two points of a triangle, with the listener's head being the third. Ideally, you want the distance between the pair of monitors to be equal to the distance from the listener's head to the monitors. This ensures the listener gets an accurate sense of the stereo field, enabling accurate panning.
Monitor stands are another consideration. Floor monitor stands tend to be quite large and require a bigger studio space. Desktop monitor stands, on the other hand, are perfect for a compact solution. Desktop stands are usually shorter, so the chosen stands should help achieve the desired height for the monitors to be level with the listener's ears.
If using a desk, it is worth noting that desk reflections can cause issues. Monitor isolation pads can help reduce vibrations from the speaker enclosures that transfer through the desk surface and affect the low-end sound.
Choosing the Right Monitors
When choosing studio monitors, it is important to consider the size of the studio and the type of music being recorded. For a very small studio, a compact set of monitors will suffice. For larger studios or if the monitors are to be used as stereo speakers, larger monitors are more suitable.
The speaker configuration should also match the type of music. For example, music with deep, thumping bass will require a monitor with a large woofer to handle the heavy low frequencies.
The difference between listening with headphones and speakers lies in the HRTF (head-related transfer function). With headphones, each ear only hears what is occurring in its respective channel. With speakers, the sound waves travel around the room, creating a more complex sonority. The listener's left ear also hears what is on the right channel and vice versa, but slightly later and with less intensity due to the acoustic shadow of the head.
Professional studio monitors are specifically engineered to be neutral sound sources, projecting sound with a flat response curve and very low levels of harmonic distortion. This is in contrast to average home stereo speakers, which often colour the sound and are therefore inappropriate for audio production.
Hooking Up Your NEC Monitor: A Step-by-Step Guide
You may want to see also

Acoustic treatment
The sound of a room is something we often don't notice until there's a big change. Acoustic treatment is about improving the quality of the sound in your studio. It is vital for two purposes: when recording a vocalist, the microphone picks up the direct sound of the singer, as well as the sound of the room; and when listening back to a recording, you'll hear the direct sound of the monitors, as well as the sound of the room.
When setting up studio monitors, it's important to consider the layout of the room. Place your speakers symmetrically, along the narrowest wall. This will direct the sound along the length of the room. They should be at head height, with the tweeter (smallest cone) level with your ears. The two monitors should form an equilateral triangle with the listener.
The speakers should be on stands that put them at head height, and the drivers should be angled so as to point towards the listener's head. Avoid putting the monitors too far into the room's corners, and observe the manufacturer's recommendations on how far from any walls they need to be. It's also best to place them symmetrically in the room, ideally firing down the long axis in smaller rooms.
To identify the main reflection points in the room, sit in your listening position and ask a friend to hold a mirror flat against the wall. Let them move it around until you can see one of the monitors in the mirror. This is the area to place an acoustic panel. Acoustic panels will absorb the sound from the speaker, rather than reflect it towards you.
Acoustic panels can be made from acoustic foam, which is great for absorbing high frequencies. If thick enough, it can also be effective for medium frequencies. Acoustic foam comes in tiles of various sizes and thicknesses. The thicker they are, the lower the frequency they can absorb. Adding an air gap behind the foam will increase its effectiveness at lower frequencies.
Another option is to use acoustic panels made from fibreglass or mineral wool slab, which are denser than foam. The thicker the panel, the lower the frequency it can absorb. These panels can be placed at the main reflection points on the walls, preferably with an air gap of a few inches to increase the bass response.
Bass traps are extra deep acoustic panels that help to absorb the longer sound waves of low frequencies, which build up in the corners of rooms. Bass traps should be placed in the corners of the room, where low frequencies collect.
To make your own acoustic panels, you can use semi-rigid slabs of mineral wool and build a simple wooden frame around them. Seal the mineral wool with a solution of PVA glue and water, then cover the frame with a porous material that allows sound waves to pass through.
Diffusers are reflective panels that scatter sound in different directions. They are good for controlling reflections without making the room sound too dry. You probably won't need diffusers for a small home recording studio, as they are not very effective in small rooms.
Everything in a room contributes to its sound. To improve the acoustics, you can be strategic by arranging furniture to get the sound you want. An upholstered sofa at the back of the room can work as a sound absorber, especially if it is big and heavy. Thick rugs and heavy wool blankets can soak up high-frequency reflections. Bunch them up and hang them on the wall with an air gap of a few inches, or put them on a clothes rail so you can move them around.
Carpets or rugs on the floor can help tame a reverberant room by absorbing high frequencies, but don't make the mistake of carpeting every surface as this will only absorb high frequencies and leave you with a dull, boxy sound.
LCD Monitors: Handling Both NTSC and PAL Signals
You may want to see also
Frequently asked questions
Studio monitors are speakers designed to provide accurate and clear sound reproduction in recording studios. They come in two varieties: powered (active) and unpowered (passive). Powered monitors have built-in amplifiers, making them easy to set up, while unpowered monitors require external amplifiers.
Studio monitors offer a more complex listening experience compared to headphones. With speakers, sound waves travel around the room, creating interaural intensity and interaural time differences. These differences enable us to locate sounds in space, which is crucial for mixing.
Several factors include acoustics, budget, specifications, and size. It's important to consider the room's impact on sound and treat reflections to optimise audio. Additionally, the budget, amplifier specifications, and size of the monitors should be considered to match the studio space and music type.
Proper monitor setup includes considering height, angle, and distance. The high-frequency drivers should be at ear height, angled towards the listening position, with an equal distance between the speakers and the listener. This forms an equilateral triangle for accurate stereo field perception and panning.
You need an audio interface and cables. Identify the outputs on your interface (XLR or jack) and the inputs on your monitors. Ensure you use balanced cables (TRS format) to reduce noise and maintain signal integrity.


