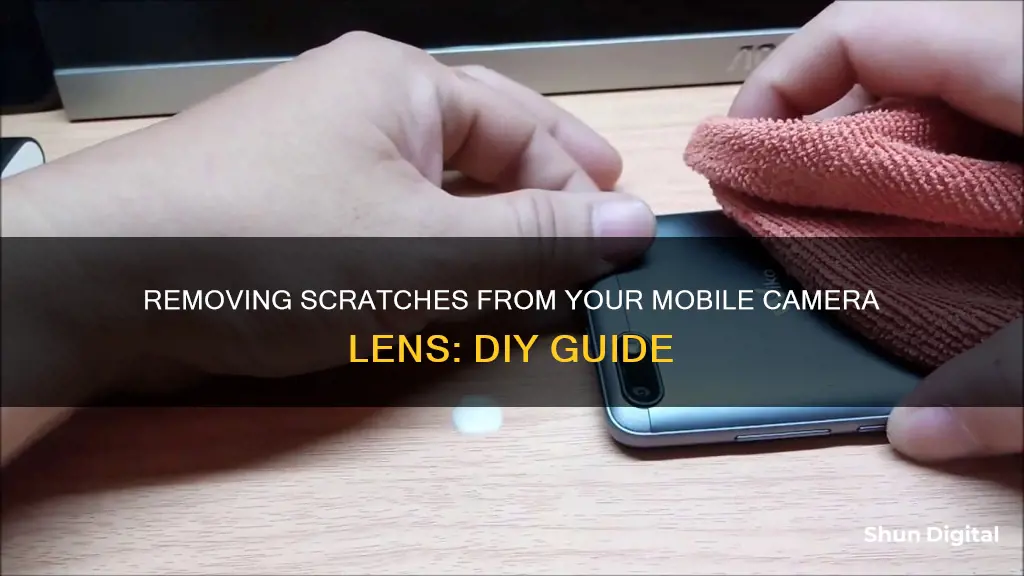
Scratches on your mobile phone camera can be frustrating, especially when they affect the quality of your photos. Luckily, there are several DIY methods to remove scratches from your camera lens. This includes using toothpaste, rubbing alcohol, Vaseline, a pencil eraser, baking soda and banana, a screen polisher/scratch remover, or a camera lens repair kit. While some of these methods may only work for minor scratches, others can help with deeper scratches. It's important to proceed with caution when attempting any of these methods, as incorrect application could lead to further damage.
| Characteristics | Values |
|---|---|
| Prevention | Using a protective case |
| Scratch identification | Take pictures in a well-lit area to look for distortion |
| Cleaning | Air duster, cleaning pen, microfiber cloth, lens cleaner |
| Light scratches | Toothpaste, rubbing alcohol, Vaseline, screen polisher/scratch remover, pencil eraser |
| Deep scratches | Replace the camera lens or the entire phone |
What You'll Learn

Using toothpaste
Toothpaste is an effective scratch remover for various surfaces, including mobile phone cameras. Toothpaste, especially the paste-based variety, contains mild abrasives that act as fine polishing agents. When applied to a scratched surface, toothpaste gently wears down the uneven edges of the scratch, making it less visible or even removing it entirely.
Step 1: Choose the Right Toothpaste
Not all toothpastes are created equal when it comes to scratch removal. It is important to choose a non-abrasive toothpaste with a low Radioactive Dentin Abrasiveness (RDA) value. Look for toothpastes with an RDA value below 70-80. Avoid advanced toothpaste products designed for whitening, plaque removal, or sensitive teeth, as they tend to be more abrasive.
Some suitable toothpaste options include:
- Arm & Hammer Dental Care Sensitive (RDA 48)
- Weleda Children's Tooth Gel (RDA 45)
- Colgate 2-in-1 Fresh Mint (RDA 70)
- Colgate Total (RDA 70)
- Colgate Regular (RDA 68)
Step 2: Prepare the Toothpaste and Application Tools
You will need a small amount of toothpaste, a soft cloth or cotton swab, and a clean, slightly damp cloth for this process. If you are using a cotton swab, slightly dampen it before proceeding to the next step.
Step 3: Apply the Toothpaste to the Camera Lens
Take a small amount of toothpaste on your chosen application tool and gently rub it onto the scratched area of your mobile phone camera lens. Use gentle, circular motions and avoid applying too much pressure. Be careful not to get any toothpaste inside the camera lens or other sensitive areas of your phone.
Step 4: Remove the Toothpaste
Once you have applied the toothpaste and gently rubbed it onto the scratch, use a clean, slightly damp cloth to wipe away the excess toothpaste from the camera lens. Be gentle during this step to avoid damaging the lens.
Step 5: Inspect the Results
After removing the toothpaste, take a close look at the camera lens to see if the scratches have been removed or reduced. If the scratches are still visible, you may need to repeat the process or try a different method.
It is important to note that toothpaste may not be effective for deep or major scratches. Additionally, be cautious when applying and removing toothpaste, as using the wrong technique or a highly abrasive toothpaste can potentially cause more harm than good.
Spotting Cameras: Tips to Identify Them Discreetly
You may want to see also

Using rubbing alcohol
Using a microfiber cloth and rubbing alcohol is a popular method for repairing scratches on your mobile camera lens. This method is simple and effective, but it is important to exercise caution to avoid damaging the lens coating.
Firstly, you will need to dilute the rubbing alcohol. The ideal solution is a 3.5% concentration of alcohol, which can be achieved by mixing one part alcohol with 20 parts water. It is important not to skip this step, as undiluted alcohol can cause further damage to the lens.
Next, dampen a microfiber cloth with the diluted alcohol solution. The cloth should be slightly damp, not dripping wet. It is important to use a microfiber cloth designed for cleaning lenses, as other materials may create tiny scratches on the lens.
Now, gently rub the damp cloth over the scratch. Keep rubbing gently, and you should see the scratch start to disappear. Finally, use a dry, clean microfiber cloth to dry off the lens.
While this method can be effective for minor scratches, it may not work for deeper scratches or cracks. Additionally, it is important to note that alcohol has a reputation for damaging the lens coating. Therefore, this method should be used with caution and only when necessary.
Troubleshooting Facetime: Camera Visibility Issues
You may want to see also

Using Vaseline
Vaseline is a low-risk, old-school, homemade DIY method to remove minor scratches from your mobile camera lens. It is also a good option if you are looking for a temporary fix.
Step 1: Clean the Camera Lens
Use a microfiber cloth to wipe the lens and remove any dust or dirt. Make sure the cloth is clean and dry.
Step 2: Apply a Small Amount of Vaseline
Take a very small amount of Vaseline and gently apply it to the lens's surface. Be careful not to apply too much pressure or use excessive force.
Step 3: Rub the Lens with a Microfiber Cloth
Use a clean, dry microfiber cloth to carefully rub the Vaseline on the lens until it is completely clear. Continue rubbing gently until the scratch is no longer visible.
Step 4: Repeat as Needed
This method may need to be repeated semi-regularly, as the Vaseline will wear off over time.
Tips:
- While Vaseline can be effective for minor scratches, it may only minimise the appearance of major scratches without completely removing them.
- Be careful not to get Vaseline on any other parts of your phone.
Understanding Camera Vision in Unity: What's in View?
You may want to see also

Using a glass windscreen polish
If you have a scratched camera lens on your phone, you can use a glass windscreen polish to remove the scratches. This is a low-risk method that may even restore the lens coating.
Firstly, you will need to purchase a windscreen polish with nano-glass coating protection. These are readily available in many stores. Look for one with an advanced formula nano-coating protection, as the nano-coating has a unique ceramic molecular compound formula that adds a protective layer to your lens.
Before you begin, clean the lens with a microfiber cloth to remove any dust or dirt. Then, follow these steps:
- Dab a small amount of the polisher onto a flat surface.
- Using the tip of the microfiber cloth, pick up a tiny portion of the polish.
- Gently rub the polish along the scratch on your camera lens until the scratch disappears.
- Wipe the lens clean with a dry microfiber cloth.
If you want to try this method but are unsure about using it on your phone, you could try it on an old camera lens first.
You can also use this method in conjunction with fine sandpaper if your lens is badly scratched. However, be aware that this is a high-risk method that will strip the lens of its protective coating. Apply a wet piece of fine sandpaper (2000 grit) to the lens in a circular motion to remove deep scratches, then follow the steps above to add a new layer of protection with the windscreen polish.
Remember, prevention is better than cure. To avoid scratches on your camera lens, consider investing in a protective case and a screen protector.
Apple Watch Series 1: Camera Expectations Explained
You may want to see also

Using a pencil eraser
Scratches on your mobile camera can be frustrating, but there's a simple solution right at your fingertips—literally! You can use a pencil eraser to remove those unsightly scratches and have your camera lens looking like new again. Here's a step-by-step guide on how to do it:
Step 1: Choose the Right Eraser
It's important to select an eraser that is soft and not too coarse or abrasive. The ideal eraser is new and hasn't been used before, as you don't want any graphite markings on your camera lens. White erasers, commonly found on the end of pencils, are a good option.
Step 2: Clean the Camera Lens
Before you start erasing, make sure to clean the camera lens. Use a microfiber cloth to gently wipe away any dust, dirt, or fingerprints. It's important to start with a clean surface to ensure the best results.
Step 3: Start Erasing
Now, it's time to put that eraser to work! Gently move the eraser in the direction of the scratch. If the scratch is long, use long strokes with the eraser. Be careful not to apply too much pressure, as you don't want to damage the lens. Continue erasing for about a minute, and then change directions and erase in the opposite direction for another minute. The friction from the eraser will cause tiny particles to fill in the scratch, helping to buff it away.
Step 4: Clean the Lens Again
Once you're satisfied with the results, give the lens a final wipe-down with a microfiber cloth. Make sure to remove any residue or eraser shavings that may be left behind.
Tips and Precautions:
- This method is most effective for minor, surface-level scratches. For deeper scratches, the eraser may only help to minimise their appearance.
- While this technique is unlikely to damage the coating on your lens, it's always a good idea to proceed with caution.
- If you're dealing with severe scratches, you may need to explore other options, such as using a camera lens repair kit or seeking professional help.
- Remember to clean your lens regularly and keep it protected with a lens cap or cover to prevent scratches in the future.
Viewing Through Your Camera's Eyes on Windows
You may want to see also
Frequently asked questions
There are several methods for removing scratches from your mobile camera lens. Most of these methods involve applying a small amount of a substance to the lens and then gently rubbing it off with a microfiber cloth. Here are some substances that you can use:
- Toothpaste
- Rubbing alcohol
- Vaseline
- Windscreen polish
It is recommended to use a microfiber cloth to remove scratches from your mobile camera.
Yes, Vaseline can be used to remove minor scratches from your mobile camera lens. Apply a small amount of Vaseline to the lens and gently rub it off with a microfiber cloth.
Yes, toothpaste can be used to remove scratches from your mobile camera lens. Apply a small amount of toothpaste to the lens and gently rub it off with a microfiber cloth.


