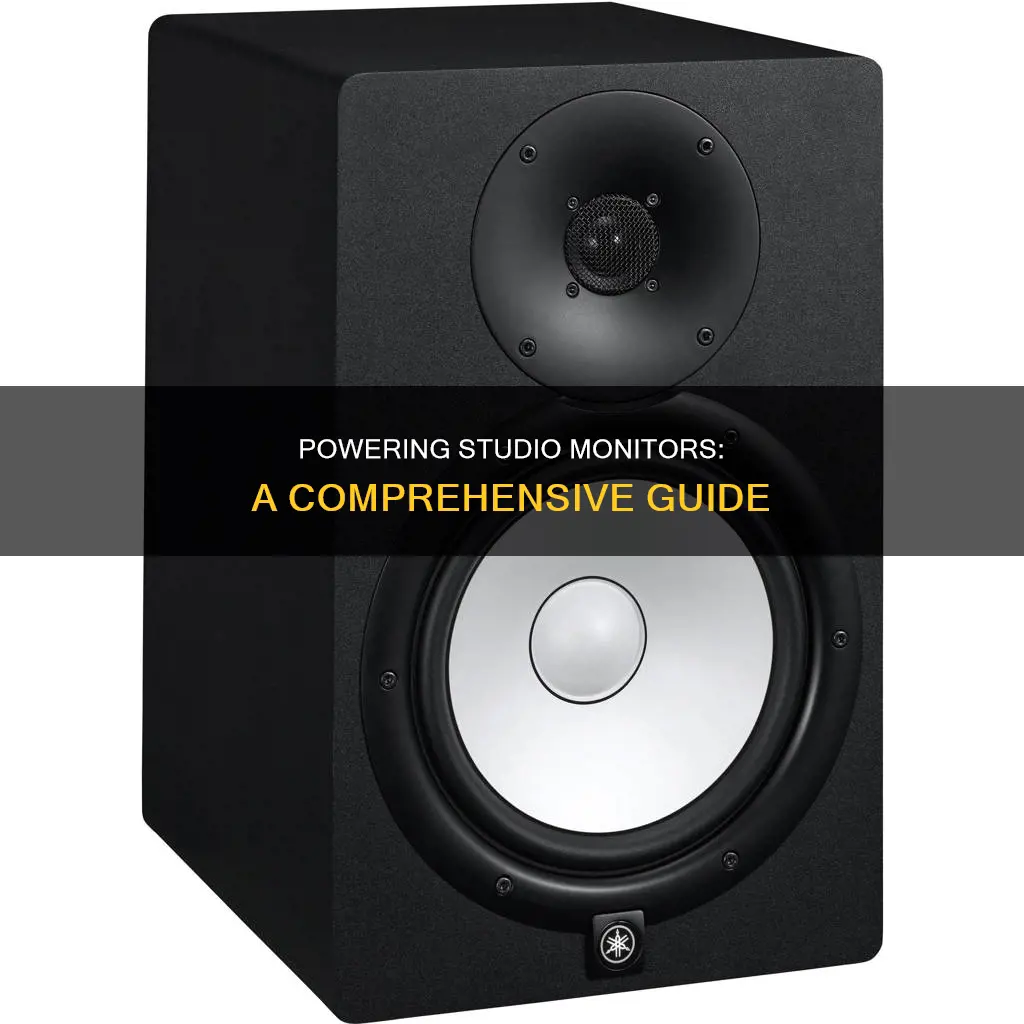
Studio monitors are an essential component of any recording setup, as they provide an accurate reproduction of sound. Unlike consumer hi-fi speakers, studio monitors offer a flat frequency response, ensuring that your mix will sound great on any system. When it comes to powering studio monitors, there are two main options: active/powered monitors and passive/unpowered monitors. Active monitors have a built-in amplifier, while passive monitors require an external power amplifier.
Active monitors, such as the Yamaha HS8, are popular among home recording artists and larger studios due to their convenience and ease of use. They can be plugged directly into an electrical outlet and offer a compact listening package. The built-in amplifier is specifically designed for the speakers, ensuring optimal sound quality. However, active monitors may offer less flexibility and lower component quality compared to passive monitors.
Passive monitors, like the Alesis Monitor1 MKII, require an external power amplifier, such as the Hafler TA1100. This setup provides more flexibility and typically offers higher-quality components. However, it can be more expensive and may not always sound as intended due to the separate amplifier.
When choosing between active and passive studio monitors, consider your budget, space constraints, and desired level of convenience and flexibility. Both options have their pros and cons, and the right choice depends on your specific needs and preferences.
What You'll Learn

Active vs. Passive Monitors
When it comes to studio monitors, there are two main types: active and passive. Here's a detailed comparison between the two to help you decide which one is more suitable for your needs:
Active Monitors
Active monitors, also known as powered monitors, have built-in amplifiers, which means they can be plugged directly into a power source and an audio source without the need for an external amplifier. This makes them simpler to use and ideal for those who want a plug-and-play solution. The built-in amplifiers in active monitors are specifically designed for the speakers, resulting in better overall sound quality. Additionally, active monitors often include features such as gain or frequency controls and built-in protection against overload. They are also more compact and streamline the mixing process by allowing you to adjust levels straight out of the unit.
Passive Monitors
Passive monitors, on the other hand, are strictly speakers and require an external power amplifier to drive them. One advantage of passive monitors is the flexibility they offer. You can choose and upgrade the amplifier separately, allowing for a more gradual progression to better-quality gear. This can also be more cost-effective, as you have the option to buy a second-hand amplifier. However, setting up passive monitors requires more components and effort, and there is a risk of the amplifier and speakers not sounding as intended when paired together.
The decision between active and passive monitors depends on your specific needs and preferences. If you prioritize convenience, simplicity, and accuracy, active monitors are a good choice. On the other hand, if you're willing to put in the extra effort for more flexibility and the ability to upgrade components separately, passive monitors might be a better option. Keep in mind that the quality of the individual components in a passive setup is usually better, but it comes at the added expense of buying two things.
Choosing the Right Rope Size for Monitor Windvane
You may want to see also

Powering Active Monitors
Active monitors, also known as powered monitors, are ideal for both the stage and the studio. They have built-in amplification, meaning you can simply plug them into your mixer and start playing or recording. They are perfect for home recording artists who need a simple setup, but they are also useful for larger studios as they reduce the number of components required.
Powered monitors are also great for audiophiles, as they provide the best sound quality with a home stereo system. The built-in amplifier is designed specifically for the speakers it accompanies, so you can be confident that your mix will turn out well.
When choosing active monitors, it's important to consider the size of your studio and the type of music you'll be working with. For example, if you're recording music with deep, thumping bass, you'll need a monitor with a large woofer that can handle heavy low frequencies.
Another thing to keep in mind is the amplifier configuration. The most common setups for active monitors are single-amp, bi-amp, and tri-amp. Bi-amp and tri-amp configurations offer more control over frequency response and more precise sound reproduction, which is essential for professional studios.
In terms of wattage, if you're just starting out or have a small to medium-sized room, 50-75 watts per channel should be sufficient. For larger commercial studios, consider monitors with 100 watts or more per channel.
Finally, when it comes to placement, active monitors should be positioned on stands or a mixing console, with the listener seated a few feet away. This allows for a relatively neutral listening environment.
Finding the MS of Your Monitor: A Simple Guide
You may want to see also

Amplifier and Speaker Compatibility
Impedance
Impedance, measured in ohms, represents the electrical resistance of your components. Speakers typically have impedance ratings between 4 and 8 ohms, while amplifiers operate effectively within a specified range, such as 4 to 16 ohms. It is essential to ensure that your amplifier supports the impedance of your studio monitors. Most home audio speakers are designed for 8 ohms, but some may be 4 or 6 ohms. Make sure to check the specifications of both your amplifier and studio monitors to ensure compatibility.
Power
The amplifier's continuous power rating should be within the guidelines suggested by the studio monitor's specifications. A more powerful amplifier is generally preferable to an underpowered one, as it reduces the risk of sending clipped waveforms to the studio monitors. However, it is crucial to use the volume control carefully to avoid potential damage. The power capacity of your studio monitors, often listed as "Power capacity," "Continuous Power Capacity," or "RMS Power handling," indicates how much power they can handle. Your amplifier should be around 50% more powerful than your studio monitors to ensure optimal performance without overworking the components.
Speaker Sensitivity
Speaker sensitivity measures how loud a speaker can get with a specific input power and is usually expressed in decibels (dB) per watt. A higher-sensitivity speaker will produce more volume with the same power input compared to a lower-sensitivity speaker. When choosing an amplifier and studio monitors, consider the desired volume and the sensitivity of the speakers. If you want louder sound, either increase the amplifier's power or opt for more sensitive speakers.
Manufacturer Recommendations
Another important consideration is following the manufacturer's guidelines and recommendations. Different amplifier and studio monitor brands may have specific instructions or requirements for compatibility. Some manufacturers might suggest a particular power range or impedance level for optimal performance. Refer to the manuals or product pages to find this information.
Listening Environment
Don't underestimate the impact of your listening environment on the overall sound quality. The size of the room, the placement of the studio monitors, and your listening position all play a crucial role. Spacing the studio monitors one-and-a-half times farther away from you than from each other, angling them slightly inward, and positioning them at the same height as your ears are recommended. Additionally, avoid obstructing the studio monitors with furniture and placing them too close to walls unless specified by the manufacturer.
Hooking Up Three Monitors to NVIDIA 920: A Step-by-Step Guide
You may want to see also

Monitor Placement
- Triangle Setup: Arrange your monitors using an equilateral triangle configuration, with the listener positioned at one point and the monitors creating a 60-degree angle towards the listener. Symmetry is essential, ensuring equal distances from the walls and consistent angles.
- Distance from Walls: Maintain some space between the monitors and nearby walls. Direct sound from the monitors should not mix with reflections from walls, tables, or other surfaces.
- Avoid Reflections: Sound reflections from nearby surfaces can interfere with the direct sound, causing destructive or constructive interference that alters the frequency response.
- Bass Trapping: Low-frequency absorption, or bass trapping, is crucial, especially in small rooms. Use thick, porous absorbers in corners or on the back wall to reduce standing waves and improve bass response.
- Symmetry and Placement: Ensure symmetry in your setup. Avoid being closer to one wall than another, and maintain consistent distances from walls and surfaces.
- Listening Position: For near-field monitors, the "sweet spot" is usually about 3 feet away, making them ideal for average-sized rooms. Adjust your listening position accordingly.
- Subwoofer Placement: If using a subwoofer, place it directly on the ground, not under furniture, to avoid misleading low-end rumble buildup. Ensure the bass blends seamlessly with the sound from your monitors.
- Avoid Rear-Ported Speakers: If placing monitors close to a wall, avoid rear-ported speakers as they can artificially extend low frequencies, leading to compensation issues in your mix.
Monitoring VRAM Usage: A Comprehensive Guide to Tracking Memory
You may want to see also

Bass Traps
There are a few different types of bass traps available, each with its own advantages and disadvantages. One common type is made from thick, porous absorbers such as foam or rockwool. While these can be effective, they need to be quite thick and carefully positioned to work at bass frequencies. Another option is to use a resonant panel with an internal box of absorbent material. However, this type of trap only works at a specific resonant frequency and can return unwanted energy to the room.
A more flexible solution is to use a "barrier mat" or "dead sheet" – a heavy, floppy vinyl sheet loaded with lead or mineral particles. This can be hung a few inches from a wall and combined with a porous absorber to create an effective full-range trap. Another option is to combine a thick slab of absorbent material with a thin, non-porous sheet, which dissipates energy as the sound tries to make the sheet move.
When positioning bass traps, it's important to target the main reflection points, especially room corners (both vertical and horizontal). You can also utilise deep ceiling voids, fireplaces, alcoves, or other unused spaces by stuffing them with rockwool and covering the access points with acoustically transparent fabric.
Ankle Monitors: Who's Being Tracked and Why?
You may want to see also
Frequently asked questions
Powered studio monitors have built-in amplification, meaning you can plug them directly into an electrical outlet and start playing or recording. This makes them ideal for home recording artists who need a simple setup, as well as larger studios that want to limit the number of components required. Powered monitors also include the necessary channels to allow you to adjust levels straight out of the unit, streamlining the mixing process.
Passive studio monitors, also known as unpowered or passive monitors, are strictly speakers and require an external power amplifier to drive them. While this setup may offer higher-quality components, it also comes with added expense and potential acoustic compromises.
When choosing studio monitors, it's important to consider the size of the woofer, the frequency response, the type of amplifier, the speaker enclosure material, the connectivity options, and the sound-shaping capabilities. Additionally, it's crucial to match the inputs on the studio monitors with the outputs available on your audio interface.


