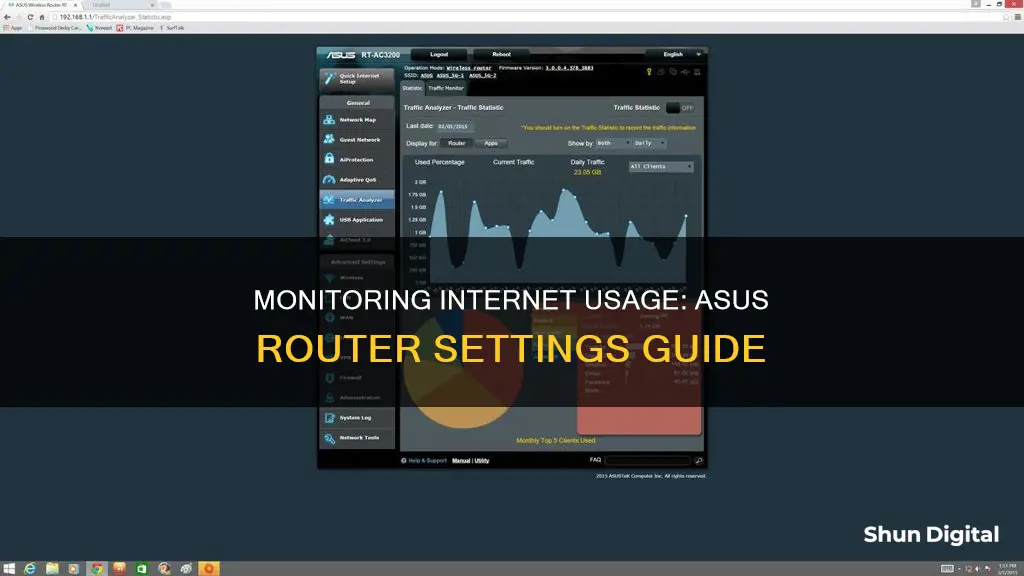
Monitoring internet usage on an Asus router can be done in several ways. The Traffic Monitor feature allows users to monitor incoming and outgoing packets from both wired and wireless networks. The Traffic Analyzer can also be used to track each individual IP's data usage over a month, although this may require a USB drive to store the data. Additionally, the Website History feature allows users to review the web browsing history of devices connected to the network.
| Characteristics | Values |
|---|---|
| Monitor bandwidth usage | Bandwidth Monitor |
| Monitor incoming/outgoing packets | Traffic Monitor |
| Monitor data usage by IP | Traffic Analyzer |
| Monitor web history | Website History |
What You'll Learn

Using the Traffic Monitor tool
The Traffic Monitor tool allows you to monitor the incoming and outgoing packets of the following:
- Incoming Internet packets
- Incoming packets from wired network
- Incoming packets from wireless network
- Outgoing Internet packets
- Outgoing packets from wired network
- Outgoing packets from wireless network
To use the Traffic Monitor tool, follow these steps:
- Connect your computer to the router via a wired or Wi-Fi connection and enter your router LAN IP or router URL (http://www.asusrouter.com) to the WEB GUI.
- Key in your router's username and password to log in. If you have forgotten your username or password, please restore the router to the factory default status and set it up again.
- Go to Traffic Analyzer > Traffic Monitor.
Please note that when DualWAN is enabled, the WAN statistics do not reflect the incoming/outgoing traffic accurately. The Traffic Monitor can only record the current WAN that the router is using and can only work when the dual wan is set in failover mode; it cannot monitor two WANS at the same time.
Monitoring Solar Usage: ActewAGL's Smart Meter Revolution
You may want to see also

Monitoring bandwidth usage
Monitoring your bandwidth usage on an Asus router can be done through the Bandwidth Monitor or the Traffic Analyzer. The Bandwidth Monitor allows you to see the instant bandwidth usage of total download and upload, as well as the data for each client. To set up the Bandwidth Monitor, follow these steps:
- Use the drop and drag operation to set device priorities by clicking and dragging the priority tag to the device icon.
- Click the "Apply" button to make the priority setting work.
- Click the priority tag to view all devices with the same priority level.
- Click "Show All" to return to the default display status.
- Enable the "Apps analysis" function to view each app's bandwidth usage for each client device.
- Click on the device icon to view the bandwidth usage of each app.
On the other hand, the Traffic Analyzer allows you to monitor incoming and outgoing packets, including internet packets and packets from wired and wireless networks. To use the Traffic Analyzer:
- Connect your computer to the router via a wired or Wi-Fi connection.
- Enter your router LAN IP or router URL (http://www.asusrouter.com) into the WEB GUI.
- Log in to your router by entering your username and password.
- Go to Traffic Analyzer > Traffic Monitor to view the real-time monitoring data.
It's important to note that the firmware features may vary depending on the model and version of your Asus router. Additionally, the Traffic Analyzer may not provide the level of detail needed to monitor monthly usage or stay within a specific data cap.
Monitor Bandwidth and Data Usage Like a Geek
You may want to see also

Checking website history
To check the website history on your ASUS router, you will need to enable the Website History feature. This feature shows the web surfing history of all clients, and you can also select a specific client to review their web history.
First, check if your router supports Web History. You can do this by going to the ASUS Global site (https://www.asus.com//) and searching for your router model. For example, if you have the RT-AX92U model, you would search for "RT-AX92U" and click on "Specifications" to see if Website history is supported.
Once you have confirmed that your router supports Web History, follow these steps:
Step 1: Connect to Your Router
Connect your computer to the router using a wired or WiFi connection. Enter your router LAN IP or router URL (http://www.asusrouter.com) to access the WEB GUI.
Step 2: Log In
Enter your router's username and password to log in. If you have forgotten your login credentials, you will need to restore the router to its factory default status and set it up again.
Step 3: Go to Adaptive QoS
Under the General section, click on "Adaptive QoS." Here, you will find the Web History feature.
Step 4: Enable Web History
Turn on Web History. By default, this feature is turned off. Once enabled, you will be able to see the web surf history of all clients.
Step 5: Select a Specific Client (Optional)
If you want to review the web history of a specific client, you can select them from a drop-down list. This allows you to monitor individual devices on your network.
Step 6: Review and Refresh
Review the list of websites visited by the selected client(s). You can click "Refresh" at the bottom of the page to update the list manually.
Note that the web history log is minimal, and it captures everything, including ads and background processes that use the internet. Therefore, you may only be able to see the last one or two websites visited.
Additionally, keep in mind that anyone using a VPN or proxy service will not have their web history visible through this method.
To clear the Web history, click "Clear." Please note that once deleted, the data cannot be recovered.
Monitoring Data Usage: Tips for Managing Home Internet Plans
You may want to see also

Viewing browsing history
To view the browsing history on your Asus router, you will need to enable the Website History feature. Here is a step-by-step guide:
Firstly, check if your router supports Website History. You can do this by visiting the ASUS Global website and searching for your specific router model. For example, if you have the RT-AX92U model, you can search for this on the website and click on 'Specifications'. If your router supports Website History, it will be listed under the specifications.
Once you have confirmed that your router supports this feature, you can proceed to the next steps:
- Connect your computer to the router using a wired or Wi-Fi connection.
- Enter your router LAN IP or router URL (http://www.asusrouter.com) into your web browser to access the WEB GUI.
- Log in to your router by entering your username and password. If you have forgotten your login details, you will need to reset your router to the factory default status and set it up again.
- Once logged in, navigate to Adaptive QoS > Web History. By default, this feature is turned off.
- Turn on Web History. You will now be able to see the web browsing history of all clients connected to your router.
- To view the history of a specific client, select the client from the drop-down list.
- Click "Next" or enter a page number and click "Next" to navigate through the records.
- The records are automatically updated, but you can also click "Refresh" to manually update the history.
- If you need to clear the Web History, click "Clear". Please note that deleted data cannot be recovered.
It is important to note that the Web History feature only shows the websites visited and does not provide information on the exact content accessed within those websites. Additionally, users can bypass this monitoring by using a VPN or proxy service that allows anonymous browsing.
Monitoring Data Usage: Track Device Consumption
You may want to see also

Using the Traffic Analyzer tool
The Traffic Analyzer tool is a feature of the ASUS Wireless Router. It allows you to monitor the incoming and outgoing packets of internet and network data. This includes data from both wired and wireless networks.
To use the Traffic Analyzer tool, first connect your computer to the router via a wired or WiFi connection. Then, enter your router LAN IP or router URL (http://www.asusrouter.com) into the WEB GUI. You will then need to log in with your router's username and password. Once you have done this, you can go to Traffic Analyzer> Traffic Monitor.
The Traffic Monitor will display similar wave patterns for internet and wireless activity. This is because the wireless router acts as a gateway between the internet and the devices connected to the network. When the router receives requests from network devices, it requests an equal amount of data from the internet. Therefore, the network activity the router processes is almost equal to the total activity from both wired and wireless devices on the network.
You can also choose the time to do the traffic monitor. However, it is important to note that when DualWAN is enabled, the WAN statistics do not reflect the incoming and outgoing traffic accurately. The Traffic Monitor can only record the current WAN that the router is using, and it can only work when the dual wan is set in fail-over mode; it cannot monitor two WANS at the same time.
Monitoring Bandwidth Usage: Track IP Address Activity
You may want to see also
Frequently asked questions
To monitor internet usage on your Asus router, you can use the Traffic Analyzer or Traffic Monitor features. First, connect your computer to the router via a wired or WiFi connection. Then, enter your router LAN IP or router URL (http://www.asusrouter.com) to the WEB GUI and log in using your router's username and password. From there, you can access the Traffic Analyzer or Traffic Monitor to view bandwidth usage and data consumption.
To monitor internet usage for specific devices, you can use the Web History feature. After logging into your router, click on Adaptive QoS and enable Web History. You can then select the specific device you want to monitor and review its web history.
Yes, the Traffic Analyzer feature allows you to view data consumption over daily, weekly, and monthly periods. You can also set up an external USB drive to store long-term data usage trends.
Some users have reported limitations and inconsistencies with the Traffic Analyzer and Traffic Monitor features. For example, the Traffic Analyzer may only show usage as a whole rather than for individual devices, and it may not provide accurate monthly usage data. Additionally, the Traffic Monitor may not work properly when DualWAN is enabled.


