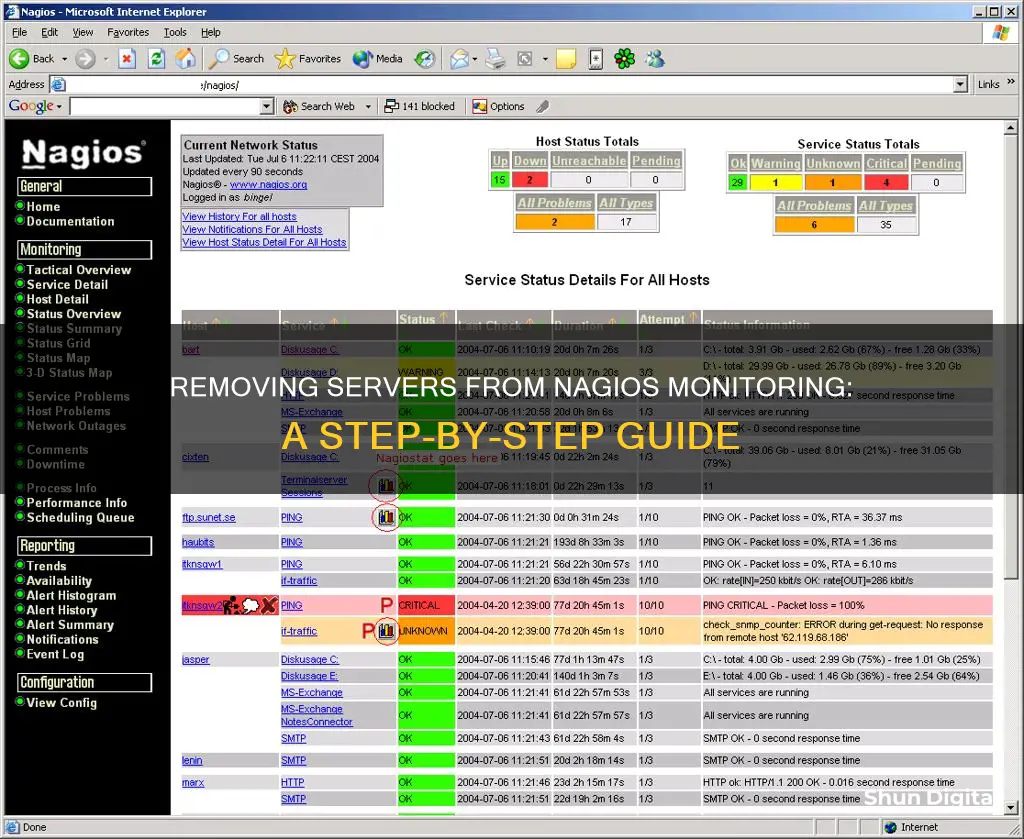
Nagios is a popular monitoring and alerting service, which is used to keep track of systems and ensure they are functioning as expected. However, there may be times when you need to remove a server from Nagios monitoring, for example, when a server is decommissioned or moved to a different monitoring system. This can be done through the Nagios CCM web interface or by manually deleting the relevant configuration files.
| Characteristics | Values |
|---|---|
| Nagios Core host removal | Remove host's services first, then the host, due to the database relationship |
| Nagios CCM host removal | Remove via the web interface |
| Nagios Core service removal | Remove the .cfg files |
| Nagios CCM service removal | Remove via the web interface |
| Nagios Server GUI URL | https://NagiosServer-HostName-or-IPaddress/nagios |
What You'll Learn

Removing Nagios Core hosts via the CLI
To remove Nagios Core hosts via the Command Line Interface (CLI), you need to identify and access the relevant configuration files. The specific steps may vary depending on your system setup, but here is a general guide based on discussions in the Nagios Support Forum:
- Understanding the Issue: Determine if you are facing a similar issue to other users, where hosts are removed from Nagios CCM but persist in Nagios Core. This issue may be related to the "ghost host" phenomenon.
- Check Configuration Files: Navigate to the following directories: /usr/local/nagios/etc/hosts and /usr/local/nagios/etc/services. Check if the config files for the problematic hosts are still present in these directories.
- Manually Remove Config Files: If the config files exist, you can manually delete them. However, ensure that you have removed the host's services first and then the host itself, due to the database relationship.
- Restart Nagios Core: After removing the config files, restart Nagios Core. Check if the hosts have been successfully removed from the web interface.
- Address Re-population: In some cases, the hosts may re-populate in the directories after applying the configuration. This could be due to the hosts still being present in the CCM or the database. Ensure that the hosts are removed from the CCM and check the database for any remaining entries.
- Check Nagios.cfg: If the hosts are still not removed, check the nagios.cfg file to ensure it is not pulling configurations from another directory.
- Restart Nagios Service: If there are no relevant config files and nagios.cfg is not pulling from other directories, try restarting the Nagios service using the command: "service nagios restart".
- Final Verification: Check the web interface again to ensure that the hosts are no longer present and are not being checked.
Remember to back up any modified or deleted files before proceeding, as a safety measure. Additionally, ensure that you have the appropriate permissions and access rights to perform these operations.
Setting Up Monitors with a Mackie Mixer: A Guide
You may want to see also

Removing Nagios Core hosts via CCM
Firstly, it is important to note that the CCM (Cluster Control Manager) is designed to eliminate the need to edit files via the CLI (Command Line Interface). However, if you are encountering issues with removing hosts via the CCM, there are a few steps you can take.
- Ensure that you are removing the host's services first and then the host itself. This is due to the database relationship between the host and its services.
- After removing the host and its services, click "Apply Configuration".
- If the host is still viewable from the Host Detail/Service Detail pages, check if the config files for that host are still present in the following directories: /usr/local/nagios/etc/hosts and /usr/local/nagios/etc/services.
- If the config files are still present, manually remove them. This issue is known as the "ghost host" phenomenon, where flat config files were not deleted when the database entries were removed.
- Restart Nagios Core, and the hosts should now be removed.
- If the hosts reappear in those directories after applying the configuration, it could mean that A: the hosts are still in the CCM, or B: the hosts are still in the database but not in the CCM.
- If you are still encountering issues, check if Nagios has restarted properly. If there are no config files in the aforementioned directories and your Nagios.cfg does not pull configurations from another directory, try restarting the Nagios service: "service nagios restart".
- Check if the hosts are still in the web interface and if they are currently being checked.
- If you are still unable to remove the hosts, you may need to edit the config files directly. The config files are usually located in /usr/local/nagios/etc/ or /etc/nagios/.
- Reach out to the person who set up the system or a Nagios expert for further assistance if needed.
Connecting HP EliteBook to a Monitor: A Step-by-Step Guide
You may want to see also

Removing Nagios CCM hosts
Firstly, ensure that you are clicking "Apply Config" after removing the hosts. Check if the issue is with hosts, services, or both. If the problem persists, check if the config files for the host are still present in the following directories:
- /usr/local/nagios/etc/hosts
- /usr/local/nagios/etc/services
If they are, manually remove them. This issue is known as the "ghost host phenomenon", which occurs when the flat config files are not deleted when the DB entries are. After this, restart the core, and the hosts should be removed.
If the hosts re-populate the directories after applying the configuration, it means that they are either still in the CCM or, for some reason, still in the database but not in the CCM.
Another method to remove Nagios CCM hosts is by using the command line. The following commands can be used:
- /usr/local/nagiosxi/scripts/nagiosql_delete_host.php --host=$host
- /usr/local/nagiosxi/scripts#./reconfigure_nagios.sh
However, note that these commands are deprecated in newer versions of Nagios XI. For newer versions, use the following command instead:
/usr/local/nagiosxi/scripts/ccm_delete_object.php -t host -n "$host"
Signs Your Monitor is Dying and What to Do
You may want to see also

Removing Nagios Core host files
Removing hosts and services in Nagios Core involves editing or deleting the relevant configuration files. This can be done via the Command Line Interface (CLI).
Firstly, identify the directory on the server where the Nagios Core configuration files are stored. This is typically located in either /usr/local/nagios/etc/ or /etc/nagios/.
Once you have located the correct directory, look for the specific configuration files related to the hosts and services you want to remove. These files usually have extensions like .cfg and are named according to the hosts or services they define.
You have two options for removing the hosts:
- Edit the configuration files: Open the relevant configuration files in a text editor and locate the sections defining the hosts and services you want to remove. Comment out or delete these sections to effectively remove them from monitoring.
- Delete the configuration files: If you are certain that you want to remove the hosts and services entirely, you can simply delete the corresponding configuration files.
After making these changes, remember to restart the Nagios service for the changes to take effect. This can be done by running the following command:
Service nagios restart
Additionally, ensure that you have the necessary permissions to modify these files and always make backups before making any changes, in case you need to restore the original configuration.
Monitoring Sprint Hot Spot Usage: A Comprehensive Guide
You may want to see also

Disabling Nagios service monitoring
Option 1: Using the Nagios Web Interface
- Log in to the Nagios Server GUI using the following URL: https://NagiosServer-HostName-or-IPaddress/nagios.
- In the left pane, click on "Services".
- Select the service you want to disable monitoring for.
- In the "Service Commands" section, click on "Disable active checks of this service".
- Click "Commit" to confirm the change.
- (Optional) If you also want to disable passive checks, go back to the "Service Commands" section and click on "Stop accepting passive checks for this service". Click "Commit" again.
Option 2: Modifying the Host Definition
This option involves modifying the configuration file for the host you want to disable checks for.
- Access the configuration file for the host. This could be the main Nagios configuration file (nagios.cfg) or a separate file included from it.
- Locate the definition for the host you want to modify.
- Change the "check_command" option to "check_dummy". This command always returns an "OK" result, effectively disabling host checks.
- Save the configuration file and restart the Nagios service for the changes to take effect.
Option 3: Disabling Notifications and Acknowledging the Host Problem
If you just want to stop receiving notifications about the host being down, you can disable notifications and acknowledge the host problem through the Nagios web UI:
- Log in to the Nagios Server GUI using the URL: https://NagiosServer-HostName-or-IPaddress/nagios.
- Find the host you want to manage and click on it.
- In the "Host Commands" section, click on "Disable notifications for this host".
- (Optional) To acknowledge the host problem and add a comment or note, click on "Acknowledge this host problem".
- Click "Commit" to confirm the changes. Remember to enable notifications again after resolving any issues.
Option 4: Using Filters in the Status CGI View
You can also use filters to control what is displayed in the Nagios status view, which is what the Firefox/Chrome plugins use to display information.
- Use the following URL format to apply filters: status.cgi?[parameters]
- For example, to only see hosts, use: status.cgi?hostgroup=all&style=hostdetail.
- To view only problem services on hosts that are up, use: status.cgi?host=all&servicestatustypes=28&hoststatustypes=2.
- Refer to the Nagios blog for more information on filter values and their meanings.
Remember that disabling service monitoring may affect your ability to detect and respond to issues. Always consider the potential impact on your monitoring and notification setup before making any changes.
Connecting Your APM PC: Monitor Setup Guide
You may want to see also
Frequently asked questions
To remove a server from Nagios monitoring, you can use the Nagios Core web interface or the Command Line Interface (CLI). First, ensure you have removed the host's services, then the host itself. After applying the configuration, if the host is still visible, you may need to manually remove the relevant configuration files and restart Nagios.
Log in to the Nagios Server GUI using the URL: https://NagiosServer-HostName-or-IPaddress/nagios. Next, click "Hosts" in the left pane, select the host you want to remove, and choose "Disable notifications for this host" from the Host Commands section. Finally, click "Commit" to confirm the changes.
Log in to the Nagios CCM web interface and navigate to the relevant section for managing hosts. Remove the host and its associated services through this interface. Remember to click "Apply Configuration" after making the changes to ensure they take effect.
Connect to the server via the CLI and navigate to the directory containing the configuration files: /usr/local/nagios/etc/hosts and /usr/local/nagios/etc/services. Manually remove the .cfg files corresponding to the host and its services. After removing the files, restart the Nagios service to apply the changes.


