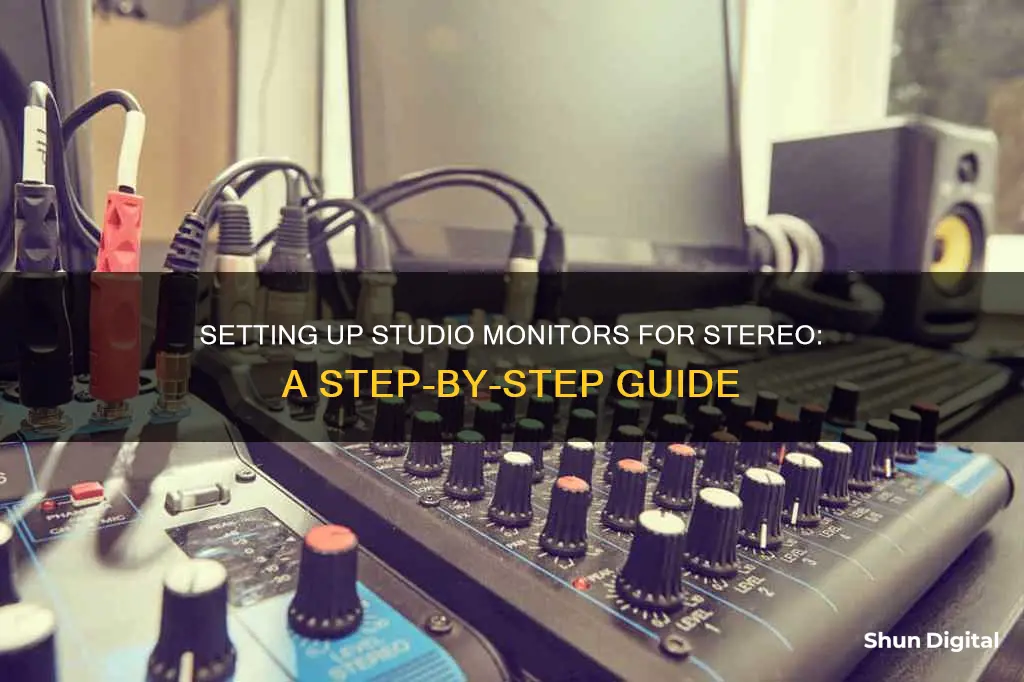
There are several ways to connect studio monitors to a stereo, depending on the type of input and output ports available on the devices. Here are some common methods:
- Using a 3.5mm jack to 2x XLR male cable to connect a pair of studio monitors to a laptop or PC without an audio interface.
- Using a 1/8 to RCA cable to connect the stereo output from the headphone jack of a computer to the RCA inputs on entry-level studio monitors.
- Using a 1/8 to 1/4 cable to connect the headphone jack of a computer to the 1/4 inputs on high-end studio monitors.
- Using an audio interface to connect the computer to the studio monitors, which offers improved audio quality and allows for the connection of microphones and instruments.
| Characteristics | Values |
|---|---|
| Connection type | 3.5mm jack to 2x XLR male cable, 1/8" to RCA cable, 1/8" to 1/4" cable, XLR or RCA outputs |
| Connection process | Connect the cable to the headphone port on your computer, then connect the RCA jacks to the speaker |
| Speaker position | Angled towards the listener's ears, 8 to 12 inches away from walls and corners, forming an equilateral triangle with the listener |
| Speaker height | Level with the listener's ears |
| Speaker distance | Between 0.9 and 1.5 metres between the monitor centres |
| Speaker mounts | Dedicated speaker stands, desktop monitor stands, isolation platforms, or isolating feet |
What You'll Learn
- Connecting studio monitors to a laptop or PC without an audio interface
- Using an audio interface to connect studio monitors to a laptop or PC
- Using a mixer to connect studio monitors to a stereo
- Connecting studio monitors to a computer using RCA cables
- Connecting studio monitors to a computer using 1/8 to 1/4 cables

Connecting studio monitors to a laptop or PC without an audio interface
It is important to ensure that your 1/4-inch speaker cables are balanced or in TRS format (often referred to as stereo jack). Balanced cables have two black rings on the jack connector instead of one and reduce unwanted noise while maintaining signal integrity.
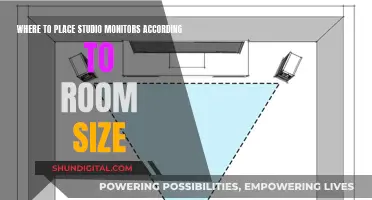
When positioning your monitors, the most crucial factor to consider is the height and angle relative to your ears. The high-frequency drivers of your monitors should be at ear level to receive more direct sound, resulting in a richer and more detailed listening experience. Your monitors should also be angled towards your ears at about a 45-degree angle, with an even distance between each speaker and your listening position.
Disassembling the Asus VN248 Monitor: Removing the Stand
You may want to see also

Using an audio interface to connect studio monitors to a laptop or PC
To connect studio monitors to a laptop or PC using an audio interface, follow these steps:
- Connect the audio interface to your computer: Use the supplied cable to connect your audio interface to your computer's USB or USB-C port. Open your DAW (Digital Audio Workstation) and select your interface under the audio preferences menu.
- Turn down the volume: Before connecting your studio monitors, set the output volume of your audio interface to zero to avoid unexpected pops, crackles, or overly loud music. Also, turn down the volume of your studio monitors.
- Identify your cables: Check the outputs on your interface, usually found at the back of the unit. These could be 6.35mm TRS jack sockets marked 'Main', 'Line', 'Monitor', or 'Outputs L R'.
- Check for XLR outputs: Some more expensive or larger interfaces designed for multiple channel recording may also have XLR outputs.
- Check your monitor inputs: With the volume still down and power off, check the monitor inputs, typically located at the back. These could be TRS jack or XLR inputs, or both.
- Connect the interface outputs to the monitor inputs: Use the appropriate cables to connect the left and right interface outputs to the corresponding left and right speaker inputs. For 'balanced' outputs from the audio interface, use two balanced TRS cables. If your monitors have only XLR inputs, use a balanced TRS to male XLR cable.
- Adjust speaker positioning: Once your audio interface and studio monitors are connected, power up the speakers and gradually increase the volume. Ensure that the tweeter (high-frequency) driver is level with your head, and you are sitting at the front point of an equilateral triangle with the speakers at the other two points. Place the monitors at least 30cm away from walls and corners to minimise the impact on the EQ response.
Monitoring Data Usage: DD-WRT for Device Control
You may want to see also

Using a mixer to connect studio monitors to a stereo
To connect studio monitors to a stereo using a mixer, you will need to consider the type of cables required for your setup. The type of cable you will need depends on the output source of your mixer and the inputs on your studio monitors.
Mixer Output Source
Your mixer's output source will determine the type of cable you will need to connect it to your studio monitors. The most common output sources are:
- 1/4-inch jack port
- 3-pin XLR output
Studio Monitor Inputs
The inputs on your studio monitors will be either:
- 3-pin XLR input
- 1/4-inch jack input
- Both
Types of Cables
Once you have identified the output source of your mixer and the inputs on your studio monitors, you can choose the appropriate cable to connect the two. Here are some common cable types:
- 1/4-inch TRS cable: This cable is used for a balanced connection between the mixer's monitor outputs and the speaker's inputs.
- 1/4-inch TRS to XLR cable: This cable is used if your speakers only have XLR inputs. It creates a balanced connection and provides the same quality as a regular TRS cable.
- 1/4-inch TS cable: This unbalanced cable can be used if you are on a tight budget or if your cable run is under 15'.
- 1/4-inch TS to RCA cable: This unbalanced cable is used if your studio monitors only have RCA inputs. It connects the monitor outs on your mixer to the inputs on the speakers.
Connection Process
To connect your studio monitors to your mixer, follow these steps:
- Connect the left monitor output to the left speaker's input and the right monitor output to the right speaker's input.
- Adjust the settings on your mixer:
- Connect an audio source
- Unmute/turn on the channel
- Turn up the channel level
- Unmute/turn on the main output
- Turn up the main stereo output level
- Place your studio monitors in the ideal location, usually 3-5ft in front of each performer or group of performers.
- Ensure that the high-frequency driver of your studio monitors is at the same height as your ears and angled at about 45 degrees towards your listening position.
Monitoring Memory Usage: A Guide for PFsense Users
You may want to see also

Connecting studio monitors to a computer using RCA cables
Step 1: Gather the Necessary Equipment
Before you begin, make sure you have the following:
- Studio monitors with RCA inputs
- A computer with an audio output (either a dedicated audio interface or a headphone jack)
- RCA cables (preferably 10' in length to ensure sufficient reach)
Step 2: Connect the Cables
Connect one end of the RCA cable to the audio output on your computer. If you're using a dedicated audio interface, this will typically be a 3.5mm jack. If you're connecting directly from your computer's headphone jack, you may need an adapter to convert the output to RCA.
Step 3: Connect the Studio Monitors
Connect the other end of the RCA cable to the inputs on your studio monitors. Typically, the red connector is for the right channel, and the black or white connector is for the left channel. Make sure the cables are securely plugged into both the computer and the studio monitors.
Step 4: Power On and Adjust Settings
Power on your studio monitors and computer. Adjust the volume and audio settings on your computer to your desired levels.
And that's it! You've successfully connected your studio monitors to your computer using RCA cables. This method provides a quick and easy way to get your studio monitors up and running, but if you're looking for improved audio quality and additional connectivity options, consider investing in a dedicated audio interface.
Choosing the Right Rope Size for Monitor Windvane
You may want to see also

Connecting studio monitors to a computer using 1/8 to 1/4 cables
Step 1: Identify the Connections on Your Studio Monitors and Computer
Before purchasing any cables, it is essential to identify the connection types available on your studio monitors and computer. Studio monitors typically offer RCA, TRS, or XLR inputs, while most computers have a 1/8" connection.
Step 2: Purchase the Appropriate Cable
Based on the connection types identified in Step 1, you will need to purchase a cable that can connect your studio monitors to your computer. In this case, you would need a 1/8" to 1/4" cable, with the 1/8" end connecting to your computer and the 1/4" end connecting to your studio monitors. Ensure that the cable is long enough to comfortably reach between your computer and studio monitors.
Step 3: Connect the Cable
Once you have the correct cable, connect the 1/8" end to the headphone jack or audio output port on your computer. Then, connect the 1/4" end to the corresponding input on your studio monitors. If the cable has two 1/4" connectors (one for the left and right channels), make sure to connect them correctly. The red connector typically goes to the right channel, while the black or white connector goes to the left channel.
Step 4: Adjust Settings and Volume
After making the physical connections, you may need to adjust the settings on your computer to ensure the audio is directed to the studio monitors. This can usually be done through the audio settings or by selecting the appropriate output device. Once the correct output is selected, you can adjust the volume to your desired level.
Using this method, you can easily connect your studio monitors to your computer using 1/8 to 1/4 cables. However, if you are looking for improved audio quality and additional connectivity options, consider investing in a dedicated audio interface. An audio interface will provide balanced outputs, input options for microphones and instruments, and convenient volume control.
Easy Guide: Hooking Up Your MacBook Pro to a Monitor
You may want to see also
Frequently asked questions
The simplest way to connect your computer to studio monitors is by using a 1/8" to RCA cable. Plug the 1/8" stereo jack into the headphone port on your computer, and then connect the RCA jacks to the speaker.
If you want high-quality audio, it is recommended to use a dedicated audio interface. This will give you a pair of balanced outputs that provide improved audio quality, as well as inputs for connecting microphones and instruments to your computer.
The best way to position your studio monitors is to form an equilateral triangle between each speaker and your listening position. The monitors should be angled towards your ears, with the high-frequency drivers at ear height. This will give you the most accurate listening experience.


