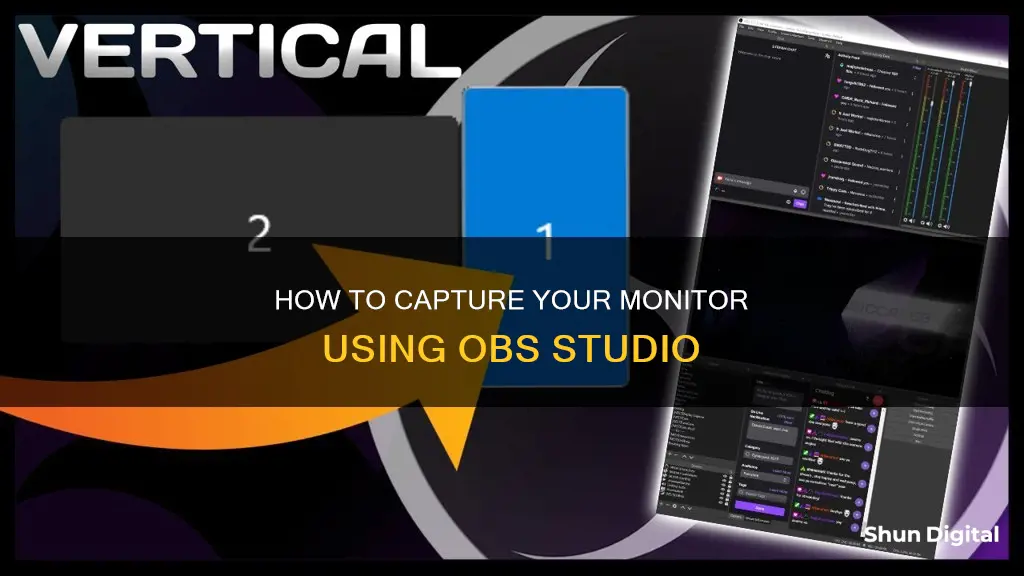
OBS Studio is a free and open-source software used for live streaming and recording videos. It is compatible with Windows, macOS, Linux, and Ubuntu operating systems. OBS Studio supports RTMP Real-Time Messaging Protocol and has versatile RTMP-enabled software encoders. This allows broadcasters to stream video content directly to a media server or other destinations. OBS Studio also allows users to capture their entire monitor or a specific window on their screen. This can be done by adding a Display Capture or Window Capture source in the software.
| Characteristics | Values |
|---|---|
| Monitor Capture | Go to Sources and add a Display Capture |
| Select your display and scale it to the proper size | |
| Sub-region | Red box that shows up and can be scaled around the spot to be seen |
| Everything outside the box will be cropped | |
| Use Window Capture for a specific application window | |
| Display Capture | Captures everything on the computer screen in a certain area |
| Window Capture | Broadcasts the screen of a particular application |
What You'll Learn

How to capture a specific part of the monitor
OBS Studio is a free and open-source streaming software that broadcasters use for mixing and producing live video content. It is a powerful tool for screen capture, allowing users to record tutorials, gameplay footage, or anything else on their screen.
To capture a specific part of the monitor, you can follow these steps:
- Set up a Display Capture by going to the "Sources" widget, clicking on the "+" sign, and selecting "Display Capture." Give it a name and click "OK."
- Choose whether you want the mouse cursor to be captured or not, and set the opacity.
- Select a "Sub-Region" to create a smaller area of your monitor screen to capture. You can resize and reposition this area as needed.
- If you are using a Window Capture, go to the "Sources" widget, click on the "+" sign, and select "Window Capture." Name the source and click "OK."
- On the drop-down menu, select the specific application you want to capture.
- Choose whether you want to capture the "Entire Screen" or the "Inner Screen."
- You can also choose to capture or exclude the mouse cursor, adjust the opacity, and create a smaller sub-region.
- Click "OK" when you're done.
Additionally, you can crop the area of a source, such as Display Capture or Window Capture, by holding down the ALT key while dragging the bounding box to limit the captured area.
By following these steps, you can capture and stream a specific part of your monitor using OBS Studio.
Monitoring CPU Usage: A Comprehensive Guide to Tracking Performance
You may want to see also

How to capture the entire monitor
OBS Studio is a free and open-source streaming software that broadcasters use for mixing and producing live video content. It is also a powerful tool for screen capture. OBS Studio can be used to record tutorials, gameplay footage, or anything else on your screen with ease.
Step 1: Install OBS Studio
Go to the official OBS website and download the latest version of the software for your operating system. OBS Studio is available for Windows 10 and 11, macOS 11 and newer, and Ubuntu 20.04 and newer.
Step 2: Launch the Program
Open the OBS Studio application however you prefer—by clicking on the icon, through the start menu, or by searching for it. Upon opening, you will see that OBS has automatically added a scene for you. If it hasn't, simply click on the "+" icon within the "Scenes" box in the bottom left corner of the screen.
Step 3: Specify the Settings
Next to the "Scenes" box, you will see the "Sources" box. Click the "+" at the bottom left of the "Sources" box and select "Display Capture" from the menu. In the pop-up window, create a title and click "OK."
Step 4: Choose the Capture Method
In the next pop-up window, select your display method and capture method. You will also have the option to choose whether you want your cursor to be captured or not. If you are using multiple monitors, be sure to click the down-arrow and select the appropriate display from the drop-down menu. When you've finished making your selections, click "OK."
Step 5: Select the Output Folder
Click "Settings" on the bottom right of your screen, then click the "Output" icon in the menu on the left. In the "Recording" box, choose your destination file under "Recording Path." You can do this by clicking "Browse" and selecting a destination.
Step 6: Start Recording
Once you've made all your selections, click the "Start Recording" button on the OBS Studio record screen. This is usually located on the lower right side of your screen, below "Start Streaming."
By following these steps, you will be able to capture your entire monitor using OBS Studio.
Discovering Monitor Speed: A Quick Guide to Finding Yours
You may want to see also

How to set up a display capture
OBS Studio is a free and open-source streaming software used for mixing and producing live video content. It is a great tool for screen capture and can be used to record tutorials, gameplay footage, or anything else on your screen. Here is a step-by-step guide on how to set up a display capture using OBS Studio:
Step 1: Download and Launch OBS Studio
Go to the official OBS website and download the latest version of the software for your operating system. Once downloaded, launch the OBS application.
Step 2: Add a Source
In the Sources box, click on the "+" sign and select "Display Capture." This will allow you to capture your entire monitor. If you want to capture a specific window, you can select "Window Capture" instead.
Step 3: Specify Settings
In the pop-up window, give your source a name and click "OK." Here, you can also choose whether you want to capture the mouse cursor or not, and set the opacity and area of the display to crop.
Step 4: Choose the Capture Method
Select your display method and capture method. If you are using multiple monitors, be sure to select the appropriate display from the drop-down menu.
Step 5: Set Up Audio Input Devices
Go to "Settings" > "Audio" to configure your microphone and any other audio sources you want to include. Here, you can choose your default microphone and speaker devices, adjust audio levels, and enable features like noise suppression.
Step 6: Confirm Output Settings
Go to "Settings" > "Output" to confirm that your streaming service and stream key are properly configured. You can also adjust output settings such as the bitrate and encoder, which will impact the video quality and bandwidth usage of your stream.
Step 7: Start Recording/Streaming
Before going live, test your stream by clicking the "Start Streaming" button to ensure everything is working correctly. Once you are satisfied, you can start your stream or recording by clicking the "Start Recording" or "Start Streaming" button.
Finding the White Point: Calibrating Your Monitor for Accuracy
You may want to see also

How to capture a specific window
OBS Studio is a free and open-source streaming software that many broadcasters use for mixing and producing live video content. It is a powerful tool for screen capture and can be used to record tutorials, gameplay footage, or anything else on your screen.
To capture a specific window using OBS Studio, follow these steps:
Step 1: Open OBS Studio. The software usually automatically adds a Scene upon startup. If not, click on the "+" icon in the Scenes box in the bottom left corner of the screen.
Step 2: Go to Sources next to Scenes and click the "+" icon at the bottom of the panel.
Step 3: Select "Window Capture" from the options menu.
Step 4: A small popup will appear. Add a title and click "OK".
Step 5: Another pop-up window will appear. If you have multiple monitors, click the small down arrow to open the dropdown. Select the monitor you want to capture and press "OK".
Step 6: If you want to capture a specific part of the window, you can crop the area by holding down the ALT key while dragging the bounding box to limit the area captured.
Step 7: Click "Settings" in the bottom right corner of the screen.
Step 8: A new window will appear. Select Output from the sidebar on the left to confirm your output settings.
Step 9: Once you're done, click the "Start Recording" or "Start Streaming" button in the bottom right corner of the screen.
By following these steps, you will be able to capture a specific window using OBS Studio.
Removing the ONN Monitor Stand: A Step-by-Step Guide
You may want to see also

How to capture audio
OBS Studio is a free and open-source streaming software used for mixing and producing live video content. It is also a powerful tool for screen capture. OBS Studio supports the RTMP Real-Time Messaging Protocol and has versatile RTMP-enabled software encoders, allowing professional broadcasters to stream video directly to a media server or other destinations.
To capture audio on OBS Studio, follow these steps:
- Set up your audio input capture devices: Navigate to “Settings” > “Audio” to configure your microphone and any other audio sources you want to include in your stream. Here, you can choose your default microphone and speaker devices, adjust audio levels, and enable features like noise suppression.
- Add an audio source: Click the “+” button under the “Sources” section and choose your audio source. You can add sources like webcams, images, and audio input devices.
- Adjust your audio levels: In the “Audio Mixer” box, adjust the audio levels for your audio source.
- Access properties: Right-click on your audio source and select “Properties” to access additional settings. Here, you can select a specific input for audio recording, apply filters, and adjust advanced settings.
- Test your audio: Before starting your stream or recording, test your audio to ensure it is working correctly. Click the “Start Streaming” or “Start Recording” button to begin a test.
If you are experiencing issues with audio capture in OBS Studio, here are some additional troubleshooting steps:
- Check your audio settings: Ensure that OBS is recording from the correct audio source and that your audio devices are configured properly.
- Set your speaker as the default playback device: Right-click the Speaker icon, choose “Sounds”, click the “Playback” tab, and select your speaker as the default device.
- Unmute OBS: Check if OBS is muted in the Volume Mixer by right-clicking the Speaker icon and opening the Volume Mixer.
- Check audio-tracking settings: Launch OBS, click “Settings”, select “Files” > “Output” > “Recordings”, and verify that the audio tracks are correct.
- Remove conflicting programs: Other audio-related programs may interfere with OBS. Try disabling or uninstalling programs like Nahimic, Razer Synapse, and Realtek Gaming Software.
- Adjust encoding settings: Open OBS Studio “Settings”, click “Output”, set your Bitrate to 128, and uncheck the “Use CBR” option.
- Run OBS as administrator: Search for OBS Studio in Windows, right-click on the icon, and select “Run as administrator”.
- Update your audio drivers: Update your audio drivers to the latest version compatible with your operating system.
Positioning Main Speakers: Optimal Distance for Studio Monitors
You may want to see also
Frequently asked questions
Go to "'Sources' and add a "Display Capture". From there, select the display you want to capture and scale it to the right size.
Yes. There should be a red box that shows up. Scale this around the spot you want to capture. Everything outside the box will be cropped.
Go to the "Sources" widget and click on the "+" sign, then select "Window Capture". Name the source and click "OK".
Yes. OBS Studio is a powerful tool for screen capture. You can record tutorials, gameplay footage, or anything else on your screen.
Go to the "Sources" widget, click on the "+" sign and select "Display Capture". Give it a name and click "OK". Choose whether you want the mouse cursor to be captured or not, then set the opacity and select a "Sub-Region" to create a smaller area of your monitor screen to capture.


