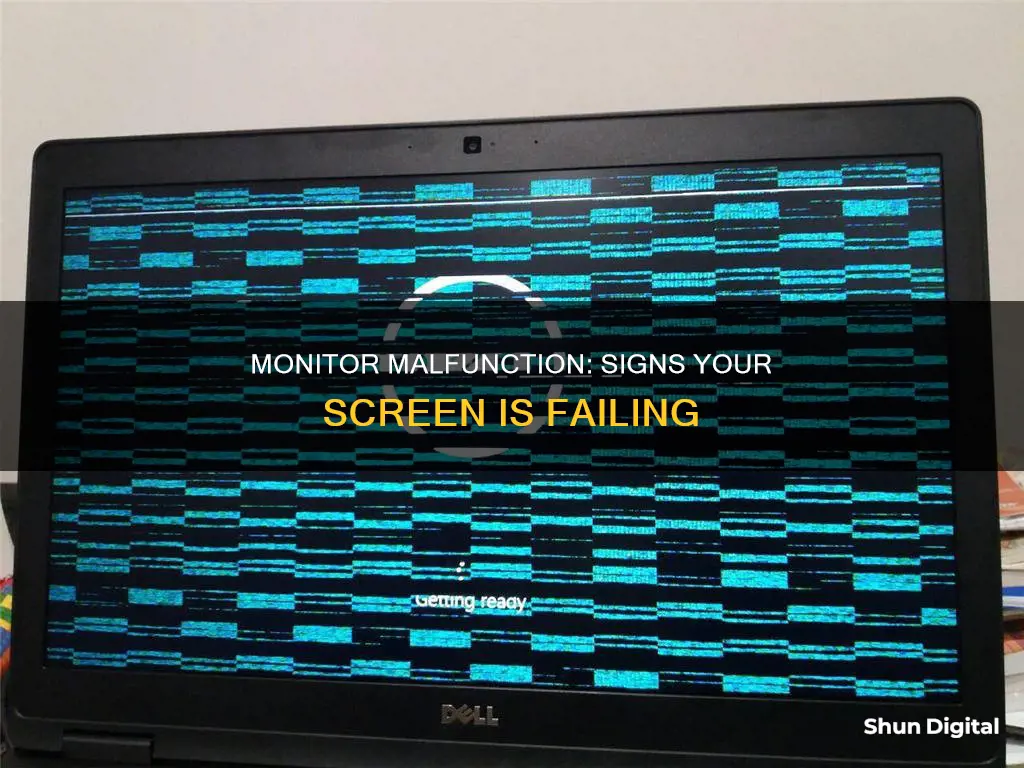
If your monitor is acting up, it's important to troubleshoot and determine whether the problem lies with the monitor or your computer. There are several signs that could indicate your monitor is failing. For instance, if your monitor screen suddenly stops working, you can test it with other devices and parts to see what stops working. If you're experiencing issues like a flickering screen, dim or corrupted images, strange lines and patterns, or the monitor not turning on at all, these could be signs that your monitor is on its way out.
| Characteristics | Values |
|---|---|
| Flickering | May be caused by a loose cable or a monitor going bad |
| Black screen | May be caused by a blown monitor or a computer lock-up during the boot-up process |
| Missing half of the screen | A circuit in the monitor has likely failed |
| Slow to reach full brightness | Monitor is wearing out |
| Stuck or burnt-out pixels | Monitor is slowly going out |
| Dim images on the screen | Could be due to a faulty graphics card, RAM, or computer's bad power supply |
| Monitor takes too much time to turn on | Could be an internal problem that could lead to the end of the monitor's life |
| Corrupted pixels | Could be due to a faulty video adapter, internal screen parts, loss of contact in the signal cable, or broken power supply connectors |
| Strange lines and patterns on the screen | Could be due to a glitch in the hardware, a failure of the graphics card, or the monitor's screen panel |
| Monitor does not turn on | Could be due to a problem with the power supply board, a POST error, or an incomplete connection to the monitor |
| Monitor noise and image jitter | Could be due to a poor-quality cable or a PC video card without an EMI suppressor |
What You'll Learn

Monitor is slow to reach full brightness
If your monitor is slow to reach full brightness, it could be a sign that your monitor is wearing out. Full brightness here refers to the brightness level you have set on your monitor, not 100% brightness. For example, if you have set your monitor's brightness to 20%, full brightness would be 20%.
There are a few things you can try if your monitor is slow to reach full brightness. Firstly, give the display some time to warm up. If your monitor still doesn't reach full brightness, check that the display brightness is turned on and adjust the level of brightness. If you are using a Mac, you can turn on the ambient light sensor so that your Mac can automatically adjust the brightness based on the current ambient lighting conditions. To do this, go to System Settings, click Displays in the sidebar, and then turn on "Automatically adjust brightness" or "Ambient light compensation". These options will only appear if your Mac has an ambient light sensor.
If your monitor is old, it might be a good idea to start saving for a new one. However, before you do that, you can try changing the settings on your monitor, such as the brightness and contrast. If you have a CRT monitor, you can try degaussing the screen. Additionally, make sure you have the latest drivers for your monitor.
Hooking Arcade Monitors: Power Supply Connection Point?
You may want to see also

Monitor takes too long to turn on
If your monitor takes too long to turn on, it could be a sign that it is failing. This is a common issue with flat-panel monitors as they age. The problem is usually caused by bad capacitors that need to be replaced.
If your monitor is taking several minutes to detect a signal after turning on your computer, there are a few things you can try. Firstly, check the cable connectors on both ends to ensure they are secure and try replacing the cable. If that doesn't work, try unplugging the monitor after it detects the signal and reconnecting it to see if that resolves the issue. You can also try cleaning the connections with a can of air. If none of these solutions work, the monitor's motherboard may be dry, or one of the capacitors may be blown. In this case, you will need to take the monitor to a technician for repair.
It is important to note that the repair cost is likely to be more than the price of a comparable new monitor. So, if you are considering repairing an old monitor, it might be worth weighing the cost of repair against the cost of a new monitor with updated technology.
If you are experiencing issues with your monitor, it is recommended to try troubleshooting steps and, if necessary, seek the assistance of a technician to diagnose and resolve the problem.
Setting Up Your ASUS TUF Monitor: A Step-by-Step Guide
You may want to see also

Monitor noise and image jitter
Jitter can cause a monitor to flicker, which may be indicated by the monitor turning on but displaying an image with vertical or horizontal lines across the screen. This could be due to a damaged connection, which can be addressed by straightening bent connector pins and replacing cables. If this does not work, the monitor's connection port may be damaged.
To determine if the issue is caused by the monitor itself, you can test it with other hardware. Disconnect the monitor from your computer and connect it to another properly functioning computer. If the monitor turns on correctly and displays the expected image, then the problem lies elsewhere. If the monitor still does not work, try using the working monitor's connection and power cables to isolate the issue to the monitor itself.
In addition to jitter, monitor noise can also refer to the additive vertical noise that affects the output time shift of a signal. This type of noise can be observed on an oscilloscope and can cause transmission errors and increase the bit error rate of a serial link.
Identifying HDMI Ports and Cables on Your Monitor
You may want to see also

Screen with corrupted pixels
A monitor with corrupted pixels is a sure sign that it is slowly going out. A pixel is a small object, usually rectangular, that contains three subpixels painted in red, green, and blue. When a pixel is corrupted or stuck, it appears as a dot in the same place on the screen, typically not moving but sometimes flickering. This dot has one particular colour: a combination of red, green, and blue.
Corrupted pixels are caused by the pixel receiving incomplete information, which results in it being displayed in only one of its three colours. This can be due to various reasons, such as overheating, overcooling, transistor failure, overclocking, high humidity, or exposure to strong laser light.
There are several methods to fix corrupted pixels. One method is to give your monitor a rest for 24 hours. Turn off the monitor, unplug it, and leave it untouched for a day. Corrupted pixels are often a temporary problem, and this rest period can allow them to disappear on their own.
Another method is to use specialised computer software that detects and repairs stuck pixels. These programs reproduce a chaotic combination of red, green, and blue colours, aiming to return the pixel to its usual state. An example of such software is JScreenFix Online Tool, which can be downloaded and used for free.
Additionally, you can try massaging the screen. Display a black image on your monitor and gently massage the spot where the corrupted pixel is using the pulp of your index finger. Check the result after a few seconds and repeat if necessary. However, this method can be risky as it may generate new corrupted pixels.
If none of these methods work, you may need to consider replacing your monitor.
LCD Monitor Distortion: When and Why Does It Happen?
You may want to see also

Monitor does not turn on
If your monitor is not turning on, there are several possible reasons and troubleshooting steps you can take to try and fix the issue.
First, check that your monitor is switched on and that the power supply is firmly plugged into the wall socket. If the monitor is still not turning on, try plugging it into a different electrical outlet.
Next, you can check your monitor's backlight by shining a torch directly onto the screen. If you can see an image, then your monitor's backlight may be faulty and will need to be replaced by a computer repair professional.
If the above steps do not work, the issue could be with your computer rather than the monitor. Try using a second monitor to test if your original monitor is faulty. Disconnect your original monitor and connect a different monitor to your computer, using the second monitor's power supply and cable. If the second monitor turns on, then you know the issue is not with your computer.
If the second monitor does not turn on, the problem may be with the power supply. Try connecting the second monitor to the original monitor's power supply. If the second monitor still does not turn on, you may need to purchase a new power supply.
If the second monitor lights up with the original monitor's power supply, then the issue is likely with the power supply cable. Try switching the cables to see if there is a fault with the cable. If this is the case, you will need to purchase a new cable.
If you have tried all of the above steps and your monitor is still not turning on, the issue could be with your graphics card, motherboard, or RAM. Checking and fixing these components requires opening up your PC and may be a job for a computer repair professional if you do not have experience with computer repairs.
Asus Monitor Drivers: A Comprehensive Guide for Users
You may want to see also
Frequently asked questions
There are several signs that your monitor is failing. These include:
- Flickering or blinking images
- Dim images on the screen
- The monitor takes too long to turn on
- Corrupted or dead pixels
If your monitor is turning on but the screen is black, try pointing a flashlight at the screen to see if you can see what's open on your device. If you can, your monitor's backlight has likely gone out.
If the top or bottom half of your monitor isn't appearing correctly, a circuit in your monitor has likely failed and you will need to replace it.
The fastest way to determine this is to test your monitor on another computer. If the monitor turns on correctly, you can rule this out as the source of the problem.


