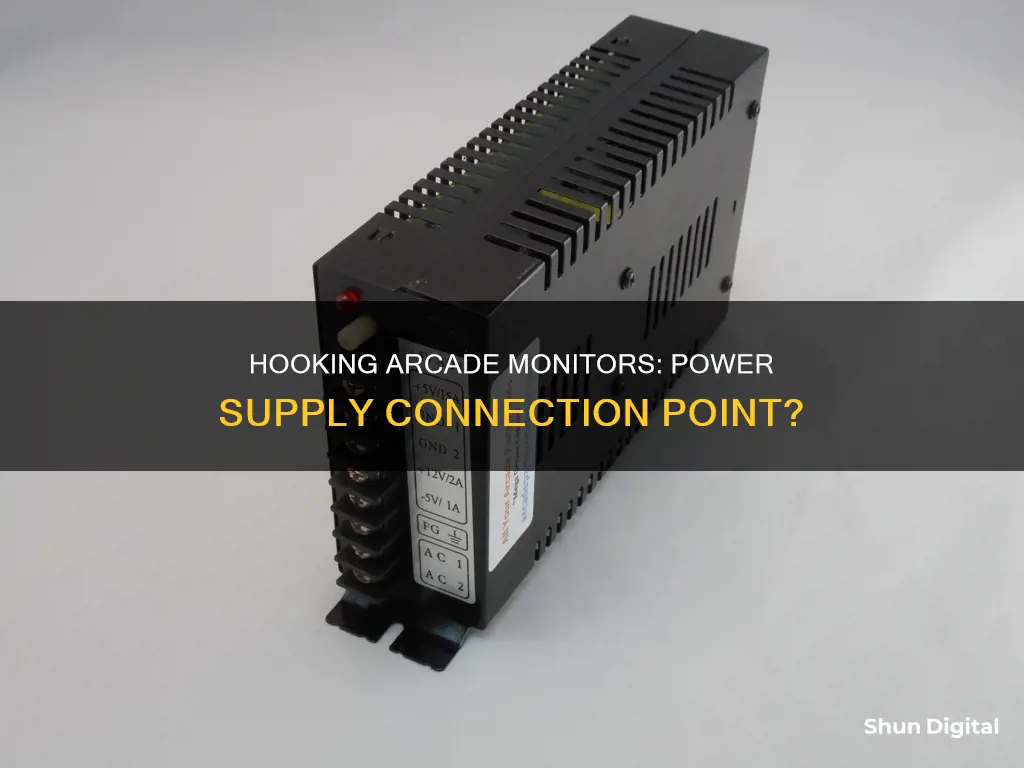
Hooking up an arcade monitor to a power supply can be a complex task, especially for those new to building arcade machines. The process may vary depending on the type of monitor and power supply being used. In general, it involves connecting the monitor to the power supply using the appropriate cables and ensuring that the power supply can provide the correct voltage and amperage for the monitor. It is important to follow safety precautions when working with electrical equipment, such as ensuring that the power is turned off before making any connections. Additionally, it is crucial to use the correct type of power supply for the specific arcade monitor to avoid damaging the equipment.
What You'll Learn

Using an isolation transformer
An isolation transformer is a critical component for powering an arcade monitor safely. Arcade monitors are typically "hot chassis," meaning they require an isolation transformer to prevent the destruction of power supply components. This step-by-step guide will walk you through the process of using an isolation transformer to power your arcade monitor:
Step 1: Understand the Basics
Isolation transformers are standard arcade parts and are necessary for all monitors that require 120VAC input. They have 120VAC input and output, ensuring a consistent power supply for your arcade monitor.
Step 2: Identify the Transformer
The isolation transformer is usually located behind and under the monitor, off to the side from the main power supply. Look for a small box-like component with a black wire and a white wire coming from the power supply leading to it. There may also be a green earth ground wire.
Step 3: Connect the Incoming Power
The incoming power from the wall outlet should be connected to the primary side of the isolation transformer. Wire the hot primary wire to the left and the common/neutral primary wire to the right. Make sure to include a switch and a fuse in the line with the hot wire for added safety.
Step 4: Connect the Outgoing Power to the Monitor
The secondary side of the isolation transformer will provide the 120V output to the arcade monitor. Connect the hot secondary wire to the left and the common/neutral wire to the right. Use appropriate wire connectors, such as Molex connectors, to ensure secure connections.
Step 5: Grounding
Proper grounding is essential for safety. Connect the ground wire from the incoming power source (wall outlet) and the ground wire from the monitor to one of the screw terminals on the left or right side of the isolation transformer's pad. Additionally, you can ground the monitor frame to the same point.
Step 6: Final Checks
Before turning on the power, double-check all your connections. Ensure that the incoming power, outgoing power, and grounding are all correctly wired as per the instructions. Once you're confident that everything is connected properly, you can plug in and power on the arcade monitor.
Adjusting Screen Display: Restoring Font Size on Your Monitor
You may want to see also

VGA for high-res games
VGA, or Video Graphics Array, is a video display controller and graphics standard that was first introduced by IBM in 1987. It can refer to the computer display standard, the 15-pin D-subminiature VGA connector, or the 640 x 480 resolution characteristic of the VGA hardware.
VGA was the last IBM graphics standard to which most IBM PC-compatible computer manufacturers conformed, and it became the lowest common denominator that all post-1990 PC graphics hardware could be expected to implement.
VGA supports a range of graphics modes, including:
- 320 x 200 in 4 or 16 colours (CGA/EGA compatibility)
- 320 x 200 in 256 colours (Mode 13h)
- 640 x 200 and 640 x 350 in 16 colours or monochrome (CGA/EGA compatibility)
- 640 x 480 in 16 colours or monochrome
The 640 x 480 resolution, with 256 colours rather than 16, became the de facto lowest common denominator of graphics cards by the mid-1990s. This was due in part to VGA being cloned in large quantities by manufacturers who added ever-increasing capabilities.
VGA was adapted into many extended forms, collectively known as Super VGA, and was then superseded by custom graphics processing units which implemented common VGA graphics modes and interfaces.
The VGA analog interface standard has been extended to support resolutions of up to 2048 x 1536 for general use, with specialised applications improving it even further.
When hooking up an arcade monitor, VGA can be used for high-res/31khz games.
OptiPlex 7070 Micro: Hooking Up Your Monitor
You may want to see also

Wiring a cabinet
Wiring an arcade cabinet can be a complex task, and it is important to ensure that you have the correct parts and knowledge before beginning. Here is a step-by-step guide to help you through the process:
Firstly, you will need to gather the necessary tools and materials. These include a power supply, an arcade monitor, wires, connectors, and tools such as a screwdriver and soldering iron. It is also important to have the manual for your specific arcade monitor model, as this will provide important information on the wiring process.
Once you have the necessary parts, the next step is to turn off the power and unplug the cabinet to ensure safety during the installation process. If you are working with a second-hand cabinet, it is important to inspect the existing wiring and take note of any colour-coding or labels on the wires. You may also need to remove the old power supply if it is being replaced.
Now, you can begin the process of connecting the new power supply. This typically involves connecting the wires from the power supply to the appropriate terminals, following the instructions provided with your power supply. Ensure that you match the correct colours or labels to the corresponding terminals. It is important to double-check all connections before proceeding.
Next, you will need to connect the power supply to the arcade monitor. This process can vary depending on the type of monitor you have. For example, a VGA connection will be different from a standard red/green/blue/ground/sync connection. Again, refer to your monitor's manual for specific instructions.
If your monitor requires an isolation transformer, this will need to be installed as well. The isolation transformer ensures that the monitor is properly grounded and isolated from the power supply, preventing any electrical issues. The transformer is typically located behind or under the monitor and is connected to the power supply and monitor using appropriate wires and connectors.
Finally, once all the connections are made, it is important to test your setup. Double-check that all connections are secure and correct, and then plug in the cabinet and turn it on. Test the functionality of the monitor and ensure that there are no issues such as ghosting or interference.
Wiring an arcade cabinet can be a challenging task, especially for those new to the process. It is important to take your time, follow instructions carefully, and ensure that all connections are correct and secure. If you are unsure about any aspect of the process, it is always best to consult a professional or seek advice from experienced individuals.
Asus Monitor Deals: How Often Do They Occur?
You may want to see also

Replacing a power supply
To replace a power supply, follow these steps:
- Ensure the cabinet is unplugged.
- Unhook the wires from the existing power supply (PS). Label them so you know how to reconnect them. They are usually colour-coded, but not always.
- Remove the old power supply (usually just a couple of screws).
- Mount the new power supply (you may need to drill new holes).
- Reconnect the wires to the new power supply.
- Double-check your connections.
- Plug it in and turn it on.
It is important to note that some power supplies don't have terminals and are instead connected to the board by a Molex connector. If this is the case, you can still check the DC voltage by identifying the black, red, and yellow wires.
Before replacing the power supply, it is a good idea to check the voltage. To do this, use a multimeter, which has several modes, including Alternating Current (AC) voltage (VAC) and Direct Current (DC) voltage (VDC). Set the multimeter to VAC and check the AC voltage coming into the power supply. It should read around 120 VAC. If it doesn't, start tracing your wiring to find the problem. Then, set the multimeter to VDC to test your DC voltage, which powers your board, controls, and coin door lights, among other things.
Monitoring RF Usage: Powercell Insights and Strategies
You may want to see also

Using a standard monitor
If your arcade cabinet has a built-in power supply, you can connect the monitor directly to it. Make sure to use the correct voltage and amperage for your monitor, as using the wrong power supply can damage the monitor. If you're unsure, consult a professional or refer to the monitor's manual.
When connecting the power supply, follow these steps:
- Turn off the power to the arcade cabinet.
- Identify the power input on the monitor. It is usually located at the back or side of the monitor and will have a connector or terminal block for the power cord.
- Connect the power cord from the power supply to the monitor's power input. Ensure that the connections are secure and that there are no loose wires.
- Double-check that all connections are correct and secure.
- Turn on the power to the arcade cabinet.
- Test the monitor to ensure it is functioning properly.
If your arcade cabinet does not have a built-in power supply, you can purchase a separate power supply unit. This will involve additional wiring, so be sure to follow the instructions that come with the power supply unit.
Additionally, some older arcade monitors may require an isolation transformer to prevent electrical interference. This is less common with modern monitors, but if you are using an older model, be sure to check if an isolation transformer is needed.
If you are unsure about any part of the process, it is always best to consult a professional or seek advice from an arcade forum.
Monitor Size: Does Scale Impact Studio Performance?
You may want to see also
Frequently asked questions
You can hook up an arcade monitor to a power supply by connecting the monitor's power cord to a power strip or a wall outlet.
If your arcade monitor has a different power connector than your power supply, you have a few options. You can either cut and splice the wires to match the connector on the power supply, or you can use an adapter cable. It is generally recommended to avoid cutting and splicing if possible.
Most new arcade monitors do not require an isolation transformer. However, some older monitors or specific models may require one. It is important to check the requirements for your particular monitor to ensure you are using the correct power setup.


