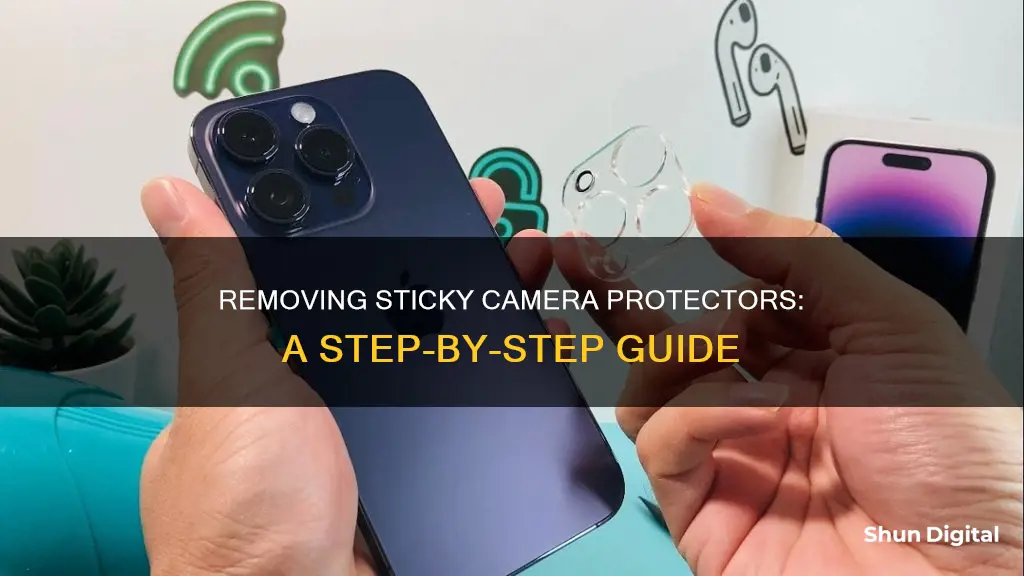
If you're looking to remove a sticky camera lens protector, you've come to the right place. This process can vary depending on the type of camera and the adhesive used, but we'll guide you through the steps to safely remove that stubborn protector. Firstly, it's important to power off your device to avoid accidental touches during the removal process. Next, grab a microfiber cloth and gently wipe the surface of the lens protector to remove any dust or debris, ensuring a smooth and residue-free surface. Now, here comes the tricky part: loosening the adhesive. You can use a hairdryer on a low or medium setting to warm up the adhesive, making it easier to remove the protector. Alternatively, you can apply a small amount of isopropyl alcohol to dissolve the adhesive. Once the adhesive is loosened, carefully insert a plastic pry tool or a thin, non-metallic object to gently lift one corner of the protector. Avoid using metal tools to prevent scratching the camera lens. Slowly and steadily, continue to peel off the protector, being careful not to apply too much force. Finally, use a microfiber cloth with a small amount of lens cleaning solution to wipe away any remaining adhesive residue. Voilà! Your camera lens should now be protector-free and ready for use.
| Characteristics | Values |
|---|---|
| Power off the device | Avoid accidental touches |
| Clean the protector with a microfiber cloth | Remove dust and debris |
| Warm up the adhesive with a hairdryer | Loosen the adhesive |
| Use a plastic pry tool to lift the corner of the protector | Avoid applying too much pressure |
| Peel off the protector slowly | Avoid sudden movements or excessive force |
| Clean the camera lens with a microfiber cloth and lens cleaning solution | Remove remaining adhesive |
What You'll Learn

Use a hairdryer to warm up the adhesive
Using a hairdryer to warm up the adhesive on a sticky camera protector is an effective way to loosen the adhesive and make it easier to remove the protector. Here is a detailed guide on how to do this safely and effectively:
Firstly, it is important to take safety precautions. Ensure you have a plan in case of a fire, especially if you have a swollen battery. Keep the hairdryer unplugged and switched off when not in use, and avoid using extension cords as they can pose a fire risk.
Now, let's begin the process:
Step 1: Prepare Your Device
Place your device on a clean, heat-resistant surface or mat. Keep flammable materials away from your work area. Ensure that your hands are clean and dry to prevent fingerprints or smudges on the lens.
Step 2: Set Up the Hairdryer
Set the temperature of the hairdryer to its "hot" setting. If your hairdryer has multiple settings, choose the "low" or "medium" heat setting as recommended by some sources. Set the fan setting to "Low" if you are working with small parts, such as cables or tape, and "High" for larger surfaces, like screens or back covers.
Step 3: Warm Up the Adhesive
Position the nozzle of the hairdryer 2-3 inches above the device. Move the hairdryer along the surface, being careful not to leave it in one spot for too long. Heat the surface until it is hot to the touch, or follow the instructions provided by the manufacturer.
If you are working with an OLED screen, do not heat it above 176 °F (80 °C) to avoid damage. Similarly, if heating adhesive near or underneath a battery, ensure the battery is fully discharged and does not exceed 150 °F (66 °C). Keep the hairdryer in motion, especially when working with smaller surfaces, by moving it in circles.
Step 4: Soften the Adhesive Further
For stubborn adhesives, you can apply heat in small circles for about 30 seconds. This will help loosen the adhesive further and make it easier to peel off the protector.
Step 5: Remove the Protector
Once the adhesive is softened, use a plastic pry tool or a thin, non-metallic object to gently lift one corner of the lens protector. Avoid using metal tools as they can scratch the camera lens and housing. Slowly and carefully peel off the protector, avoiding sudden movements or excessive force, which could damage the lens or leave residue.
Step 6: Clean the Lens
After removing the protector, use a microfiber cloth and a small amount of lens cleaning solution to gently wipe away any remaining adhesive residue from the camera lens, ensuring a thorough and safe clean.
By following these steps, you can effectively use a hairdryer to warm up and loosen the adhesive on a sticky camera protector, making it easier to remove and leaving your camera lens clean and protected.
Night Vision Camera: Which Colors Are Invisible?
You may want to see also

Use a plastic pry tool to lift the protector
If you're looking to remove a sticky camera protector, one recommended method is to use a plastic pry tool. This method is particularly useful if you're dealing with a stubborn protector that's firmly stuck to your camera lens. Here's a detailed guide on how to use a plastic pry tool for effective removal:
Choose the Right Tool:
Select a plastic pry tool that is specifically designed for removing camera lens protectors. This tool should be made of durable plastic to ensure it doesn't break during the removal process. It should also have a thin and slightly flexible edge that can easily slide under the protector.
Warm the Adhesive:
Before attempting to lift the protector, it's crucial to soften the adhesive. Use a hairdryer on a low or medium heat setting to gently warm the adhesive. Hold the hairdryer a few inches away from the camera lens and move it back and forth to evenly distribute the heat. Avoid using high heat, as this may damage the lens or the surrounding components.
Insert the Pry Tool:
Once the adhesive is sufficiently warmed up, carefully insert the plastic pry tool between the camera lens and the protector. Gently slide the tool along the edge of the protector, creating a slight gap. Be cautious not to apply too much force, as you don't want to scratch the camera lens or apply excessive pressure that could damage the lens.
Lift and Peel:
After successfully inserting the pry tool, focus on lifting one corner of the lens protector. Gently apply upward pressure with the pry tool to slowly lift the corner. Once you have lifted a small portion, you can switch to using your fingers to continue peeling back the protector. This method helps prevent damage to the lens and ensures a more controlled removal process.
Slow and Steady Wins the Race:
When peeling back the protector, maintain a slow and steady pace. Avoid sudden or aggressive movements, as these can lead to damage or leave behind residue. Continue peeling back the protector until it is completely removed. If needed, rewarm the adhesive with the hairdryer during the process to keep it pliable.
Clean the Lens:
After successfully removing the protector, use a microfiber cloth and a small amount of lens cleaning solution to gently wipe away any remaining adhesive residue from the camera lens. This step ensures your lens is clear and free of any sticky residue or dust particles.
Using a plastic pry tool is an effective way to remove a stubborn camera lens protector. Just remember to work slowly and carefully to avoid any damage to your camera lens or device. With gentle precision, you'll have that sticky protector removed in no time!
Smart TVs: Are They Watching You?
You may want to see also

Clean the camera lens with a microfiber cloth
To clean your camera lens with a microfiber cloth, start by ensuring the cloth is clean and dry. Microfiber cloths can pick up debris, so it's important to use a fresh cloth to avoid scratching your lens. You can also blow away any dust or debris with a blower before wiping the lens. When using the cloth, be sure to wipe gently and avoid applying too much pressure. If there is stubborn grease or oil on the lens, you can use a small amount of lens cleaning solution or fluid along with the microfiber cloth.
It is recommended to use microfiber cloths designed specifically for cleaning delicate surfaces such as camera lenses, eyeglasses, or electronic screens. These cloths are typically softer and less likely to contain cleaning solvents that could damage the coatings on your lens. Avoid using microfiber cloths intended for car cleaning or other general-purpose cloths, as they may be too abrasive.
Additionally, it is important to note that cleaning your lens with just a microfiber cloth may not be as effective as using a lens cleaning solution. While it is possible to clean the lens with a dry cloth, a cleaning solution will help dissolve grease and oil, making it easier to wipe away.
By following these steps and taking care not to press too hard, you can effectively clean your camera lens using a microfiber cloth, removing dust, fingerprints, and other debris without causing any damage.
Can My Camera Spy on Me?
You may want to see also

Use isopropyl alcohol to dissolve the adhesive
If you're looking to remove a sticky camera protector, one effective method is to use isopropyl alcohol to dissolve the adhesive. This technique is particularly useful if the glue is very strong and stubborn.
Step 1: Prepare the Isopropyl Alcohol
Firstly, you will need to prepare a solution of isopropyl alcohol and distilled water. Mix equal parts of isopropyl alcohol (70% or higher concentration) and distilled water in a small basin or container. The alcohol will break down the sticky residue, while the distilled water dilutes the solution, reducing the chance of leaving marks on your device.
Step 2: Apply the Solution
Take a cotton swab, dip it into the prepared solution, and gently wipe down the sticky side of the camera protector. Ensure that the swab is moist but not dripping wet. Work the swab in circular motions, focusing on areas with visible residue or stubborn stickiness. Avoid applying excessive force to prevent damaging your device.
Step 3: Remove Persistent Residue
For any stubborn residue that won't budge, you can create a more potent cleaning solution. Mix a small amount of liquid soap with the isopropyl alcohol solution. Dip a corner of a microfiber cloth into this mixture and gently massage the problematic areas in circular motions. The soap will help break down and lift the remaining residue.
Step 4: Dry the Device
Once you've removed the residue, it's important to dry your device thoroughly. Use a soft, lint-free cloth to gently wipe away any remaining moisture from the area where the camera protector was applied. Ensure that your device is completely dry before turning it back on or reapplying any new protectors.
Tips and Precautions:
- Always handle your electronic devices with care to avoid accidental damage.
- Avoid using paper towels or tissues to clean your device, as they can leave behind lint or scratch the surface.
- Do not pour isopropyl alcohol directly onto your device. Instead, use a cotton swab or cloth to apply the solution gently.
- If you're removing a screen protector, it's a good idea to turn off your device to make it easier to locate and clean areas with leftover glue.
By following these steps, you can effectively use isopropyl alcohol to dissolve the adhesive on a sticky camera protector, ensuring a thorough and safe removal process.
Viewing Hikvision Cameras on PC: A Simple Guide
You may want to see also

Peel off the protector slowly and steadily
Now that you have used a hairdryer to warm up the adhesive and inserted a pry tool to lift one corner of the sticky camera protector, it is time to peel off the protector slowly and steadily.
Peeling off the protector slowly and steadily is crucial to avoid damaging the camera lens or leaving behind residue. Apply gentle and controlled force as you pull the protector away from the lens. Be careful not to stretch or snap the protector as you remove it, as this could lead to accidental damage to the lens. If you encounter resistance, stop and reheat the adhesive with the hairdryer, as it may have cooled down and regained its stickiness.
During the removal process, be mindful of your hand placement. Avoid touching the exposed lens with your fingers, as this could transfer oils or leave smudges. If necessary, adjust your grip on the camera body or protector to maintain control and stability.
If the protector is particularly stubborn, you can use a small amount of isopropyl alcohol to help dissolve or weaken the adhesive. Apply it with a syringe or dropper, targeting the areas where the protector is still firmly attached. Allow the alcohol to work for a few moments before attempting to peel off the protector again.
Remember, the key to success is patience and a gentle touch. By taking your time and working slowly, you can effectively remove the sticky camera protector without causing harm to your valuable camera equipment.
Removing Camera Flash Reflections from Eyes on Android
You may want to see also
Frequently asked questions
First, power off your device to avoid any accidental touches during the removal process. Next, use a microfiber cloth to gently wipe the surface of the lens protector and remove any dust or debris. Then, use a hairdryer on a low or medium heat setting to warm up the adhesive and loosen its grip. Finally, carefully insert a plastic pry tool or a thin, non-metallic object under the protector to lift and peel it off slowly.
Ensure you clean your hands before starting the removal process to prevent fingerprints or smudges on the lens. Additionally, always lift the protector from a corner or edge to avoid applying excessive force that could damage the lens.
Purchase a bottle of rubbing alcohol and pour a small amount onto a dry towel or tissue paper. Gently rub the alcohol solution onto the sticky residue, then let the camera surface dry for 2-3 minutes. This will effectively remove the stickiness and restore a clean surface.
Regularly clean the camera body and exterior to prevent the build-up of dirt and sticky substances. Keep your hands clean and store your camera in a safe place to minimise the transfer of dirt, dust, or sweat onto the lens protector.


