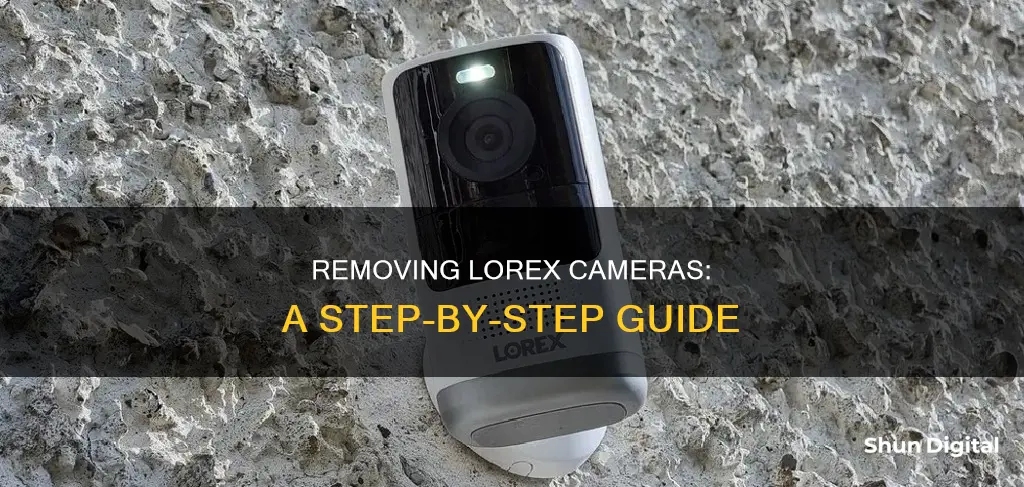
Lorex is a company that offers security systems and cameras. Lorex's products are designed to be straightforward to install, with simplified installation processes that allow users to set up the system themselves. However, Lorex has received numerous complaints about its customer service and technical support, with an average review rating of 1.08 out of 5 stars. If you are unsatisfied with your Lorex camera and wish to remove or replace it, there are a few options available. For instance, you can remove a Lorex camera by launching the Lorex App, tapping the Device Settings of the camera, and then selecting Remove Device. Alternatively, you can replace your Lorex camera with a different security camera system, such as those offered by CCTV Camera World, which provides top-of-the-line products and support.
How to Remove a Lorex Camera
| Characteristics | Values |
|---|---|
| Step 1 | Launch the Lorex App, then tap the Device Settings of the camera you wish to remove. |
| Step 2 | Scroll all the way down, and tap Remove Device. |
| Step 3 | Tap Remove when prompted if you want to remove the device from your account. |
| Note | You will get an on-screen prompt telling you that the device has been successfully removed. |
| Alternative Step 1 | Launch the Lorex Secure / FLIR Secure app on your smartphone or tablet. |
| Alternative Step 2 | Tap Cameras, and then tap the camera you want to remove. |
| Alternative Step 3 | Tap the Settings icon. |
| Alternative Step 4 | Swipe left to the General tab and scroll down to the bottom of the list. Tap Remove Camera. |
| Alternative Step 5 | Enter your camera password, and then tap Remove Device. |
What You'll Learn

Removing a Lorex camera from the Lorex/FLIR Secure app
To remove a Lorex camera from the Lorex/FLIR Secure app, you must first ensure that your camera is online. If you have an offline camera, you will need to contact Lorex support to remove the camera from the app.
Next, you will need to launch the Lorex Secure/FLIR Secure app on your smartphone or tablet. Once the app is open, tap 'Cameras', and then tap the camera you wish to remove. After this, tap the settings icon, and then swipe left to the 'General' tab. Scroll down to the bottom of the list and tap 'Remove Camera'. You will then be prompted to enter your camera password before tapping 'Remove Device'. You can find your default camera password in your user manual.
Note that if you receive an error message asking you to call technical support, there may be a subscription associated with the camera you are trying to remove.
Cameras and Ghosts: An Unlikely Pair
You may want to see also

Removing a Lorex camera from your Lorex App account
To remove a Lorex camera from your Lorex App account, you must first ensure that your camera is online. If your camera is offline, you will need to contact Lorex support to remove it from your account.
If your camera is online, follow these steps:
- Launch the Lorex App and log in.
- Tap 'Device Settings' on the camera you wish to remove.
- Scroll down and tap 'Remove Device'.
- You will be asked to confirm that you want to remove the device. Tap 'Remove' to continue.
You will then receive a message confirming that the device has been successfully removed.
Please note that this process only removes the camera from your Lorex App account and does not delete your account or any other devices associated with it.
If you wish to revoke access for a specific user, rather than remove the entire device, you can follow a similar process:
- Launch the Lorex App and tap 'Device Settings'.
- Scroll down and tap 'Share Device'.
- All shared users will be listed under the 'Share Users' screen. Tap 'Revoke' next to the user you wish to remove access for.
- Confirm that you want to revoke access, and you will receive a message confirming that access has been revoked.
This process will remove the user's access to the camera, but they will still have an active account on the Lorex App.
Activating Your Apple Watch Camera: A Simple Guide
You may want to see also

Compatibility issues with Lorex HD-SDI cameras
Compatibility issues are common with Analog HD security camera technology. HD-SDI cameras, for instance, use varying signal types to transmit video, and these are sometimes not interchangeable. Lorex sold systems that used the HD-SDI signal type for a brief period. However, this is no longer supported by most major security camera manufacturers and suppliers. If you have any SDI equipment, it is highly recommended that you replace any cameras or DVRs as soon as possible.
To suggest compatible replacement security cameras, technicians will need to know the signals and resolutions that a DVR supports. This information can be provided by supplying the model number of the DVR and the brand if it is not Lorex, along with pictures of the front and back of the DVR, and the software on a monitor or TV showing the main menu or system information.
Removing Camera Leather: A Step-by-Step Guide
You may want to see also

Lorex camera removal from a Lorex App account
To remove a Lorex camera from a Lorex App account, you must first ensure that the camera is online. If you have an offline camera, you will need to contact Lorex support to remove it from your account.
Once you have ensured that your camera is online, follow these steps:
Step 1:
Launch the Lorex App and log in to your account.
Step 2:
Tap on "Device Settings". This will open a menu with various options related to your device.
Step 3:
Scroll down to the bottom of the "Device Settings" menu and look for the "Remove Device" or Share Device" option. If you are using the Lorex Secure/FLIR Secure App, you will need to tap "Cameras" and then select the specific camera you want to remove before tapping the Settings icon.
Step 4:
Tap "Remove Device" or Revoke next to the user or camera you wish to remove.
Step 5:
You will be prompted to confirm that you want to remove the device from your account. Tap "Remove" or OK to continue.
After following these steps, your device should be successfully removed from your Lorex App account.
Please note that if you receive an error message instructing you to call technical support, there may be a subscription associated with the camera you are trying to remove. In this case, you will need to contact Lorex Technical Support for further assistance.
Additionally, it is important to mention that, according to Lorex Support, there is currently no way to deactivate indoor cameras via the app. The only way to turn them off is by unplugging the network or Ethernet cable.
If you wish to delete your entire Lorex App account, you can do so by opening the app, tapping the Settings tab, and then selecting Account Settings. Please note that this action will permanently delete your account and cannot be undone.
Cleaning Mirrorless Cameras: Removing Dust Efficiently
You may want to see also

Lorex camera removal from a Wi-Fi network
To remove a Lorex camera from your Wi-Fi network, you will need to access your Lorex app account and remove the camera from there. Here is a step-by-step guide on how to do this:
Step 1: Launch the Lorex App
Open the Lorex App on your smartphone or tablet. Make sure you are logged into the account that is linked to the camera you wish to remove.
Step 2: Access Device Settings
Tap on the Device Settings of the specific camera you want to remove from your Wi-Fi network. This will open up the settings for that particular camera.
Step 3: Scroll Down and Remove Device
Scroll down the camera settings until you see the Remove Device option. Tap on this option to initiate the removal process.
Step 4: Confirm Removal
You will be prompted with a message asking if you are sure you want to remove the device from your account. Tap Remove to confirm the action.
After following these steps, your Lorex camera should be successfully removed from your Wi-Fi network and your Lorex App account.
Additional Notes:
- It is important to note that you must be a registered user to remove devices from your Lorex App account.
- If you are looking to remove users who have access to your Lorex device, you can do so by following a similar process. Launch the Lorex App, tap Device Settings, then Share Device. From there, you can revoke access for specific users.
- If you change your modem or router, your camera will lose its network connection and go offline. You will need to reset your camera and reconnect it to your new Wi-Fi network.
Removing Camera Grip: A Step-by-Step Guide
You may want to see also
Frequently asked questions
Launch the Lorex App, then tap the "Device Settings" of the camera you wish to remove. Scroll down and tap "Remove Device". You will be asked if you want to remove the device from your account. Tap "Remove" to confirm.
Launch the app, then tap "Cameras" and select the camera you want to remove. Tap the "Settings" icon, then swipe left to the "General" tab. Scroll down and tap "Remove Camera". Enter your camera password, then tap "Remove Device".
If your camera is offline, you will need to contact Lorex support to remove it from your account.
If you are looking to replace your Lorex camera, you will need to provide the model number, as well as pictures of the front and back of the camera and, in some cases, the software interface. This information will help technicians suggest the best replacement options.


