Dust and dirt are inevitable problems for photographers, especially those using mirrorless cameras with interchangeable lenses. While modern cameras often have self-cleaning modes, knowing how to clean your camera sensor manually is a valuable skill. This is because dust and dirt will inevitably end up in your images, appearing as blurry spots. In this article, we will cover how to identify sensor dust, the tools you will need to clean it, and step-by-step guides for both dry and wet cleaning methods.
| Characteristics | Values |
|---|---|
| How to check for dust on the camera sensor | Shoot a sensor check image, set the lowest normal range ISO, set to manual focus, set to f/22, post-process to find the spots, open the image on a computer and desaturate |
| How to prevent dust from entering the camera | Turn off the camera before changing the lens, only change lenses in a clean environment, check the lens before attaching, position the camera downward when removing and attaching a lens, attach a dust cap to the front of the camera and lens, keep the rear element of the lens and the sensor loupe clean |
| Tools required for cleaning the camera sensor | Manual air blower, sensor scope, sensor cleaning brush, sensor cleaning solution, cleaning swabs, bulb blower, flashlight or headlamp, sensor loupe |
| Dry cleaning method for camera sensor | Lay the camera on a table, blow on the sensor with an air bulb, use a sensor scope to check for dust, repeat the air bulb and sensor scope check, shoot a piece of paper to see if dust has been removed |
| Wet cleaning method for camera sensor | Use a sensor cleaning brush, keep the brushes clean, use a solvent such as Smear Away or Sensor Clean, tilt the swab and drag it from one edge of the sensor to the other, turn the swab over and drag it back the other way, use a loupe to inspect the sensor |
What You'll Learn

How to check for dust on your camera sensor
Dust on your camera sensor can be incredibly frustrating, showing up as dark spots in your images. Luckily, there are several ways to check for dust on your camera sensor.
Firstly, set your camera to Aperture Priority mode. Set your metering mode to Matrix or Evaluative Metering. Set your camera ISO to the lowest number, such as ISO 100 or 200. Turn off autofocus and set your lens to manual focus. Set your aperture to the largest number available for your lens by rotating the camera dial. For example, if your lens has a minimum aperture of f/16, set your aperture to f/16.
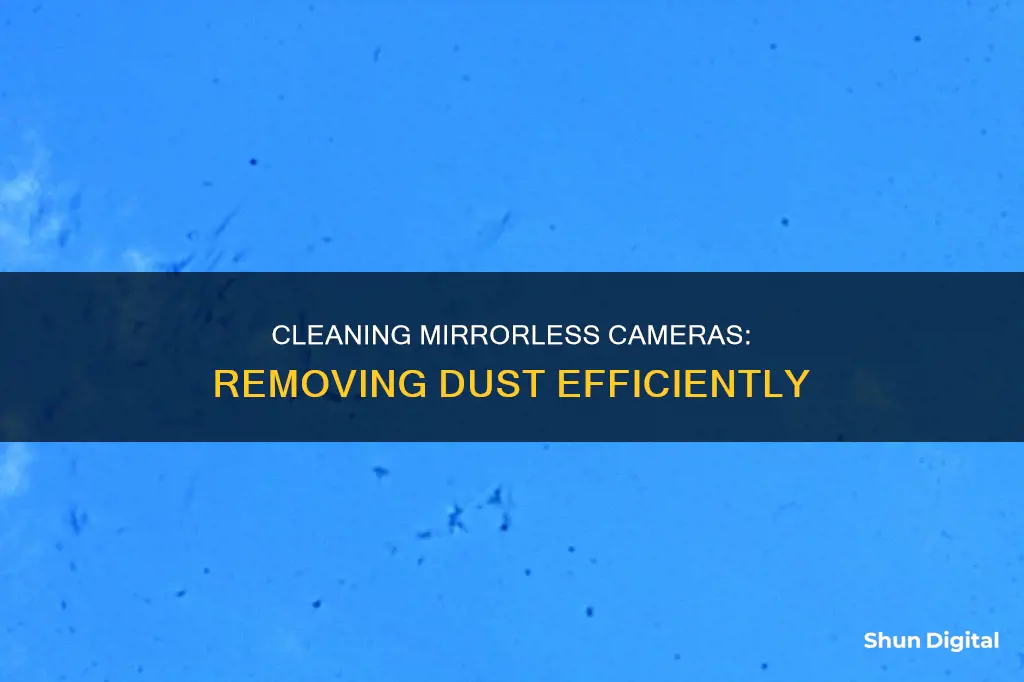
If you are outdoors, point your camera at a clear blue patch of sky and take a picture. If you are inside, point your camera at a plain white piece of paper. Make sure the paper fills the whole frame, and that the lens is completely out of focus. Take a picture.
Now, zoom in on the image and scroll over the whole picture. If you see any dark spots, your sensor has dust on it.
Alternatively, you can use image editing software to check for dust spots. Upload your image to Photoshop or Lightroom. In Photoshop, hold down Ctrl/Cmd + I to invert the image, creating a negative. Dark spots will now appear white, making them easier to see. In Lightroom, open your image in the Develop module and select the Remove tool in the upper right-hand corner. Check the Visualize Spots box, and Lightroom will create a high-contrast monochrome mask to identify any problem areas.
Checking for dust on your camera sensor is an important part of regular camera maintenance. If you find dust spots, you can either attempt to clean the sensor yourself or seek a professional cleaning service from a local camera shop.
Paranormal Caught on Camera: Australia's Spookiest Spots
You may want to see also

Dry cleaning methods
Preparation
Before you start, make sure you have a fully charged battery. If the battery runs out while you're cleaning, the mirror will slap down and you'll be faced with a very expensive repair. Also, clean your camera's exterior body first to prevent dust particles from entering the sensor.
Blowing Dust Away
Find an area that is as free of dust and wind as possible. If you're using a DSLR, look for the menu option to manually clean your camera. This will lock the mirror back and reveal the sensor. If you're using a mirrorless camera, the sensor should be exposed when you take off the lens or body cap.
Hold the camera upside down so the LCD screen is facing the ceiling, and use a manual air blower (like a rocket blower or bulb blower) to blow air into the camera and onto the sensor. Be extremely careful not to touch the sensor with the tip of the blower—the best practice is to not put the tip inside the camera at all.
Checking for Dust
After blowing, turn off the camera and replace the lens. Take a test shot against a light surface or scene (like a white wall or the sky) to see if the dust has been removed. If it has, there's no need to take any further steps.
Using a Sensor Scope
If the dust remains, you can use a sensor scope to check for uncleared spots. A sensor scope is a magnifying glass with a light that shines on the sensor, allowing you to see sensor dust as tiny silver threads or spots. Repeat the blowing and sensor scope check until you've removed as much dust as possible.
Using a Brush
If you still have small spots that are only visible in a Photoshop image, you can use a sensor cleaning brush. These brushes have bristles that hold an electrostatic charge and attract particles off the sensor, so only a light touch is needed. Remember to keep these brushes very clean and charge them right before use by blowing on the bristles with a squeeze bulb or spinning them with a battery-powered Visible Dust Arctic Butterfly.
Final Checks
After brushing, take another test shot to see if you've removed the dust. If you see an elongated smear, you've brushed through an oil spot thrown by the shutter, and you'll need to clean the brush before using it again. If there's no oil smear, your sensor is clean!
Night Owl Wireless: Viewing Camera Footage Easily
You may want to see also

Wet cleaning methods
Now gently start from one side of the sensor, moving the swab slowly across. When you get to the end, use the other side of the swab head to go back to the start. Don't be tempted to put too much fluid on or you will end up with streaks.
It is also important to only use a swab once. You can also use the other side of the swab, but you might end up putting dust back on the sensor if you don't keep the swab properly angled.
Accessing USB Camera in Python: A Step-by-Step Guide
You may want to see also

Tips for cleaning without sensor swabs
- Use your camera's self-cleaning mode: Most cameras have self-cleaning modes that can be found in the camera menu. This is the easiest way to clean your mirrorless camera sensor.
- Use a rocket blower: Hold your camera upside down and gently force air into the sensor area using a rocket blower. Be careful not to hold the blower too close to the sensor.
- Check for dust: Set your camera to a small aperture (e.g. f/16 or f/22) and take a photograph against a bright white surface or the sky. If you see dark blobs or other random spots, your sensor has dust.
- Use a gel stick: The Eyelead SCK-1 sensor gel stick is a great tool for cleaning your sensor. Dab the gel stick onto the sensor gently, then transfer it to a strip of viscous paper to remove dust and oil.
- Use a bulb blower: Remove the lens and use a bulb blower to blast dust from the sensor. Be careful not to touch the sensor or other internal components with the blower tip.
- Prevent dust from entering: Always hold your camera facing down when changing lenses to minimise the chance of dust entering your camera.
How Cameras in Space Miss the Stars
You may want to see also

When to get a professional clean
While it is possible to clean your camera sensor yourself, there are times when it is best to get a professional clean.
Firstly, if you are not confident in your ability to clean the sensor without causing damage, it is best to leave it to a professional. Sensor cleaning requires careful handling, and even a slight mistake can result in costly repairs.
Secondly, if you are a professional photographer who relies on your camera for work, a professional clean is recommended. While you can edit out sensor spots, this can be time-consuming if you have to do it for hundreds of photos. A professional clean ensures your camera is always ready for use, and you won't have to worry about dust spots ruining your shots.
Additionally, if you have tried cleaning your sensor yourself but are still seeing dust spots or streaks on your photos, it may be time to seek professional help. They have the necessary tools and expertise to give your sensor a thorough clean.
Finally, if you are unable or unwilling to clean your sensor yourself and don't want to risk damaging your camera, a professional service is the way to go. They will have the right equipment and experience to get the job done effectively and safely.
Remember, a clean sensor is crucial for maintaining the quality of your photographs. While you can take precautions to minimise dust buildup, regular cleaning is necessary, especially if you frequently change lenses or shoot in dusty environments.
Can Your TV Spy on You?
You may want to see also
Frequently asked questions
Set your camera to a small aperture such as f/16 or f/22 and the lowest ISO. Take a photograph against a white wall, piece of paper, or cloudy sky. If you see blurry spots, your camera has dust on it.
Only change lenses in a clean, indoor environment, away from fans, vents, or windows. Check the lens before attaching it to the camera and use a blower to remove any dust. Position the camera downward when removing and attaching a lens. Attach a dust cap to the front of the camera and lens when not in use.
First, try using your camera's self-cleaning mode. If this doesn't work, use a rocket blower to gently force air into the sensor area while holding the camera upside down. You can also use sensor swabs, gently passing a swab over the sensor in a clean room.
Do not touch the sensor with anything other than a clean sensor swab. Do not use compressed air near the sensor as this will damage it. Do not shake your camera. Do not keep the sensor exposed for too long. Do not splash water on the sensor.


