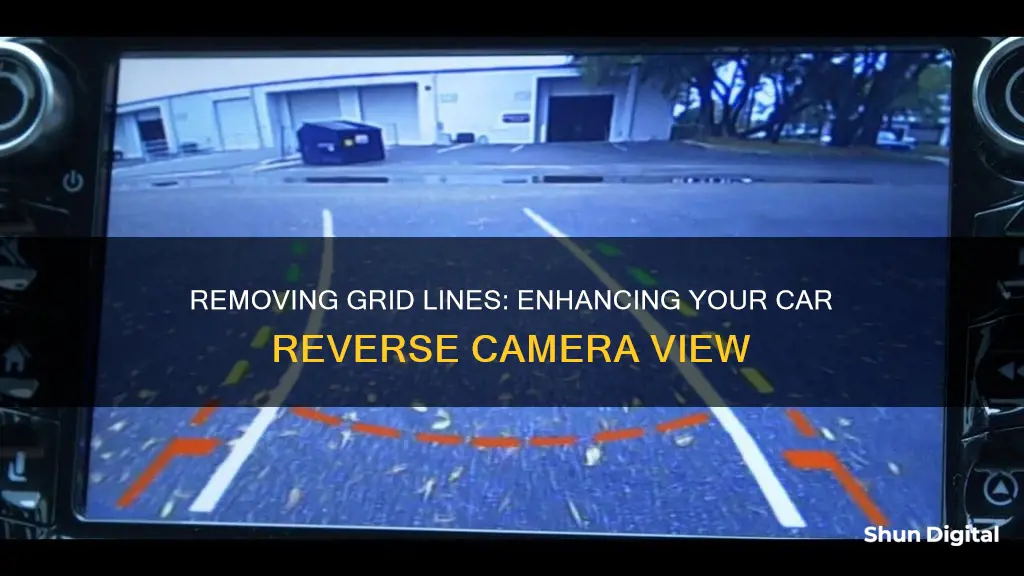
Removing the grid lines from a car's reverse camera can be a tricky task. While some cameras have an extra wire that can be cut to disable the lines, others do not have this option. In some cases, the lines are superimposed over the image by the iDrive system, which allows the driver to turn them on or off. However, in other cases, the lines may be built into the camera itself, and the only way to remove them may be to modify the software that displays them or to purchase a new camera that does not have the grid lines feature.
| Characteristics | Values |
|---|---|
| Reasons for removing grid lines | To use the camera for a different purpose, or because the lines are confusing or unnecessary |
| Ease of removing grid lines | Varies; some cameras have an extra wire to cut, but others don't |
| Alternative to removing grid lines | Contact the camera manufacturer |
| Other solutions | Re-purchase cameras without grid lines, or with exposed wire loops to be cut |
What You'll Learn

Cutting the extra wire
To remove the grid lines on your car's reverse camera by cutting the extra wire, you can follow these steps:
Firstly, it is important to note that this method may not work for all cameras. Some cameras have an extra wire that can be cut to disable the grid lines, while others may not. Therefore, it is recommended to check your camera for the presence of an extra wire before proceeding.
If your camera does have an extra wire, you can proceed with the following steps:
- Locate the extra wire: Open up the camera case by removing any screws or panels that are holding it together. Look for a wire that is not connected to anything or seems out of place. This could be a small loop or an exposed wire near the connector. This wire is typically white, but it may vary depending on the camera model.
- Cut the extra wire: Once you have identified the extra wire, use a sharp cutting tool like wire cutters or small scissors to cut it. Make sure you cut it as close to the connector as possible to avoid any loose ends that could potentially cause a short circuit.
- Reassemble the camera: After cutting the wire, carefully put the camera back together, ensuring that all screws and panels are secure.
- Test the camera: Connect the camera to your vehicle and turn on the reverse gear to see if the grid lines have been removed. If the grid lines are still visible, try adjusting the settings in your vehicle's infotainment system or display.
It is important to note that cutting wires can be risky, and it is always recommended to consult a professional or a mechanic before attempting any modifications to your vehicle's electrical system.
Chevy's Camera System: Seeing Behind Trailers
You may want to see also

Contacting the manufacturer
If you want to remove the grid lines from your car's reverse camera, one option is to contact the camera manufacturer. They may be able to provide specific instructions or guidance on how to disable the grid lines for your particular camera model.
To contact the manufacturer, you can try the following methods:
- Check the camera's packaging or manual: The manufacturer's contact information, such as a customer support phone number, email address, or website, may be included in the documentation that came with your camera.
- Look for contact information on the manufacturer's website: Most manufacturers have websites where you can find customer support options, including email, live chat, or phone support.
- Reach out through social media: Many manufacturers have a presence on social media platforms like Twitter, Facebook, or Instagram. You can try sending them a direct message or post about your issue on their public profiles.
- Visit a local dealership or service center: If your camera was installed by a professional, you can visit the dealership or service center where the work was done. They may have technicians who are familiar with your camera system and can provide guidance on removing the grid lines.
When contacting the manufacturer, it is important to have the following information ready:
- Camera model and part number: This information can usually be found on the camera itself or in the documentation that came with it.
- Vehicle information: Include the make, model, and year of your car, as well as any other relevant details, such as any modifications or aftermarket installations.
- Detailed description of the issue: Explain clearly that you want to remove the grid lines from your reverse camera and provide any relevant details, such as the steps you have already taken to try and resolve the issue.
By providing detailed and accurate information, the manufacturer's customer support team will be better equipped to understand your issue and provide specific instructions or guidance on removing the grid lines from your car's reverse camera.
Galaxy Watch: Camera Functionality Explored
You may want to see also

Finding a replacement camera without markers
If you're looking for a replacement reverse camera without the markers or grid lines, there are a few things you should keep in mind. Firstly, it's important to know that these grid lines are called parking guidelines, and they come in different types: static, dynamic, and steering-linked. Static lines help to gauge the vehicle's distance from obstacles, while dynamic lines move on the screen to aid vehicle alignment. Steering-linked lines are directly connected to the steering and provide high accuracy during manoeuvring.
When choosing a replacement camera without these markers, you should consider opting for a high-resolution camera to ensure a clear and detailed view. A wide-angle lens is also beneficial, as it provides better coverage, allowing you to see more of your rear surroundings.
In terms of specific products, there are a few options available on Amazon. For instance, the "PixelMan Backup Camera, AHD 1080P Metal 170 Degree Wide Angle Rearview Reversing Camera" offers a clear night vision and a wide-angle lens without any mention of parking guidelines. Another option is the "iBeam TE-FLC Flush Mount Micro Reverse Backup Camera", which also has a wide-angle lens and built-in parking grid lines that can be turned off by cutting a wire.
If you're specifically looking for a boot handle or number plate camera, which is designed to fit your vehicle model, you may need to explore manufacturer-specific options. Motormax, for example, provides reversing cameras for a range of vehicle models, including boot handle and brake light cameras.
When purchasing a replacement camera, it's always a good idea to consult a professional or refer to your car's manual to ensure compatibility and proper installation.
Positioning Your Camera to Spot Enemies in League of Legends
You may want to see also

Modifying the software that displays the grid lines
If you want to modify the software that displays the grid lines on your car's reverse camera, there are a few methods you can try. The specific steps will depend on the camera model and the vehicle's make and model. Here are some general instructions to help you get started:
- Consult the user manual: Before attempting any modifications, refer to the user manual provided with your car. It may contain specific instructions or guidelines for removing or adjusting the grid lines on your reverse camera.
- Contact the manufacturer: If you're unable to find the information you need in the user manual, consider contacting the camera or vehicle manufacturer directly. They may be able to provide you with technical support or guidance on how to modify the software or settings to remove the grid lines.
- Check for software updates: In some cases, there may be software updates available for your car's infotainment system or the reverse camera itself. These updates can sometimes include new features or customization options that allow you to turn off the grid lines.
- Modify the camera settings: Depending on your camera model, there may be settings or options that allow you to turn off the grid lines. Look for a settings menu or configuration options within the camera interface. There may be an option to disable the grid lines or switch between different viewing modes.
- Use third-party software: If your camera doesn't have built-in options to remove the grid lines, you might be able to find third-party software or applications that can help. These may include custom firmware or apps specifically designed to modify the camera's display. However, proceed with caution and ensure that any software you install is compatible with your camera and vehicle to avoid any potential issues.
- Consult a professional: If you're uncomfortable making software modifications yourself, consider consulting a professional car audio or electronics specialist. They will have the knowledge and tools to safely modify your reverse camera's software or suggest alternative solutions.
Remember to research specific instructions for your car make and model, as well as your specific camera model, before proceeding with any modifications.
Removing Nest Camera Doorbell: A Step-by-Step Guide
You may want to see also

Opening the camera unit without damaging it
To open the camera unit without damaging it, you will need to carefully follow these steps:
Firstly, make sure your vehicle is turned off and the battery terminals are safely disconnected. This is an important safety precaution before beginning any work on your car.
Next, remove the license plate if necessary. This will give you access to the rear of the vehicle where the camera is mounted. Depending on the make and model of your car, you may also need to remove an interior panel from the door, hatch, or tailgate to access the camera unit.
Now, you need to identify the camera unit and determine how it is mounted. It may be attached with screws, clips, or other fasteners. Carefully detach the camera unit from the mounting bracket or housing, taking care not to damage any wires or connectors.
If the camera unit is sealed, you may need to use a tool such as a thin knife or a plastic opening tool to gently pry it open. Be very cautious during this step to avoid damaging the internal components.
Once you have successfully opened the camera unit, you can proceed with any necessary adjustments or repairs. Remember to handle the internal components with care and ensure that everything is securely connected before reassembling the camera unit and mounting it back onto your vehicle.
It is important to note that opening and modifying your camera unit may void its warranty, so proceed with caution and consider consulting a professional if you are unsure about any part of the process.
Troubleshooting Camera Flicker Issues
You may want to see also
Frequently asked questions
The method to remove the grid lines from your car's reverse camera will depend on the camera's make and model. Some cameras have an extra wire that can be cut to disable the grid lines, while others may require you to modify the software that displays the lines. You may also be able to find a replacement camera that does not have grid lines.
You may need to open up the camera to access the wires. If your camera has a sealed case, you will need to remove the screws and gently pry it open. Once inside, look for the wire that controls the grid lines and cut it. Be careful not to damage any other components.
The grid lines in a Mercedes-Benz backup camera are likely built into the camera head, so you would need to find a replacement camera that does not have the markers. "Reverse" cameras typically have grid lines, while "rear view" cameras do not.
Waterproof cameras are often screwed together or glued. Look for recessed holes that may be used for screws. If there are no screws, the camera may be glued together, so be careful not to crack or chip the casing when opening it.


