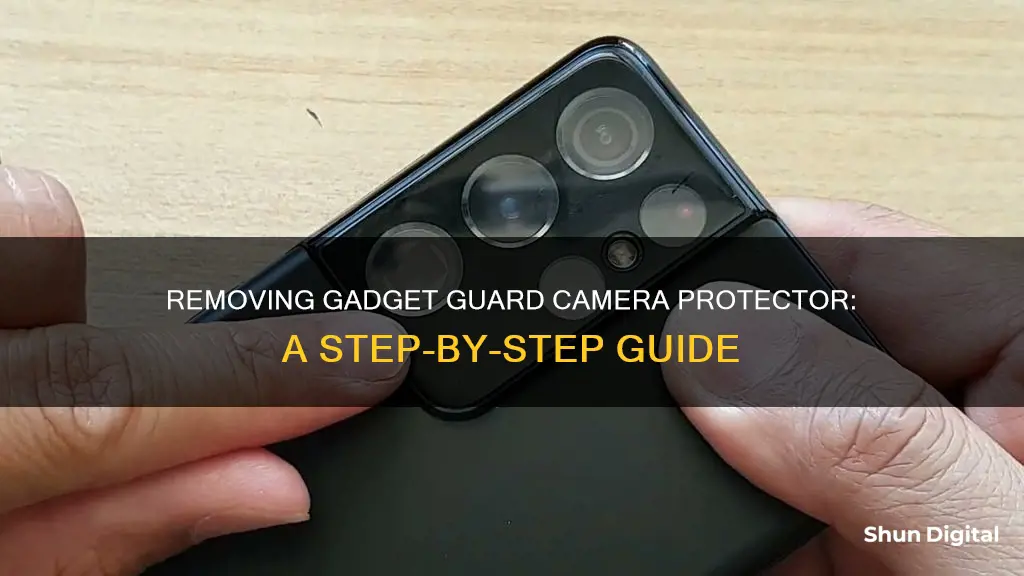
Removing a camera lens protector can be a delicate process, but it can be done safely and effectively. Before starting, make sure your hands are clean and dry to prevent fingerprints or smudges on the lens. Then, turn off your phone to avoid accidental touches or button presses during the removal process. Next, use a microfiber cloth to gently wipe the surface of the lens protector and remove any dust or debris. You can then use a hairdryer on a low or medium heat setting to warm up the adhesive and loosen its grip on the lens. Once the adhesive is loosened, carefully insert a pry tool or a thin, non-metallic object such as a credit card, guitar pick, or plastic spudger to gently lift one corner of the lens protector. Be careful not to apply too much pressure, as this could scratch the camera lens. Continue to slowly and steadily peel off the protector, avoiding sudden movements or excessive force, as this could damage the lens or leave behind residue. Finally, use a microfiber cloth and a small amount of lens cleaning solution to gently wipe away any remaining adhesive residue from the camera lens.
| Characteristics | Values |
|---|---|
| Ease of Removal | Easy to remove if careful |
| Tools | Fingernail, guitar pick, card, plastic pry tool, hairdryer |
| Adhesive | Warm up adhesive with a hairdryer to remove |
What You'll Learn

Use a card to lift the protector from a corner
To remove a Gadget Guard camera protector, you can use a card to lift the protector from a corner. Here's a step-by-step guide:
- Ensure your hands are clean and dry. This will prevent fingerprints or smudges from appearing on the lens during the removal process.
- Turn off your device. This will prevent accidental touches or button presses.
- Identify a corner of the camera protector.
- Carefully insert a card, such as a credit card, under the corner of the protector. You can also use a plastic pry tool or a thin, non-metallic object for this step.
- Gently lift the corner of the protector with the card. Be careful not to apply too much force, as this could damage the camera lens or the device itself.
- Once the corner is lifted, hold onto the protector and slowly peel it off the device. Continue lifting the protector with the card and peeling it off until the entire protector is removed.
- After removing the protector, clean any remaining adhesive residue from the camera lens using a microfiber cloth and a small amount of lens cleaning solution.
It is important to be gentle and careful throughout the process to avoid damaging the camera lens or the device. Additionally, wearing gloves during the removal process is recommended for your safety.
Removing Ford Emblem Off Your Camera: A Step-by-Step Guide
You may want to see also

Warm the adhesive with a hairdryer
Warming the adhesive with a hairdryer is a crucial step in safely and effectively removing a camera lens protector. Before you begin, ensure your hairdryer is set to a low or medium heat setting.
- Power off your phone to avoid any accidental button presses or touchscreen interactions during the removal process.
- Using a clean, soft microfiber cloth, gently wipe the surface of the lens protector to remove any dust or debris. This step ensures a smooth and lint-free removal.
- Carefully direct the airflow of the hairdryer onto the adhesive on the lens protector. This will help to loosen the adhesive and make it easier to remove the protector without damaging the lens.
- Maintain a safe distance between the hairdryer and the phone to avoid overheating any components.
- Continue applying heat for a few seconds to a minute, depending on the strength of the adhesive and the heat setting of the hairdryer.
- You will know the adhesive is ready when it becomes softer and more pliable. At this point, you can proceed to the next step, which involves using a pry tool to gently lift one corner of the lens protector.
Remember to exercise caution during the entire process, as applying too much heat or force can potentially damage your camera lens or phone.
Pet Cameras: Do Dogs Watch and Care?
You may want to see also

Clean the lens with a microfiber cloth
Cleaning your camera lens with a microfiber cloth is a simple and effective way to keep your lens in top condition. Here are some detailed instructions to ensure you do it right:
Before you begin, ensure you have the right tools. You will need a microfiber cloth, preferably one that is soft and dry. Microfiber cloths are highly recommended for cleaning camera lenses as they are gentle and effective at removing dust, grime, and fingerprints. You can also use a small blower bulb and a soft brush as additional tools to support the cleaning process.
Start by using the blower bulb to remove any dust or sand particles from the lens. This step is crucial as it prevents you from accidentally scratching the lens with the cloth. Gently blow away any grit, ensuring you don't apply too much pressure.
Now, take your microfiber cloth and gently wipe the lens in a circular motion, starting from the middle and working your way outwards. Be sure to use a light touch and avoid applying too much pressure. You don't want to risk scratching or smudging the lens. Clean both the front and back elements of the lens, as both sides are exposed to the elements and can accumulate dirt.
If your lens has particularly stubborn grime, you can dampen the microfiber cloth slightly with distilled water. Just be sure to use as little water as possible and avoid getting the camera or lens overly wet. Alternatively, you can use a lens cleaning solution specifically designed for optical lenses. Apply a small amount of the solution to the cloth and gently wipe the lens in a circular motion.
Finally, finish up by giving the lens one last wipe with a dry, unused section of the microfiber cloth. This will ensure that you remove any remaining smudges or dust particles.
Remember, it's important to clean your camera lens regularly, especially if you notice any dirt, fingerprints, or debris that might affect image quality. Always be gentle and take your time when cleaning your lens to avoid any accidental damage.
Removing Amcrest Cameras from the Cloud: A Step-by-Step Guide
You may want to see also

Insert a plastic pry tool
To remove a gadget guard camera protector, you will need a plastic pry tool or a thin, non-metallic object. You can also use a plastic card, such as a credit card, or your fingernail. Before you begin, ensure that your hands are clean and dry. It is also recommended that you wear gloves to protect your hands and avoid leaving fingerprints or smudges on the lens.
Now, let's get into the detailed steps for inserting the plastic pry tool:
- Start by gently warming up the adhesive on the lens protector. You can use a hairdryer set to a low or medium heat setting for this. Warming up the adhesive will help to loosen it, making it easier to remove the protector. Be careful not to overheat the adhesive, as you don't want to damage the lens or the surrounding area.
- Once the adhesive is warmed up, carefully insert the plastic pry tool between the lens protector and the camera housing. Gently lift one corner of the lens protector with the pry tool. Be very gentle and careful during this step to avoid applying too much pressure, which could result in scratches on the camera lens.
- Continue to slowly and steadily peel back the lens protector. It's important to avoid sudden movements or excessive force, as this could damage the lens or leave behind residue. Work your way around the edges of the protector, lifting and peeling as you go.
- If you encounter any resistance or the adhesive seems especially strong, you can use a small amount of isopropyl alcohol to dissolve or weaken it further. Use a syringe or dropper to apply a very small amount of alcohol between the protector and the camera housing.
- As you work, be mindful not to touch the exposed adhesive with your fingers, as this can affect its effectiveness when you need to reapply a new protector.
- Once you have lifted and peeled back the protector, slowly pull it away from the lens, being careful not to let it snap back into place.
By following these steps, you can effectively remove the gadget guard camera protector using a plastic pry tool, ensuring a safe and successful removal process.
Turn Off Camera Sound in Snapchat: A Step-by-Step Guide
You may want to see also

Clean the lens after removal
Once you have removed the camera protector, it is important to clean the lens to ensure that your photos are not blurry.
Firstly, it is important to note what not to do. Avoid using your shirt or sleeve to wipe the lens, as this is a great way to scratch the lens. Similarly, avoid using your finger, as this can spread the smudge and make it worse.
The best way to clean your camera lens is to use a microfiber cloth. Microfiber cloths are small, compact, and inexpensive, and they can be easily stored in your bag or pocket. They are also ideal for removing fingerprints, but be sure to remove any dust or dirt with an air duster first, so you don't accidentally scratch the lens.
You can also use a lens cleaning pen, such as the one sold by Moment. These are small enough to fit in your pocket or bag and are perfect for removing dust and fingerprints.
If there is any stubborn oil or grime on the lens, you can try using a lens cleaning solution. However, be very careful to avoid getting any liquid into any vital parts of your phone or lens. Use just a drop or two on a microfiber cloth and gently wipe the lens until the grime is gone.
Always clean your lens before a photoshoot to ensure that your photos are clear and crisp.
Unblocking Your Camera in Unity: A Step-by-Step Guide
You may want to see also
Frequently asked questions
You can use a card, your fingernail, or a plastic object like a credit card to lift the camera lens protector from any corner. Once the corner is lifted, slowly peel off the protector.
No, you can simply use your fingernail or a thin, strong object like a guitar pick or a plastic card to slowly lift and peel off the protector.
It is recommended to power off your device and clean the protector with a microfiber cloth to remove any dust or debris. You should also wear gloves to protect your hands during the removal process.
You can use a hairdryer on a low or medium setting to warm up and loosen the adhesive. Then, use a plastic pry tool or a thin, non-metallic object to gently lift one corner of the protector. Avoid using metal tools as they can scratch the lens.


