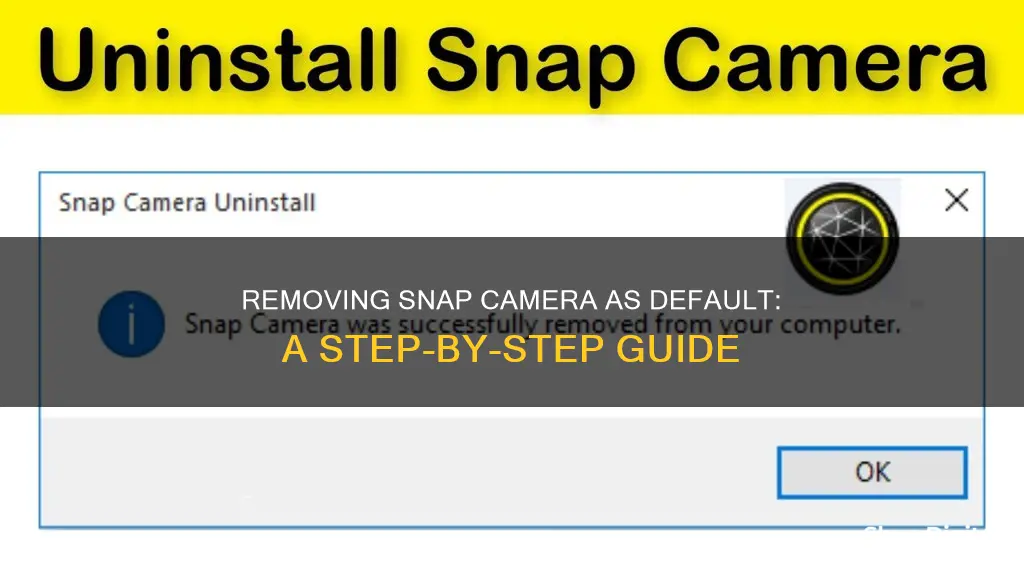
The Snap Camera app allows users to apply filters and lenses to their webcam image, which can be fun for personal use but may be undesirable for business meetings. If you want to remove Snap Camera as your default camera, you can do so by first closing the app and then changing your default camera settings in your conferencing app. If you want to uninstall Snap Camera completely, you can follow the steps provided by Snap Camera, which involve right-clicking on the app in your Applications folder and moving it to the Trash.
How to Remove Snap Camera as Default
| Characteristics | Values |
|---|---|
| Uninstall Snap Camera | Navigate to Applications folder > Right-click on Snap Camera > Move to Trash > Enter password > Reboot computer |
| Remove Snap Camera as an option in other applications | Open Terminal application > Enter commands: launchctl remove com.snap.AssistantService, rm ~/Library/LaunchAgents/com.snap.AssistantService.plist, rm -r ~/Library/Caches/Snap/Snap Camera, rm -r ~/Library/Preferences/Snap/Snap Camera, osascript -e 'do shell script "launchctl remove com.snap.SnapCameraRemover; rm /Library/LaunchDaemons/com.snap.SnapCameraRemover.plist; rm -r /Library/CoreMediaIO/Plug-Ins/DAL/SnapCamera.plugin; exit 0" with administrator privileges |
| Close Snap Camera app | Snap Camera > Quite Snap Camera from the top menu bar > Command + Q > Right-click Snap Camera in the Dock > Choose Quit |
| Change camera settings | Tap camera/video feed option > Choose computer's built-in camera |
| Disable camera permissions (for Macs) | Apple Menu > System Preferences > Security & Privacy > Privacy tab > Deselect checkbox next to Snap Camera > Choose Quit Now |
| Uninstall Snap Camera from Mac | Close all camera apps > Go to Applications folder > Right-click Snap Camera > Move to Trash > Enter password > Tap Yes to remove all Snap Camera data > Reboot Mac |
What You'll Learn

Navigate to Applications folder
To remove Snap Camera as the default camera on your device, you will need to uninstall it. The first step to doing so is to navigate to your Applications folder.
On a Mac, you can do this by opening the Finder application. Once you have opened Finder, you should be able to see several folders, one of which should be labelled "Applications". Click on this folder to open it.
If you cannot see the Applications folder, it may be hidden. Try pressing Command + Shift + G, which will bring up a "Go to Folder" search bar. Type in "/Applications" and press enter. This should bring you to the Applications folder.
Once you have located and opened the Applications folder, you should see a list of all the applications installed on your device. Find the Snap Camera application in this list.
Right-click on the Snap Camera application. This will bring up a menu with several options. From this menu, select "Move to Trash". You may be asked to enter your password at this point. If so, enter your password and click "OK".
After you have moved the Snap Camera application to the trash, you will need to reboot your computer for the changes to take effect. Once your computer has restarted, the Snap Camera application should be uninstalled and no longer set as the default camera.
Landlord's Exterior Cameras: Privacy Rights and Legal Boundaries
You may want to see also

Right-click on Snap Camera
Right-clicking on the Snap Camera app is a crucial step in uninstalling the software from your computer or removing it as your default camera. The process varies slightly depending on whether you are using a Windows PC or a Mac.
If you are using a Windows PC, you will need to first open the Start menu by clicking the Windows icon in the bottom-left corner of your screen. Then, select "Settings" (next to the cogwheel icon) and choose "Apps" from the menu. In the Apps menu, scroll down and click on "Snap Camera", then select "Uninstall". You will be asked to confirm your decision a few times. However, it is important to note that if Snap Camera is currently running in the background, you won't be able to proceed with the uninstallation. To close Snap Camera, click the chevron icon to reveal the running background processes, find and right-click the Snap Camera icon, and select "End Task".
For Mac users, the process is slightly different. First, open the "Finder" app and click on the "Applications" folder in the sidebar. Scroll through the list of applications to find "Snap Camera.app", then right-click on the app and select "Move to Trash". Depending on your security settings, you may be prompted to enter your password. After moving the app to the Trash, a dialog box will appear asking if you want to remove all Snap Camera-related data. Click "Yes" to confirm. Once you have rebooted your computer, Snap Camera will be completely uninstalled.
In addition to uninstalling the app, you can also disable Snap Camera filters and lenses by quitting the app. To do this, locate the Snap Camera icon in the taskbar or dock at the bottom of your screen and right-click on it. Then, select "Quit" or "Turn Off". Alternatively, you can use keyboard shortcuts by pressing "Command + Q" to quit the app.
Viewing Zmodo Cameras on LG Smart TV
You may want to see also

Move to Trash
To remove Snap Camera from your Mac, you will need to first close all apps that use your camera. Then, navigate to your Applications folder in Finder. Right-click on Snap Camera and select 'Move to Trash'. If prompted, enter your password and tap 'OK'. You may also be asked if you want to remove all Snap Camera data, in which case you should tap 'Yes'.
If you have uninstalled Snap Camera but are still seeing the virtual camera as an option in other applications, you will need to take a few additional steps. Open the Terminal application in the Utilities folder and copy and paste the following commands into the Terminal window:
Launchctl remove com.snap.AssistantService
Rm ~/Library/LaunchAgents/com.snap.AssistantService.plist
Rm -r ~/Library/Caches/Snap/Snap\ Camera
Rm -r ~/Library/Preferences/Snap/Snap\ Camera
Osascript -e 'do shell script "launchctl remove com.snap.SnapCameraRemover; rm /Library/LaunchDaemons/com.snap.SnapCameraRemover.plist; rm -r /Library/CoreMediaIO/Plug-Ins/DAL/SnapCamera.plugin; exit 0" with administrator privileges'
Press Enter and, if prompted, enter your password. Finally, reboot your computer.
Safely Removing a Pill Camera: A Step-by-Step Guide
You may want to see also

Enter password
If you want to remove Snap Camera from your Mac, you will first need to close all apps that use your camera. Then, navigate to your Applications folder in Finder and right-click on Snap Camera. Choose 'Move to Trash' and, if asked, enter your password and tap OK. Tap 'Yes' when prompted to remove all Snap Camera data.
If you have uninstalled Snap Camera but the virtual camera is still available as an option in other applications, you will need to take a few additional steps. Open the Terminal application in the Utilities folder and copy and paste the following set of commands into the Terminal window:
Launchctl remove com.snap.AssistantService
Rm ~/Library/LaunchAgents/com.snap.AssistantService.plist
Rm -r ~/Library/Caches/Snap/Snap Camera
Rm -r ~/Library/Preferences/Snap/Snap Camera
Osascript -e 'do shell script "launchctl remove com.snap.SnapCameraRemover; rm /Library/LaunchDaemons/com.snap.SnapCameraRemover.plist; rm -r /Library/CoreMediaIO/Plug-Ins/DAL/SnapCamera.plugin; exit 0" with administrator privileges'
Hit Enter and, if prompted, enter your password. Finally, reboot your computer.
Earwax Cameras: Safe Procedure or Risky Business?
You may want to see also

Reboot your computer
To reboot your computer, you need to restart it by closing out open programs, wiping any current processes in RAM, and restarting the operating system (OS). This can be done to install updates or troubleshoot a problem.
Rebooting a Windows 10 or Windows 8 Computer
- Open the Start menu.
- Click the power icon at the bottom of the screen for Windows 10 or the top of the screen for Windows 8.
- Click Restart.
Using Shortcut Keys
To avoid opening the full Start menu:
- Open the Power User Menu by pressing Windows + X.
- Click Shut down or sign out.
- Click Restart.
Rebooting a Windows 7, Vista, or XP Computer
- Close any files or programs that are open on the laptop.
- Open the Start Menu at the bottom left of the taskbar of the Windows desktop.
- Click the right arrow next to the Shut down button.
- From the menu that appears, click Restart.
Rebooting a Windows Computer Using Ctrl + Alt + Del
- Press the Ctrl + Alt + Del keys. A shutdown dialog box will appear. The box will look different depending on the Windows version used.
- Click restart within the dialog box:
- Windows 10 and 8: Click the power icon on the bottom right of the screen and press Restart.
- Windows 7 and Vista: Click the arrow next to the red power button and click Restart.
- Windows XP: Click the Shut Down tab from the menu, then click Restart.
Rebooting a Windows Computer via Command Prompt
Every system has a Command Prompt, also known as a 'cmd', that can facilitate a reboot.
- Open Command Prompt by searching 'cmd' within the search tab at the bottom or pressing Windows + R keys. From here, the Run box will open. Type 'cmd' and then 'OK'.
- When the Command Prompt opens, type in either 'shutdown/r' or 'shutdown-r' and press Enter.
- Wait while the computer restarts. Note that it restarts because the '/r' or '-r' parameter indicates restarting. The '/s' parameter indicates shutting down.
The Internal Camera on Your Smart TV: Where is it?
You may want to see also
Frequently asked questions
First, close all apps that use your camera. Then, go to your Applications folder, right-click on Snap Camera, and choose "Move to Trash". Enter your password if prompted, and restart your computer.
The easiest way is to close or quit the Snap Camera app. You can do this by choosing "Quite Snap Camera" from the top menu bar, using the keyboard shortcut Command + Q, or by right-clicking on the Snap Camera icon in the Dock and choosing "Quit".
Open the Apple Menu, then go to System Preferences > Security & Privacy. Choose the Privacy tab, and deselect the checkbox next to Snap Camera.


