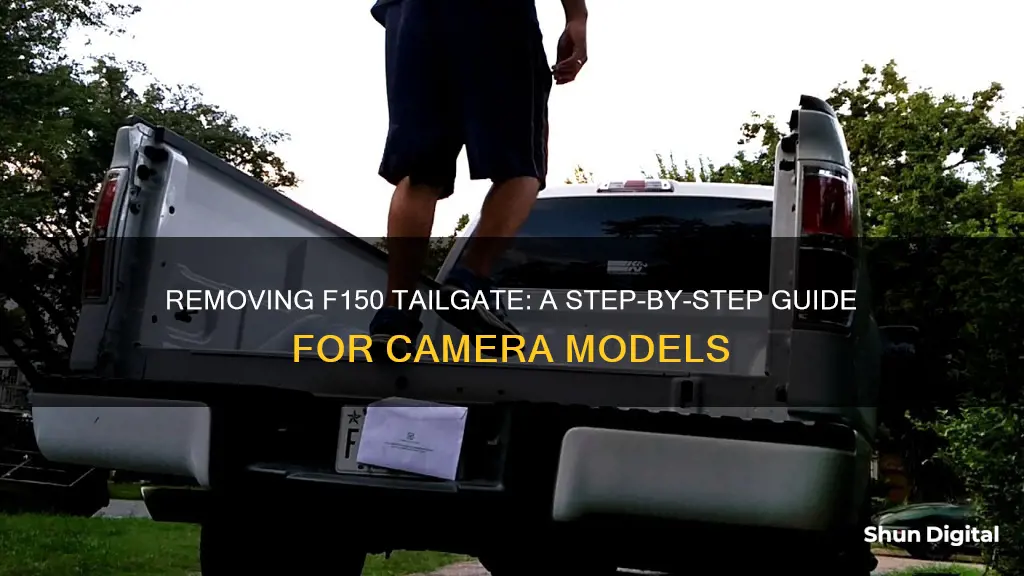
Removing a tailgate from a Ford F-150 truck is a simple process, but it can be tricky if your model has a backup camera installed. This is a step-by-step guide on how to remove an F150 tailgate with a camera. Begin by crawling under the truck and locating the wiring harness clip. Unclip it and, if you're unsure which one it is, follow the wire from the gate. Then, simply unplug the harness and leave the gate up. Look between the bumper and the gate to find the harness and feed it through. Now, you can remove the tailgate as normal, but be aware that if your model has a man step, you may need a helper as these tailgates are heavy and awkward.
What You'll Learn

Disconnect the camera harness
Disconnecting the camera harness on your Ford F-150 truck is a simple process, but it requires careful attention to detail. Here is a step-by-step guide to help you through the process:
Step 1: Locate the Camera Harness
Begin by identifying the camera harness. This is the wiring that connects the camera to the truck's electrical system. It is usually located under the truck, near the tailgate.
Step 2: Access the Harness Clip
Crawl under the truck and locate the clip that is holding the wiring harness in place. This clip secures the harness to the vehicle's frame. It is important to find this clip as it will need to be unclipped to release the harness.
Step 3: Unclip the Harness
Once you have located the clip, carefully unclip it. Be gentle and use both hands to avoid putting too much force on any single part of the clip or harness. This will prevent any accidental damage.
Step 4: Unplug the Harness
Now that the clip has been released, you can unplug the camera harness. Carefully pull the connector halves apart. You may need to depress a connector latch to do this. Again, be gentle to avoid damaging the connector or the surrounding components.
Step 5: Feed the Harness Through
With the harness unplugged, you can now feed it through the gap between the bumper and the tailgate. Ensure that the gate is left up during this step to make the process easier. This will allow you to manage the wiring more effectively.
Step 6: Secure the Harness
After feeding the harness through, ensure that it is secured safely out of the way. You don't want it to dangle or get caught on anything. Place it under the pickup box or tie it up gently to keep it secure.
By following these steps, you will have successfully disconnected the camera harness. Remember to work carefully and methodically, taking your time to avoid any damage to the camera, wiring, or other components. Always refer to your owner's manual for additional information or guidance specific to your vehicle's make and model.
Hidden Cameras: Are Your TV's Watching You?
You may want to see also

Unclip the wiring harness
To unclip the wiring harness, first locate the wiring harness by crawling under the truck and looking for a clip holding it in place. If you're unsure which one it is, follow the wire from the tailgate. Once you've found the clip, simply unclip the wiring harness by depressing the connector latch and gently pulling the connector halves apart. You may need to use a screwdriver to gently pry the clip open. Now, leave the tailgate up and look between the bumper and the gate to find the harness. Feed it through here and pull up the slack.
Now that the wiring harness is unclipped, you can remove the tailgate as you normally would. If you have a tailgate with a man step, it is recommended to get a helper as these tailgates are heavy and awkward.
It is worth noting that some users have reported that the camera-equipped tailgates can be easily stolen. As such, it is recommended to invest in a tailgate lock to prevent theft.
Watching Pi Camera Footage: A Guide for Your Pi Desktop
You may want to see also

Remove the tailgate like normal
Removing the tailgate of a Ford F-150 is a simple process, but it requires some attention to detail. Here is a step-by-step guide:
First, unlatch the tailgate to begin the removal process. Then, disconnect the power door locks in-line connector, which is located under the pickup box on the right side of the vehicle, near the spare tire. It is important to protect the in-line connector by installing a protective cap on the portion that remains under the pickup box. Usually, a protective cap can be found in the glove compartment.
Now, partially lower the tailgate and carefully feed the tailgate harness through the gap between the pickup box and the bumper. Place the harness out of the way under the pickup box. Use a screwdriver to gently pry the spring clip on each connector past the head of the support screw, and then disconnect the cable.
At this point, you can disconnect the other cable and start lifting the tailgate. Lift the tailgate to a 45-degree angle from the horizontal position. This will allow you to lift the right-hand side of the tailgate off its hinge. Continue lifting until the tailgate reaches an 80-degree angle from the horizontal position.
Finally, remove the tailgate from the left-hand side hinge by sliding it to the right. The tailgate should now be completely removed. Reinstalling the tailgate can be done by following these steps in reverse order.
It is worth noting that this process may vary slightly depending on the generation of your F-150. However, the steps outlined above should work for most models, especially the fourteenth generation and previous generations.
The Evolution of Smartwatch Cameras: Where Are They Now?
You may want to see also

Disconnect the power door locks in-line connector
Disconnecting the power door locks in-line connector on your F150 tailgate with a camera is a straightforward process, but it requires careful attention to detail. Here is a step-by-step guide to help you through the process:
First, locate the wiring harness. This can be found by crawling under the truck and looking for a clip holding the wiring harness in place. If you're having trouble finding it, simply follow the wire from the tailgate. Once you've found the clip, unclip it to release the wiring harness.
With the wiring harness now accessible, leave the tailgate in the up position. Look for the gap between the bumper and the tailgate, and feed the wiring harness through this gap. This step is much easier with the tailgate up, as it provides more room to manoeuvre.
At this point, you can now remove the tailgate as you normally would. If your F150 is equipped with the man step, it is recommended to get an extra pair of hands to help, as these tailgates are quite heavy and awkward to handle alone.
If you're looking to completely remove the backup camera, there are a few additional steps to take. For a camera integrated into the tailgate handle, you will need to remove the tailgate cover by unscrewing the T-30 Torx bolts. Then, remove the camera/handle assembly by taking out the 11mm handle retaining nuts. Disconnect the camera connector from the secondary camera wiring harness by gently pulling the connector halves apart. Remove the camera secondary wiring harness cable by pulling it out of its hole.
For a camera integrated into the Ford emblem, use a screwdriver to gently separate the emblem from its housing. Please note that this will damage the retaining tabs on the back of the emblem, so take care not to force it. Remove the two 7mm bolts connecting the emblem/camera lower bracket to the tailgate. Depress the connector latch on the camera/harness connector and pull them apart.
By following these steps, you can successfully disconnect the power door locks in-line connector and remove the tailgate with a camera on your F150.
Hotel Cameras: Privacy or Security?
You may want to see also

Remove the camera from the handle assembly
To remove the camera from the handle assembly, you will need to first lower the factory tailgate and remove the eight T-30 Torx tailgate cover bolts. Then, remove the tailgate cover. Next, remove the camera/handle assembly by taking out the two 11mm handle retaining nuts.
Now, to separate the camera from the handle assembly, you will need to remove the push nuts from the two camera retaining studs. This can be challenging without breaking the studs, so be cautious and gentle. Once the push nuts are removed, carefully lift the camera free from the handle assembly.
Removing Snap Camera: A Step-by-Step Guide to Uninstalling the App
You may want to see also
Frequently asked questions
Removing a tailgate with a camera can be done in a few simple steps. First, unlatch the tailgate and disconnect the power door locks in-line connector. Then, partially lower the tailgate and feed the tailgate harness through the gap between the pickup box and the bumper. Disconnect the cables, lift the tailgate to 45 degrees, and then to your right to remove it from the hinge.
To disconnect the camera wiring harness, crawl under the truck and unclip the wiring harness by pulling it from the gate. Then, leave the gate up and look between the bumper and the gate to find the harness. Feed it through and remove the tailgate as normal.
The best method to disconnect the camera harness depends on the location of the camera. If the camera is integrated into the tailgate handle, remove the tailgate cover bolts and the handle retaining nuts. Then, disconnect the camera connector from the secondary camera wiring harness. If the camera is integrated into the Ford emblem, use a screwdriver to gently separate the emblem from the housing. Then, remove the bolts and separate the emblem/camera lower bracket from the tailgate.


