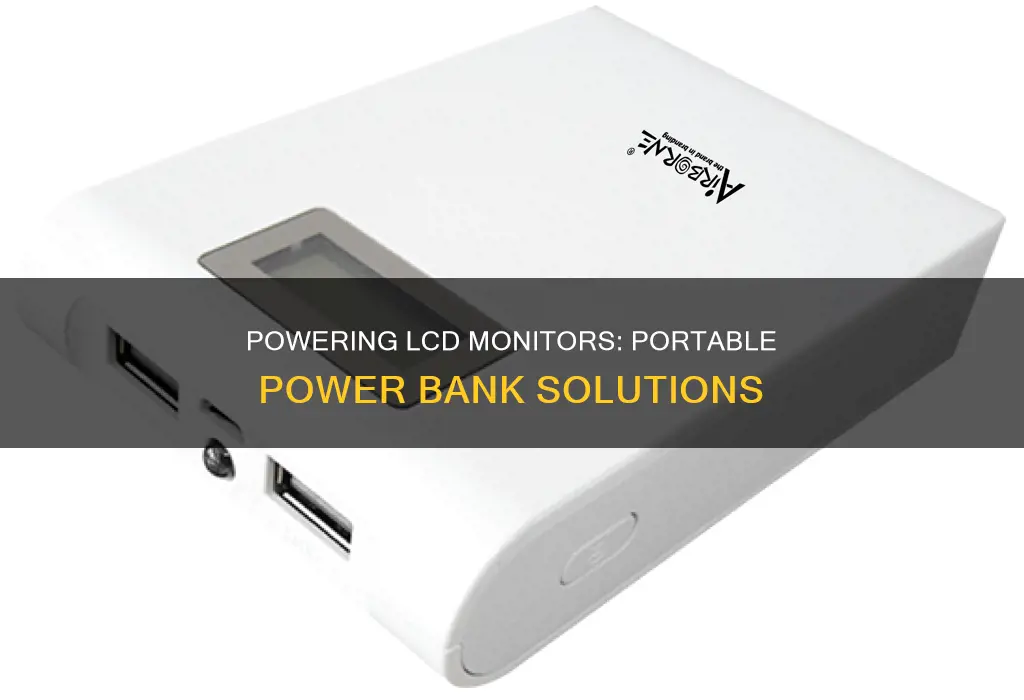
There are a few ways to power an LCD monitor with a power bank. One way is to use a step-up converter to convert the 5V output of a power bank to 12V, which is the standard input voltage for most LCD controllers. However, a regular power bank will not be able to provide the required amperage, so an alternative method is to use a mains-powered power supply that can provide the required voltage and amperage. Another option is to repurpose an old laptop battery and its protection board to power the LCD monitor, provided the battery cells are still adequately charged. Additionally, some portable monitors can be powered by USB-A, which has a low power output, making it possible to power them with a power bank.
| Characteristics | Values |
|---|---|
| LCD Monitor Voltage | 12V |
| Power Bank Voltage | 5V |
| LCD Monitor Current | 3A |
| Power Bank Current | 2A |
| LCD Monitor Power | 36 Watts |
| Power Bank Power | 10 Watts |
What You'll Learn

Using a DC-to-DC converter to step up the voltage from 5V to 12V
To power an LCD monitor with a power bank, you can use a DC-to-DC converter to step up the voltage from 5V to 12V. This is because a typical power bank outputs 5V, while an LCD controller board may require 12V and more than 3A as input power to work.
One option for a DC-DC converter is to use a boost converter circuit, which can increase the voltage from 5V to 12V. This type of circuit uses a transistor as a switching supply, which has higher efficiency than a transistor.
Another option is to use an integrated circuit (IC) such as the LM2577-ADJ, which provides all the power and control functions for step-up, fly-back, and forward converter switching regulators. This IC is available in three different output voltage versions: 12V, 15V, and adjustable. It requires a minimum number of external components and is, therefore, cost-effective and simple to use.
Alternatively, there are off-the-shelf DC-DC step-up converters available, such as the MT3608 or the DROK 6V to 12V Step Up Converter, which can be purchased online.
When choosing a DC-DC converter, it is important to consider the power requirements of the LCD monitor and ensure that the converter can provide sufficient current and voltage. Additionally, it is important to follow safety precautions when working with electrical components to avoid damage or injury.
How to Overclock Your ASUS ROG PG278Q Monitor
You may want to see also

Using a power bank with a USB-PD (Power Delivery) output
When choosing a USB-PD power bank, consider the power requirements of your LCD monitor. The power bank should be able to output sufficient voltage and amperage to meet the needs of the monitor. For example, if your monitor requires 12V and more than 3A, a standard 5V power bank will not be sufficient, and you may need to look for a power bank that can output a higher voltage.
There are a variety of USB-PD power banks available on the market that can meet your needs. They come in different capacities, ranging from 10,000mAh to 50,000mAh. Higher capacity power banks will provide longer charging times for your monitor. Some power banks even offer multiple USB-PD ports, allowing you to charge multiple devices simultaneously.
When purchasing a USB-PD power bank, it is important to ensure that it has the necessary safety features. Look for power banks that offer short-circuit protection, over-charge protection, and overheat protection. These features will help protect your devices and ensure safe operation.
Additionally, consider the portability of the power bank. If you plan to travel with your monitor, you may want to choose a power bank that is compact and lightweight. However, keep in mind that higher capacity power banks may be larger and heavier.
By choosing a USB-PD power bank that meets the power requirements of your LCD monitor and has the necessary safety features and portability, you can confidently power your monitor on the go.
Monitoring Bandwidth Usage: Top Programs to Watch Your Network
You may want to see also

Repurposing an old laptop battery pack to power the LCD monitor
Repurposing an old laptop battery pack to power an LCD monitor is a detailed process that requires careful handling of components and some technical knowledge. Here is a step-by-step guide:
Step 1: Opening the Laptop Battery Pack
Start by identifying the weak spot along the seams of the battery pack. Use a screwdriver to carefully pry and twist until the pack pops open. Some packs may require more effort or a different tool, like a Dremel saw or cutting disk, to cut through at an angle. Always be cautious to avoid damaging the cells.
Step 2: Removing the Cells and Charging Circuit
Once the pack is open, pull out the cell assembly. Be gentle to avoid bending the tabs, as this could lead to a short circuit, fire, or explosion. Next, use a wire cutter to carefully cut the tabs or wires connected to the charging circuit and between the cells. Set the charging circuit aside for future projects.
Step 3: Testing and Sorting the Cells
The cells you've extracted can be tested and sorted. Measure the cell voltage; if it's less than 2.5V, discard it. If you charge the cell and it gets hot, discard it. A good cell should measure between 4.1 and 4.2V after charging and should hold that voltage for at least 30 minutes. If the voltage falls below 4V after 30 minutes, it's not suitable for reuse. Store the good cells in a cool, dry place for at least three days, and then re-measure the voltage. If the voltage has dropped by more than 0.1V, the cell is not stable enough for reuse.
Step 4: Assembling the Power Bank
Purchase a Power Bank USB 18650 Battery Charger Case, ensuring it matches the voltage requirements of your LCD monitor. Insert the good cells into the case, being mindful of the correct polarity. The positive terminal of the battery should face the charging board. Charge the power bank using the provided USB cable.
Step 5: Testing the Power Bank
After charging, test the output voltage of the power bank using a voltage meter. It should provide an output of around 5V, which is suitable for powering devices like smartphones and tablets. You can also test the capacity of the power bank using a battery capacity tester.
Step 6: Connecting the Power Bank to the LCD Monitor
Finally, connect the power bank to your LCD monitor. Ensure that the voltage requirements of the monitor match the output of the power bank. You may need to use a suitable adapter or cable to make the connection. Once connected, turn on the monitor to verify that it is receiving power from the repurposed laptop battery pack.
This process allows you to give new life to old laptop battery packs and power your LCD monitor with a portable and reusable energy source. Always exercise caution when working with batteries, and if you're unsure about any steps, consult a professional or seek guidance from online resources.
Easy Guide: Install Vivid Pixel on Your ASUS Monitor
You may want to see also

Using a 12V, 2A power supply with a barrel jack
Step 1: Gather the Required Parts and Tools
You will need an LCD/LED LVDR controller board, a 12V 2A power supply with a barrel jack, screwdrivers (preferably precision ones for small screws), and a compatible screen.
Step 2: Disassemble the Old Laptop and Extract the Screen
Follow the specific instructions for your laptop model to carefully remove the screen. Once the screen is out, look for its model number, usually found on the back of the panel.
Step 3: Choose a Compatible Controller Board
Use the screen's model number to find a compatible LVDR controller board. Most controllers are powered by a 12V power supply, but they can handle a range of voltages, so make sure to check the specifications. Some controllers also offer additional ports like VGA and HDMI.
Step 4: Test the Controller and Screen
Before proceeding further, it's a good idea to test whether the controller and screen work together. This will help ensure that you've chosen a compatible controller and that both components are functional.
Step 5: Prepare the Power Source
For this step, you'll need the laptop's old battery pack, the screen controller's power supply or a third-party protection board, a soldering iron, soldering lead, flux, and a flat-head screwdriver. Optionally, you can use a pry tool kit to extract the Li-ion cells from the battery pack. Open the power pack carefully, without damaging the cells or the controller board. Test the extracted cells with a multimeter to check their voltage. Cells with a voltage above 3.0V can be saved, and those with a voltage of 2.5V or more may still be usable. However, cells reading less than 2.0V are considered dead.
Step 6: Assemble the Power Circuit
Connect the batteries in series to achieve the required voltage for your setup. In this case, three Li-ion cells should be sufficient to power the monitor. Connect the batteries to each other and then to the protection board, following the circuit diagram provided by the manufacturer. The protection board will help ensure safe charging and discharging of the batteries.
Step 7: Connect the Power Circuit to the Controller Board
Connect the protection circuit's charging terminals to the LVDS controller board's power supply. This will allow the batteries to power the controller board and enable charging when connected to a power supply.
Step 8: Test the Setup
After assembling the circuit, test the setup by connecting the power supply and turning on the monitor. If the monitor turns on, your power circuit is working correctly.
Step 9: Finalize the Enclosure and Assembly
Drill holes, cut panels, and assemble the enclosure for your portable monitor, ensuring that all components fit securely. You may also want to add additional features like an Arduino-controlled charge indicator and charge controller, a tripod mount, or holes for the LVDS keypad buttons.
By following these steps, you should be able to successfully power an LCD monitor using a 12V, 2A power supply with a barrel jack, along with a power bank and the necessary circuitry.
Monitoring Children's Internet Usage: Parenting or Invasion?
You may want to see also

Connecting the power bank to the monitor via USB-A
To connect the power bank to the monitor via USB-A, you will need a power bank that has a USB-A output port. This is the most common type of USB port and is rectangular in shape with a flat end. If your power bank has a USB-C port, which is thinner and slightly oval in shape, you can purchase a USB-C to USB-A adapter to make the connection.
Once you have confirmed that your power bank has a USB-A output, you will need to identify if your monitor has a USB-A input port. This should be located on the back or side of the monitor, and will be clearly labelled as 'USB'. If your monitor does not have a USB-A input port, you may need to purchase an adapter that is compatible with your monitor's input ports. Common monitor input ports include HDMI, VGA, and DVI.
If your monitor has a USB-A input port, simply connect the power bank to the monitor using a USB-A cable. Ensure that the cable is inserted firmly into both the power bank and the monitor. Once the connection is made, your monitor should turn on and display an image. If the monitor does not turn on, you may need to press the power button or adjust the brightness settings.
It is important to note that not all power banks will provide sufficient power to operate an LCD monitor. The power bank must be able to output a high enough voltage and amperage to match the requirements of the monitor. Most monitors will have their power requirements listed in their specifications, which can usually be found on the manufacturer's website or in the manual.
Additionally, the length of time that the power bank can power the monitor will depend on the power bank's capacity, which is measured in milliampere-hours (mAh). A higher capacity power bank will provide a longer runtime for the monitor.
By following these steps and ensuring that your power bank meets the voltage, amperage, and capacity requirements of your monitor, you should be able to successfully connect and power your LCD monitor using a power bank via USB-A.
Troubleshooting CNC Generals: Monitor Size Detection Issues
You may want to see also
Frequently asked questions
Yes, it is possible to power an LCD monitor with a power bank.
You will need a power bank that can output the required voltage and current for your LCD monitor. The voltage and current requirements will vary depending on the make and model of your monitor, so be sure to check the specifications.
You may need additional equipment such as a DC-to-DC converter or a controller board to step up or step down the voltage from the power bank to match the requirements of your LCD monitor.
The duration will depend on the power bank's capacity (measured in mAh) and the power consumption of the monitor. A higher capacity power bank will provide a longer duration, but other factors such as the age of the power bank and the type of use can also impact the duration.


