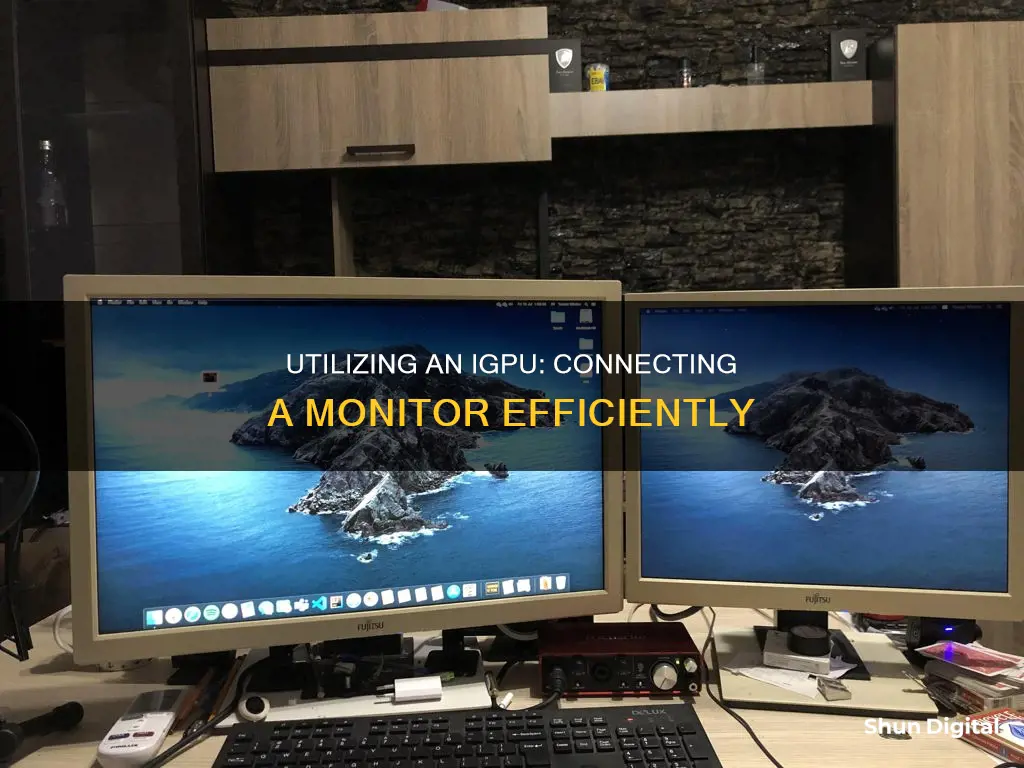
Setting up an external monitor can be a great way to improve your viewing experience, whether you're working, gaming, or just browsing. Connecting your laptop to a monitor can provide a range of benefits, from a larger screen size and improved resolution to dual-screen functionality and enhanced performance. But how do you go about hooking up that monitor to your iGPU?
Well, the first step is to understand the different cables and ports involved. Common connections include HDMI, DisplayPort, VGA, and Thunderbolt. Once you've got the right cable to connect your laptop and monitor, it's time to dive into the display settings. Depending on your operating system, you'll need to adjust the settings to either duplicate or extend your displays. If your laptop and monitor have different ports, you may also need to use an adapter.
So, if you're looking to boost your productivity, enhance your gaming experience, or just want some extra screen real estate, hooking up an external monitor to your iGPU is a great option.
What You'll Learn

Understand different cables and ports
To hook up a monitor to an iGPU, you need to understand the different cables and ports available. Here is a detailed guide to help you understand the various types of cables and ports for monitors:
VGA (Video Graphics Array) is one of the oldest connection standards available today. Introduced by IBM in 1987, it was commonly used for older video cards, computer monitors, TVs, and laptops. Nowadays, VGA ports, cables, and connectors are becoming harder to find as they are being replaced by newer display connection technologies. VGA can only transmit video signals, and it is best used when no other options are available.
DVI (Digital Visual Interface) offers a sharper and better picture quality than VGA. It is a newer connection type that transfers digital signals, resulting in improved video quality. DVI can transmit both analog and digital signals and support higher resolutions and frequencies. However, like VGA, DVI is also showing its age, as modern ports like HDMI, DisplayPort, and USB-C are becoming the norm since they can handle both video and audio transmission. Nevertheless, DVI remains one of the most common video ports found on desktops and LCD monitors today.
HDMI (High Definition Multimedia Interface) is a newer-generation port that superseded DVI. HDMI ports can transfer both video and audio, eliminating the need for separate cables. Various sizes of HDMI ports are available, including mini-HDMI and micro-HDMI, but the standard size is the most prevalent in the market. HDMI has become the default connection standard for home theatre systems, and you can find HDMI ports on modern TVs, laptops, and other devices.
DisplayPort (DP) is similar in appearance to HDMI but is more commonly found on PCs than TVs. It supports very high resolutions, stereo signals, and audio transmission. DisplayPort has gained popularity among manufacturers as it does not require the payment of license fees, unlike HDMI. Both standard DisplayPort and Mini DisplayPort are available, with the latter being used when a graphics card is present on the computer.
USB Type-C, also known as Thunderbolt, is highly versatile and accessible. It can be plugged in regardless of its position and can connect devices across different platforms, such as smartphones, tablets, laptops, and PCs. USB Type-C can transmit video, audio, data, and power, making it a common choice for TVs, PCs, and phones. While it offers convenience due to its compatibility with a wide range of devices, HDMI and DisplayPort still offer superior display and sound quality for modern devices.
By understanding the different cables and ports available, you can make an informed decision about which connection type best suits your specific requirements when hooking up a monitor to an iGPU.
LCD Monitors: UV Emission Mystery Solved
You may want to see also

Set up display preferences
Once you've connected your laptop to the monitor using the right cable, it's time to set up your display preferences.
For Windows 10, right-click on your desktop screen and select "Display settings." In the "Multiple displays" section, you can choose how you want to use your displays:
- "Duplicate these displays" – This will show the same image on both your laptop and the monitor.
- "Extend these displays" – This will increase your desktop across both displays, allowing you to use the two screens for different content.
- "Show only on 1" or "Show only on 2" – This will show the image only on the selected display.
Click "Apply" and then "Keep changes" when you're satisfied with your settings.
For macOS, click on the Apple menu and select "System Preferences." Then, click on "Displays" and then on the "Arrangement" tab. To extend your desktop across both screens, drag the two display icons to your desired arrangement. To mirror the displays, check the "Mirror Displays" box.
If you're using an NVIDIA Control Panel, you can switch the setting to either automatic or Optimus. In Armory Crate, you can set your GPU to standard, which will keep the dGPU asleep until you launch a game.
If you're using a laptop with an Intel graphics card and want to use a dedicated graphics card instead, you can try the following:
- Go into the Nvidia control panel
- Go to Manage 3D Settings
- Inside global settings, scroll down to power mode and change it to performance
Please note that forcing your laptop to use the dedicated graphics card may cause faster battery drain.
Monitoring Internet Usage: Netgear Genie's Parental Controls
You may want to see also

Use adapters when needed
If your laptop and monitor have different ports, you will need to use an adapter to connect the two. Adapters are easily available and can be purchased online or at any electronics store. The most common adapters include HDMI to DisplayPort, DisplayPort to VGA, and USB-C to HDMI.
To determine which adapter you need, start by identifying the ports on both your laptop and your monitor. Once you have determined the type of ports you are dealing with, you can select the appropriate adapter. For example, if your laptop has an HDMI port and your monitor has a DisplayPort, you will need an HDMI-to-DisplayPort adapter.
After purchasing the correct adapter, connect it to your laptop and monitor using a compatible cable. For instance, if you have an HDMI-to-DisplayPort adapter, use an HDMI cable to connect the adapter to your laptop, and a DisplayPort cable to connect the adapter to your monitor.
Adapters are a simple and effective solution when dealing with incompatible ports on your laptop and monitor. They allow for a seamless connection, ensuring that you can efficiently utilise your setup without any hassle.
In addition to adapters, it is important to ensure that your cables are properly connected and that you have selected the correct input source on your monitor. This will ensure a smooth display output and an optimal viewing experience.
Connecting a Monitor to a Tower: HDMI Setup Guide
You may want to see also

Maximising resolution
To maximise the resolution of your monitor when hooked up to an iGPU, you can follow these steps:
Firstly, you need to identify your Intel Processor number. This can be done by pressing the Windows key on your keyboard and typing "System", then choosing System Information. This will display the processor information, including the processor number.
Next, visit the product specification site and enter the processor number into the search bar. Here, you can find the maximum resolution supported by the integrated graphics included in that processor.
For example, the maximum supported resolutions for 2nd and 3rd Generation Intel Core Processors are:
- DisplayPort 1.1 = 2560x1600 at 60Hz
- HDMI 1.4 = 1920x1200 at 60Hz
- DVI (Single-link) = 1920x1200 at 60Hz
- VGA = 2048x1536 at 75Hz
Most devices will support any resolution and refresh rate up to the maximum value listed. However, it is important to check with the specific manufacturers of your computer and display to find the supported resolutions.
If you are using multiple displays in clone or duplicate mode, you can only select a resolution that is supported by all displays. Your maximum supported resolution can vary depending on your chipset, monitor capabilities, and manufacturer configurations.
To change the display resolution on Windows, you can follow these steps:
- Right-click on the Desktop and select Display Settings.
- Select the display you want to change.
- Under Display Resolution, select the desired resolution.
Alternatively, you can use the Intel Graphics Command Center:
- Open the Intel Graphics Command Center by searching for it in the Windows Start Menu.
- Click on "Display" in the left navigational menu.
- In the General tab, go to the Resolution section and select a resolution size from the dropdown menu.
- Confirm your selection by clicking "Yes" when prompted.
It is important to note that your available options may vary depending on your specific hardware and software configurations.
Connecting Multiple Monitors: A Step-by-Step Guide
You may want to see also

Checking power and data connections
To ensure your monitor is working properly, it is important to check the power and data connections. This is because bad connections can often affect the output of your monitor.
First, check that the power cord is properly connected to a functioning power outlet. If the power cord is plugged into a power strip or surge protector, make sure it is switched on. You should also check that the power cord is securely connected to the back of the monitor. Some monitors have a removable power cord, while others have a power cord that is permanently attached. If your monitor has a removable power cord, make sure it is firmly connected.
Next, check the data connection between your monitor and your computer. The most common types of data connections are HDMI, DisplayPort, VGA, and Thunderbolt (for Apple devices). Make sure the cable you are using is compatible with your monitor and computer. Check that the cable is securely connected to both the monitor and the computer. If you are using adapters, ensure they are compatible with your setup and securely connected.
If you are experiencing issues with your monitor, checking the power and data connections should be one of the first steps you take to troubleshoot the problem.
Monitoring Bandwidth Usage in Linux: A Comprehensive Guide
You may want to see also
Frequently asked questions
You will need to connect your laptop to the monitor using the right cable. First, identify the types of ports available on your laptop and monitor. Common ports include HDMI, DisplayPort, VGA, and Thunderbolt. Once you've determined the type of port, use the corresponding cable to connect the two devices.
Connecting your laptop to a monitor can provide a larger screen size, improved resolution, dual-screen functionality, better ergonomics, enhanced performance, and can even extend the longevity of your laptop.
Ensure you set the display settings correctly to get the best resolution from your monitor. Check the power and data connections to make sure they are properly connected. Use keyboard shortcuts to easily manage multiple screens. Consider getting an external keyboard and mouse if you plan to use the second monitor as your main display. Position the monitor at eye level or 20° below eye level, and place it at least 20 inches away from your eyes for optimal viewing and comfort.


