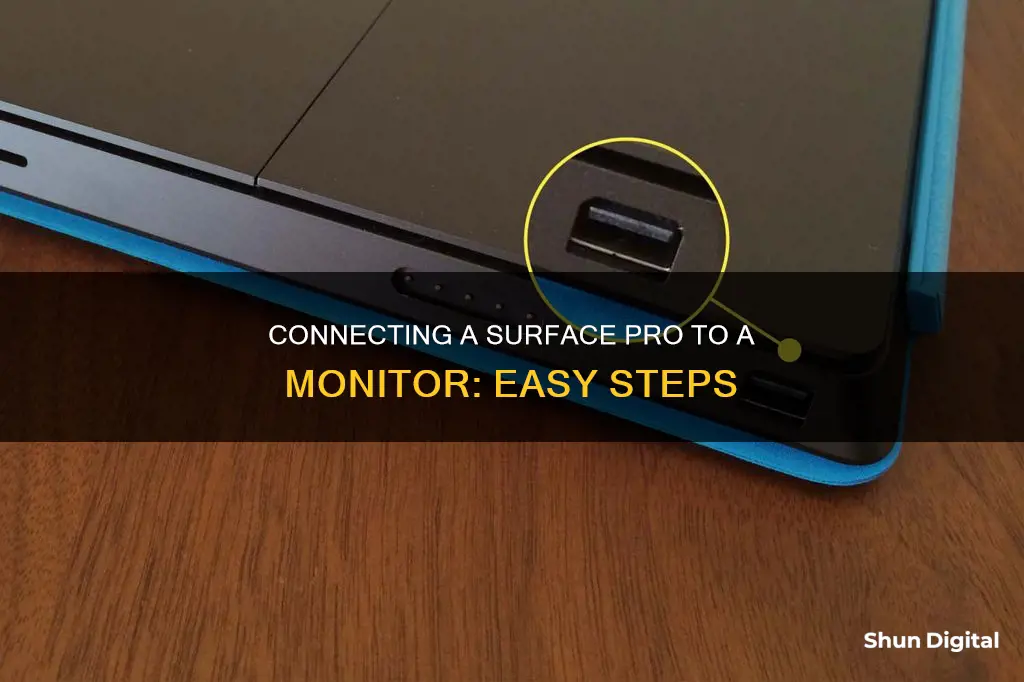
Connecting a Surface Pro to an external monitor can improve your multitasking and make what you're working on far more clear at a larger size. To do this, you'll need a compatible cable and adapter. You can even connect to some displays wirelessly.
For a Surface Pro 7 or newer, use a USB-C cable to connect to a monitor. For a Surface Pro 6 or older, you can connect a monitor using the Mini DisplayPort.
What You'll Learn

Using a USB-C to HDMI dongle or adapter
Step 1: Get a USB-C to HDMI dongle or adapter. Make sure that the USB-C end is the smaller one, as this will be plugged into your Surface Pro.
Step 2: Plug the USB-C end of the dongle or adapter into your Surface Pro. You can use either of the two USB-C ports located on the right side of your device, near the top.
Step 3: Take an HDMI cable and plug one end into the larger end of the dongle or adapter. This is the end that is not yet connected to your Surface Pro.
Step 4: Connect the other end of the HDMI cable to the HDMI port on your monitor or HDTV. The ports are usually labelled, so look for the one marked "HDMI".
Step 5: Turn on your monitor and your Surface Pro. You should now get a signal, and your Surface display should be mirrored on the monitor.
Step 6: If needed, you can change the display settings by pressing the Windows Key + P on your keyboard. This will allow you to choose between different options, such as "Extend" or "Use the Second Screen Only".
Step 7: If you want to adjust the orientation of your display, simply click on its icon and drag it to your desired placement. You can also click the "Apply" button to access additional settings for resolution, scaling, and more.
It's important to note that the USB-C cable you use should support both power and data transmission, as some cables only support charging. Additionally, if you're using a newer display, you might not need a dongle or adapter at all. Simply connect your Surface Pro and monitor using a USB-C cable that supports both power and data.
Removing Rubber Covers from Your ASUS Monitor Easily
You may want to see also

Using a USB-C to VGA dongle or adapter
If you're connecting your Surface Pro to an external monitor or projector, you may need a USB-C to VGA adapter. This adapter is big (and often blue-coloured) on one end and small on the USB-C end.
Here's how to use it:
Step 1: Connect the USB-C end to your Surface Pro. It's the smaller end, and you can connect it to either of the USB-C ports on the right side of the device.
Step 2: Grab your VGA cable and plug it into the bigger end of the adapter. Make sure you screw and secure the VGA cable into the adapter.
Step 3: Plug the other end of the VGA cable into your monitor. Look for the matching port to fit the size of the cable on your display. You'll get a signal and then you can readjust your settings as you see fit.
If your monitor didn't come with a VGA cable, make sure to get one that has the correct connector.
A VGA adapter and cable are for video only. Audio will play from your Surface speakers unless you've connected external speakers.
Monitoring Bandwidth Usage: Tips for Home Network Management
You may want to see also

Using a USB-C dongle
Step 1: Get the Right USB-C Dongle or Adapter
First, you'll need to determine what type of connection your monitor supports. Common types include HDMI, DisplayPort, and VGA. Once you know the connection type, you can choose the appropriate USB-C dongle or adapter. For example, if your monitor has an HDMI port, you'll need a USB-C to HDMI dongle.
Step 2: Connect the Dongle or Adapter to Your Surface Pro
Take the USB-C end of the dongle or adapter and plug it into the USB-C port on your Surface Pro. The USB-C port is usually located on the right-hand side of the display.
Step 3: Connect the Dongle or Adapter to Your Monitor
Now, take the appropriate cable (HDMI, DisplayPort, or VGA) and plug one end into the corresponding port on your monitor. Then, plug the other end of the cable into the dongle or adapter.
Step 4: Power On and Adjust Settings
Turn on your monitor and Surface Pro. Your Surface display should now be mirrored on the external display. You can adjust this setting by pressing the Windows Key and P on your keyboard, which will give you options like "Duplicate," "Extend," or "Second Screen Only."
Additionally, you can adjust the orientation of your display by clicking on its icon and dragging it to your desired placement. There will also be additional settings for resolution, scaling, and more.
It's important to note that if you're using a newer display that also has a USB-C port, you may not need a dongle at all. In this case, simply use a USB-C cable that supports both power and data transmission to connect your Surface Pro directly to the monitor.
By following these steps, you can easily connect your Surface Pro to a monitor using a USB-C dongle or adapter, allowing you to take advantage of a bigger screen and improve your multitasking capabilities.
Monitoring Data Usage on iPhone 5: Verizon Guide
You may want to see also

Using a Surface Dock
The Surface Dock is a small hub that is compatible with every Surface Pro since the Surface Pro 3. It gives your device a wider range of ports, including USB-A ports and a pair of Mini DisplayPort outputs (or USB-C display ports on the Surface Dock 2 and the Surface Thunderbolt 4 Dock).
To use the Surface Dock to connect your Surface Pro to a monitor, follow these steps:
- Ensure you have the correct cables and adapters for your devices.
- Connect your Surface Pro to the Dock with the power off.
- Connect your monitor to the Dock.
- Boot up your Surface Pro. It should automatically detect your monitor and you should see it activate.
If your monitor does not activate, you may need to help your Surface Pro recognise the monitor. To do this, open the Windows menu and select Settings > System > Display. You should see a tool for arranging multiple displays. If not, scroll down to Multiple displays and select Detect. Ensure Extend these displays has been selected.
The Surface Dock also has some extra ports like USB-A and ethernet.
Monitoring PCI Bus Usage: Linux Command Line Essentials
You may want to see also

Using a Microsoft Wireless Display Adapter
The Microsoft Wireless Display Adapter is a reliable way to project your content, photos, and videos to a big screen. Here is a step-by-step guide on how to use it:
First, ensure that your Windows PC has the latest updates and that your adapter has the latest firmware. You can check for updates by going to "Update Windows" on your PC and update your adapter's firmware by following the instructions in the "Update the Microsoft Wireless Display Adapter" manual.
Next, identify your wireless display adapter model. There are different versions of the wireless display adapter with slight differences in cable length and dimensions. The Microsoft 4K Wireless Display Adapter, for example, is designed for use with Miracast-enabled Windows 10, Windows 11, and Android devices.
Check the compatibility of your device with the adapter. You can refer to the table provided by Microsoft to see if your device is compatible with the specific adapter you have.
Now, connect the adapter to your display. Plug the HDMI end of the adapter into the HDMI port on your monitor or projector. Then, plug the USB end of the adapter into a USB charging port on your display. If your display does not have a USB charging port, you can plug the USB end into any standard USB Type-A charger with 5W (5V/1A).
On your display, set the input to HDMI. Refer to the manual that came with your display if you are unsure how to do this.
Finally, connect to your adapter from your Windows PC. Press the Windows logo key + K on your PC, and select the name of your adapter from the list of available connections. This name should be visible on your display.
Additionally, you can use the Microsoft Wireless Display Adapter app to change settings, update firmware, and more. Simply download the app from the Microsoft Store, open it, and follow the instructions.
By following these steps, you will be able to successfully connect your Surface Pro to a monitor using the Microsoft Wireless Display Adapter.
Fixing LCD Monitors: Worth the Cost and Effort?
You may want to see also
Frequently asked questions
You will need a compatible cable and adapter.
This depends on your model of Surface Pro and your monitor. You may need a USB-C to HDMI adapter, a USB-C to VGA adapter, a USB-C to DisplayPort adapter, or a Mini DisplayPort to HDMI adapter.
Adapters are available in the Microsoft Store.
Plug one end of the video cable into the port on the monitor. Connect the other end of the cable to the video adapter. Then, connect the adapter to your Surface.
You can choose from the following options: PC screen only, Duplicate, Extend, or Second screen only.


