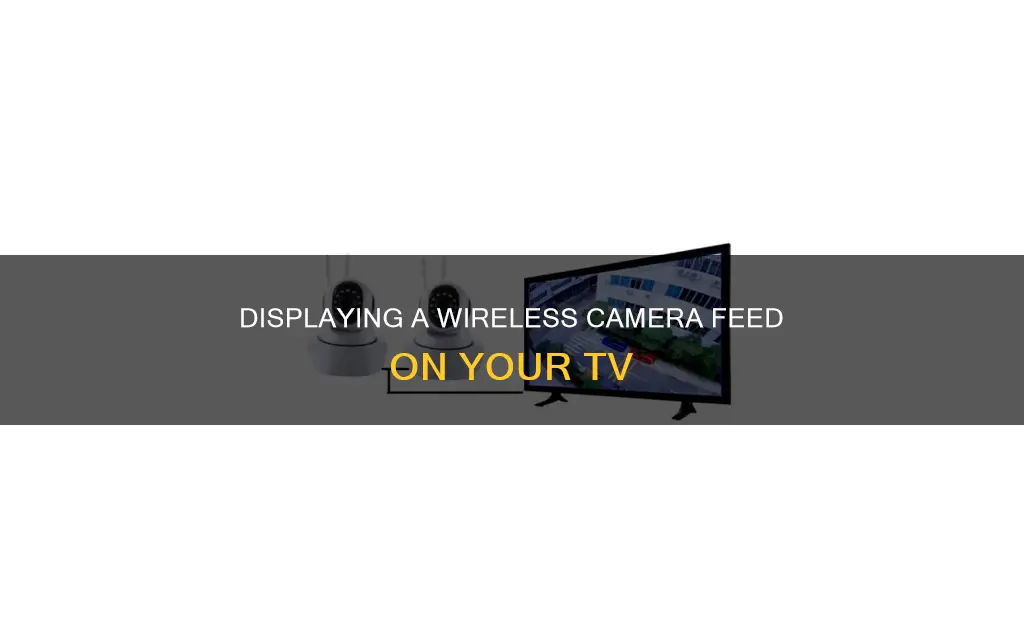
Displaying a camera system on your TV wirelessly can be done in several ways, depending on the type of camera and TV you have. Here are some common methods:
- Using a dedicated mobile app: Many wireless security cameras come with their own mobile applications that allow you to stream the camera's video feed onto your television using a Wi-Fi connection.
- Smart TV integration: If you have a smart TV, you can download and use an app directly on the TV to view the live camera feed. Some smart TVs also have built-in apps for receiving and displaying camera feeds.
- Wireless security camera system: You can set up a wireless system with easy-to-use Wi-Fi cameras and a network video recorder (NVR). The cameras communicate with each other and the NVR without the need for a Wi-Fi connection. However, you'll still need an HDMI cable to connect the NVR to your TV.
- Wireless IP camera: By connecting your IP camera to a Wi-Fi router or internet modem, you can transfer the footage via the internet to your TV.
| Characteristics | Values |
|---|---|
| Types of Security Camera | CCTV Cameras (Analog Cameras), HD-over-Coax Security Cameras, IP Security Cameras, Wireless Cameras |
| TV Input | HDMI, AV, or BNC |
| Video Resolution | Ensure TV can display camera's video quality |
| Smart TV Integration | Use a dedicated mobile app or download an app directly to the TV |
| Connection with DVR | Connect camera to DVR, then connect DVR to TV with HDMI or VGA cable |
| Connection without DVR | Connect camera to TV directly with appropriate cable (e.g. HDMI, Ethernet) |
| Wireless Connection | Use a mobile app, or if using a smart TV, download an app directly to the TV |
What You'll Learn

Connect a wireless CCTV camera to a TV using HDMI
To connect a wireless CCTV camera to a TV using HDMI, you will need to ensure that your TV is compatible with your camera. This means checking that your TV has the correct input, such as HDMI, AV, or BNC. If your TV does not have the required input, you may need to use a converter.
It is also important to check the video resolution of your TV to ensure it can display the video quality of your wireless CCTV camera. Older TV models may not support high-definition video feeds.
Once you have ensured your TV and camera are compatible, you can connect them using the following steps:
- Link the wireless CCTV camera to a Network Video Recorder (NVR) device. Any wireless security system uses a Wi-Fi signal, and any security system has Ethernet Cat 5/6 wires.
- Connect the HDMI cable that comes with your CCTV camera to the NVR (near the HDMI output port) and link it to the HDMI input port on your television.
- Connect the entire security system to a power source, and then switch on the cameras and NVR separately via their power adaptors.
- Switch on your TV, and you will be able to view your CCTV camera footage while also switching TV stations.
Alternatively, if you are connecting a wired CCTV camera, you can use an HDMI cable to connect the camera hub directly to your TV.
Watching Camera Footage on PC: Easy Steps to Follow
You may want to see also

Use a wireless security camera without internet access
Wireless security cameras can work without an internet connection, but their functionality may be limited compared to online cameras. These cameras are called IP (Internet Protocol) cameras. Despite the name, you don't have to connect them to the internet. Here are some options for using a wireless security camera without internet access:
Local Recording
Many wireless security cameras have built-in storage options such as SD cards or onboard storage. These cameras can record video footage directly to the storage device without an internet connection. The recorded footage can be accessed locally by physically removing the storage device or by connecting to the camera directly through a local network (Wi-Fi or Bluetooth).
Motion Detection and Alerts
Some wireless security cameras have motion detection capabilities. These can trigger a recording or send alerts to a connected device (e.g., a smartphone or tablet) when motion is detected. These alerts can be received over a local Wi-Fi network without an internet connection.
Closed-Circuit Systems
You can set up a closed-circuit system using multiple wireless security cameras and a network video recorder (NVR). The NVR stores video footage from the cameras and manages their recordings. While the NVR might not require an internet connection to operate, it can connect to a local network for easier access and monitoring.
Local Viewing
Many wireless security cameras come with mobile apps or software. These tools allow you to view live footage and access recorded videos directly from the camera within your local network range. You can monitor your cameras even without an internet connection, as long as you are connected to the same local network as the cameras.
Benefits of Wireless Cameras Without Internet
One advantage of wireless cameras without internet access is that you can't have a data or privacy breach. Cameras that keep data locally are generally more secure and private. Another positive is that you won't pay fees for storing your video data in the cloud. Internet-connected cameras often require a subscription service for cloud storage and remote access. Additionally, your camera footage will be stored on physical hardware inside your building, and your surveillance cameras can keep running, using battery power, even during a power outage.
Drawbacks of Wireless Cameras Without Internet
One primary drawback is the inability to access the camera remotely. Without an internet connection, you won't be able to view the live feed or recorded footage from a remote location, limiting your ability to monitor your property while away. Another drawback is that you won't receive alerts or have access to two-way communication features, which are often available with internet-connected cameras.
Casting Your S10 Camera to TV: A Simple Guide
You may want to see also

Connect a wired security camera to a TV
To connect a wired security camera to a TV, you need to first determine the type of camera and TV you have. This is important because different camera types require different methods for connecting to your TV. Here are the steps for connecting a wired security camera to your TV:
CCTV Cameras (Analog Cameras)
These are traditional surveillance devices that use video cable connections to connect to television screens. They typically have lower image resolutions such as 960H, D1, and CIF, and require the use of a coaxial or RCA cable for connection. Here's what you need to do:
- Connect the Camera to a DVR or NVR: Use an RG59 coaxial cable to connect your analogue camera to a DVR (Digital Video Recorder). If you're using an NVR (Network Video Recorder), connect your camera with a Cat 5-Cat 6 network cable.
- Connect the Recorder to Your TV: If you have a digital TV, use an HDMI cable to connect the recorder to your TV. For older CRT TVs, you'll need a coaxial cable with a BNC connector and an RCA connector.
- Power the Devices: Attach the power adapter to your DVR or NVR and turn on your TV.
HD-over-Coax Security Cameras
This type of camera is a variant of analogue cameras, optimised for high-definition video transmission. They use coaxial cables like traditional CCTV cameras but offer improved image resolution and quality through specialised BNC connectors. Here's how to connect them:
- Connect the Camera to the TV: Use a BNC cable to connect your HD-over-Coax camera directly to your TV.
- Configure the TV Input: Switch your TV input to the appropriate source, such as HDMI or BNC.
- Power the Devices: Ensure that both your camera and TV are powered on.
IP Security Cameras
IP cameras are digital cameras that transmit video data through IP networks. They usually connect to the internet via Ethernet cables. Here's how to connect them to your TV:
- Connect the Camera to a DVR or NVR: Use Eternal cables for digital IP cameras or BNC cables for analogue IP cameras to connect to a DVR or NVR.
- Connect the DVR or NVR to Your TV: Utilise an HDMI or VGA cable to establish a connection between the DVR or NVR and your TV. Most modern DVRs/NVRs support HDMI for better image quality.
- Power the Devices and Configure Input: Power on the DVR/NVR and TV, then set the correct input source on your TV.
- View Camera Feeds: Access the camera feeds through the DVR or NVR interface on your TV.
Using an NVR System
Using an NVR (Network Video Recorder) system is a straightforward way to connect your security camera to your TV. Here's a simple process:
- Connect Cameras to NVR: Use Ethernet Cat 5/6 cables to connect your CCTV cameras to the NVR.
- Connect NVR to TV: Utilise an HDMI cable to connect the NVR to your TV.
- Power the NVR: Plug in the power adapter for the NVR.
- Turn on the TV: Power on your TV, and the live view from your cameras should appear on the screen.
Viewing Hikvision Cameras on PC: A Simple Guide
You may want to see also

Connect an HD security camera to a TV
There are several ways to connect an HD security camera to a TV, and the specific method you choose will depend on the type of camera and TV you have. Here is a step-by-step guide:
Step 1: Identify Your Camera and TV Type
Before connecting your HD security camera to your TV, it's important to identify the type of camera and TV you have. This is crucial for ensuring a successful connection. Here are some common types of security cameras:
- CCTV Cameras (Analog Cameras): Traditional surveillance devices that use video cable connections like coaxial or RCA cables to connect to TV screens. They typically have lower image resolutions like 960H, D1, and CIF.
- HD-over-Coax Security Cameras: A type of analog camera designed for high-definition video transmission using coaxial cables and BNC connectors. They offer improved image resolution and quality compared to traditional CCTV cameras.
- IP Security Cameras: Digital cameras that transmit video data through IP networks and connect to the internet via Ethernet cables.
- Wireless Cameras: These cameras use Wi-Fi or Bluetooth to wirelessly send video feeds to connected devices, such as your TV, phone, or computer.
Additionally, you need to ensure your TV is compatible with your camera. Check if your TV has the required input options, such as HDMI, AV, or BNC. If your TV lacks the necessary input, you may need to use a converter. Also, confirm if your TV can support the camera's video resolution to ensure the best video quality. Finally, if you have a smart TV, explore built-in apps that can receive and display camera feeds wirelessly.
Step 2: Choose a Connection Method
Once you understand the type of camera and TV you have, you can choose the appropriate connection method. Here are some options:
- Using a DVR or NVR: This method is suitable for handling multiple security cameras and supports both analog and digital camera feeds. Connect your security camera to the DVR or NVR using Eternal cables for digital cameras or BNC cables for analog cameras. Then, connect the DVR or NVR to your TV using an HDMI or VGA cable. Power on the devices and configure the input source on your TV. Finally, view the camera feeds through the DVR or NVR interface.
- Direct Connection with HDMI: If your camera and TV both have HDMI ports, you can use an HDMI cable to connect them directly. Simply connect the devices with an HDMI cable, turn on your TV, and switch to the HDMI input to view the live camera feed.
- Using Ethernet Cables: If your TV has an Ethernet port, you can connect your security camera directly using an Ethernet cable. If this doesn't work, try using an Ethernet-to-HDMI adapter. Connect your camera to the adapter, then connect the adapter's HDMI output to your TV's HDMI input. Turn on your TV and switch to the HDMI input to view the feed.
- Wireless Connection: If you want to connect wirelessly, you can use a dedicated mobile app that comes with your security camera. Download and launch the app on your phone, connect your camera to Wi-Fi, and use the app to stream the video to your TV. Alternatively, if you have a smart TV, you can download the camera brand's app directly to your TV and follow the on-screen instructions to add your camera.
Step 3: Set Up Your Equipment
After choosing the appropriate connection method, it's time to set up your equipment. Follow the specific instructions provided with your chosen method. Here are some general tips:
- Ensure you have all the necessary cables, adapters, and connectors required for the connection.
- Carefully connect the cables, following the correct ports and inputs on your camera, TV, and any intermediate devices like DVRs or adapters.
- Power on all the devices and make sure they are configured correctly.
- Test the connection by switching your TV to the appropriate input and checking if the camera feed is displayed.
By following these steps, you should be able to successfully connect your HD security camera to your TV, allowing you to monitor your security footage conveniently on a larger screen.
Frankfurt Brothels: Are They Under Surveillance?
You may want to see also

Connect a CCTV camera to a TV wirelessly
Connecting a CCTV camera to a TV wirelessly can be done in several ways, depending on the type of camera and TV you have. Here is a step-by-step guide on how to do it:
Step 1: Identify Your Camera and TV Type
Before setting up your CCTV camera, it is essential to identify the type of camera and TV you have. This is because different camera types require different connection methods. Here are some common types of security cameras:
- CCTV Cameras (Analog Cameras): Traditional surveillance devices that use video cable connections like coaxial or RCA cables to connect to TV screens. They usually have lower image resolutions such as 960H, D1, and CIF.
- HD-over-Coax Security Cameras: A type of analog camera optimised for high-definition video transmission using specialised BNC connectors and coaxial cables.
- IP Security Cameras: Digital cameras that transmit video data through IP networks and connect to the internet via Ethernet cables.
- Wireless Cameras: Security cameras that rely on Wi-Fi or Bluetooth to send video feeds to connected devices. They are typically connected to a TV using software on a mobile phone or computer.
Additionally, when it comes to your TV, ensure it has the necessary input options, such as HDMI, AV, or BNC, to connect to your security camera. Also, check if your TV can support the camera's video quality and explore options for smart TV integration, which can provide a seamless viewing experience.
Step 2: Choose a Connection Method
There are several ways to connect your CCTV camera to your TV wirelessly. Here are some common methods:
- Using a Network Video Recorder (NVR): This method involves connecting your wireless CCTV camera to your TV using an NVR gadget and an HDMI cable. First, link your security cameras to the NVR using Wi-Fi or Ethernet cables. Then, connect the NVR to your TV using an HDMI cable. Finally, power on all devices and you should be able to view your CCTV camera feed on your TV.
- Using a NetcamViewer Monitor: If you have multiple security cameras and want to view them all on your TV, a NetcamViewer Monitor is a small, easy-to-configure device that supports over 600 camera brands. Simply connect your IP camera to the NetcamViewer using an Ethernet cable and then connect the NetcamViewer to your TV using an HDMI cable.
- Using Streaming Apps: If you own a smart TV, such as a Samsung or LG model, you can use your IP camera's viewing apps to connect your CCTV camera wirelessly. Simply download the relevant viewing app, connect your camera to Wi-Fi, and view your camera feed on your smartphone or TV via the app.
Step 3: Set Up Your Equipment
Once you have chosen a connection method, it's time to set up your equipment. Here are some general steps to follow:
- Connect Your Camera to Power: Ensure your CCTV camera is properly connected to a power source and turned on.
- Connect Your Devices: Depending on the connection method you chose, connect your camera to the NVR, NetcamViewer, or directly to your smart TV using the appropriate cables (HDMI, Ethernet, etc.).
- Power On Your TV: Turn on your TV and select the correct input source. For example, if you're using an HDMI cable, select the HDMI input on your TV.
Step 4: Test Your Setup
After completing the setup, it's time to test if your CCTV camera is successfully connected to your TV. Here are some general steps to follow:
- Launch Your Camera App: If you're using a streaming app or a dedicated camera app, open the app on your smartphone or TV.
- Check the Camera Feed: You should now be able to view the live camera feed from your CCTV camera on your TV screen. Adjust any settings as needed to ensure the feed is clear and stable.
By following these steps, you should be able to successfully connect your CCTV camera to your TV wirelessly and enjoy the convenience of monitoring your surveillance footage on a larger screen.
Big Brother: Is the Government Spying on Us?
You may want to see also
Frequently asked questions
The easiest way to connect a security camera to a TV is by using a Network Video Recorder (NVR). This allows you to capture HD video footage and audio recordings if your camera permits. First, connect your camera to the NVR using an Ethernet cable. Then, connect the NVR to the TV using an HDMI cable. Power on the NVR and TV, and the live view from your camera should appear on the TV screen.
Yes. If your wireless security camera has a dedicated mobile app, you can download and use the app on your smart TV to view the live camera feed. Alternatively, if your smart TV has built-in apps for receiving and displaying camera feeds, you can connect your security camera wirelessly through this integration.
Using an NVR system for connecting your security camera to a TV offers several advantages. It provides easy wiring with no connection failure, large storage space for continuous recording, the ability to work without a network connection, and a more stable signal.


