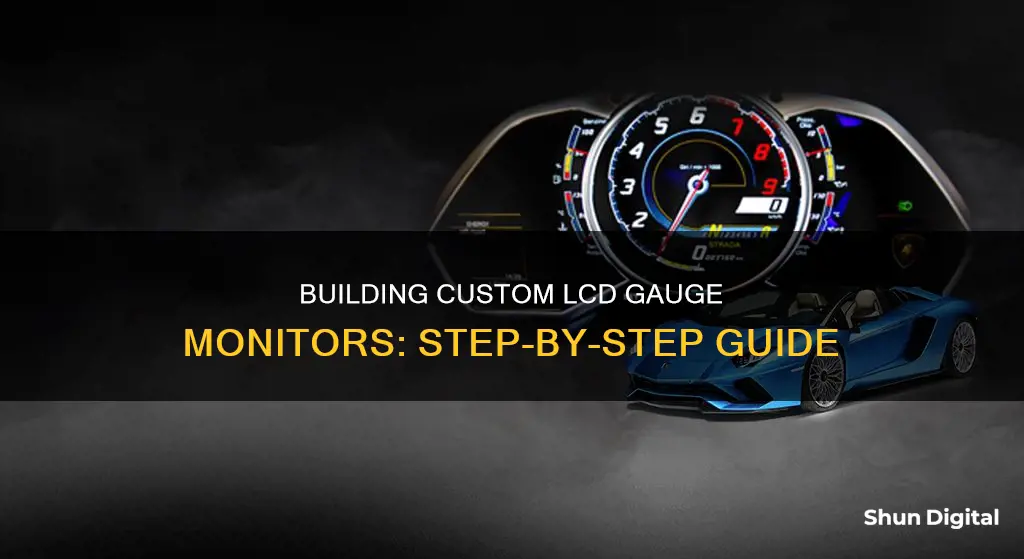
Building a custom LCD gauge monitor is a project that can be undertaken by anyone, from hobbyists to those in the automotive industry. The process can vary in complexity, from using pre-made kits to designing and fabricating a completely custom solution. The LCD gauge monitor can be used to display various vehicle information, such as oil pressure, engine temperature, fuel pressure, and battery voltage. The level of customisation can also vary, with some opting for a simple display and others choosing to include touch capabilities and custom graphics. The cost and level of modification required will depend on the chosen method, with phone or tablet installations being a more affordable and less invasive option, while custom touchscreen LCDs may offer a more seamless look but at a higher price point and with more extensive dashboard modifications.
What You'll Learn

Using an old instrument cluster
When using an old instrument cluster, it is important to consider the vehicle's age and the type of signals it uses. Older cars may not have an OBDII port, which means decoding the OBD interface and dealing with analogue signals will be more challenging. Additionally, the boot time of the LCD system should be considered, as it needs to come online with the ignition and not a few minutes later.
To address the issue of different signals, you can use an Arduino or Raspberry Pi to interface with the vehicle's electronics. Arduino has open-source projects that can be utilised, and Raspberry Pi can be connected to the vehicle's OBDII port to access various data. However, a Raspberry Pi may not be ideal for critical gauges due to its limitations in handling real-time processes and potential issues with SD card corruption.
Another consideration is the environment in which the LCD will operate. Cars can experience extreme temperatures, ranging from -40°C to 80°C, which can significantly reduce the lifespan of consumer-grade electronics. Therefore, it is crucial to choose components that can withstand these temperature variations.
In summary, using an old instrument cluster can be a viable option for custom LCD gauge monitors, especially for older vehicles with square openings. However, it is important to consider the vehicle's age, signal types, boot time, and environmental factors when designing the LCD system to ensure reliability and compatibility.
Removing OSD from Your ASUS ROG Monitor
You may want to see also

Finding an adapter
When it comes to finding an adapter for your custom LCD gauge monitor, there are a few options to consider. Firstly, it is worth checking if your vehicle is commonly modified or has strong aftermarket support, as you may be able to find an adapter specifically designed for your car. For example, the Volvo 240 adapter allows you to add a 7-inch screen to the factory instrument cluster location. If you can't find an off-the-shelf adapter, you could reach out to companies specialising in custom LCD solutions, such as OneGauge, who may be able to design an adapter tailored to your vehicle.
Another approach is to utilise 3D printing technology to create a custom adapter. This modern technique enables you to fabricate parts that perfectly fit your vehicle's specifications. Alternatively, you could build or fabricate your own adapter using materials like fibreglass to house the LCD display. This option provides you with the flexibility to create a unique solution that suits your specific requirements.
Additionally, you can explore the option of modifying your vehicle's instrument cluster. This involves removing existing gauges and replacing them with LCD screens and bezels to achieve a finished look. However, this method may require significant modifications, especially for modern vehicles with round or small openings.
If you're open to a more universal solution, you can consider using a DisplayLink adapter. This adapter allows you to connect a monitor with a DVI or HDMI connector to the USB port of your laptop or computer. This option provides flexibility and is commonly used for connecting external devices.
Repairing an Asus 24" Monitor: A Step-by-Step Guide
You may want to see also

Building your own adapter
Planning and Design
Start by determining the size and type of LCD screen you want to use. Consider the dimensions of your vehicle's dashboard and choose a screen that will fit seamlessly. Decide on the features you want, such as touch functionality or specific sensors. It's important to plan the layout and functionality before beginning construction.
Materials and Tools
Gather the necessary materials and tools, including the LCD screen, fiberglass or other suitable housing material, and any required tools for cutting and shaping the housing. You may also need additional components like a voltage divider, relay, and sensors, depending on your specific design.
Housing Construction
Create a custom housing for your LCD screen using fiberglass or other chosen material. Ensure that the housing securely holds the LCD screen and fits seamlessly into your vehicle's dashboard. You may need to cut and shape the housing to match the contours of your dashboard.
Electrical Connections
Establish the necessary electrical connections between the LCD screen, vehicle power source, and any additional components. This process may involve soldering and wiring, so ensure you have the required skills or seek assistance from someone with electrical expertise.
Testing and Refinement
Once the adapter is constructed and installed, thoroughly test all its functions. Ensure that the LCD screen displays correctly and that any additional features, such as sensors or touch functionality, work as intended. Make any necessary adjustments or refinements to ensure optimal performance.
Finishing Touches
Add any final touches to your adapter, such as bezels to cover rough edges or RGB lighting for a custom look. Ensure that your adapter enhances the overall aesthetics of your vehicle's interior while providing the desired functionality.
Monitoring Internet Usage: A Guide to Tracking Your Data
You may want to see also

Using dashboard space
Firstly, consider the type of display you want to use. One option is to use your phone or tablet, which is easy to install and requires little to no vehicle modification. You can often find mounts for all sizes of phones and tablets that can be attached to your dashboard. This option offers convenience and flexibility.
On the other hand, a touchscreen LCD can provide a more professional and finished look. However, it requires more work, is usually more expensive, and often involves heavy modification of your dashboard. If you decide to go with a touchscreen LCD, there are several approaches you can take:
- Modified Instrument Cluster: For older vehicles with square openings, you can remove the gauges on both sides of the speedometer and replace them with LCD screens and bezels for a seamless look. However, this option may not work as well for modern vehicles with round or small openings, as it would require significant modification.
- Find an Adapter: With the advent of 3D printing, it has become easier to find or create custom adapters that allow you to add a screen to your factory instrument cluster location. You may be able to find adapters specifically designed for your vehicle or work with a company to have one designed for you.
- Build Your Own Adapter: You can also fabricate your own adapter using modern materials like fibreglass to house your LCD display. This option provides flexibility and customisation.
- Utilise Unused Space: If you're comfortable with making modifications to your dashboard, you can cut a hole in an empty or unused portion and install an LCD screen. You may need to create or purchase a bezel to cover up any rough edges, but this can be a great way to utilise wasted space.
- Add a Console: Consider adding a custom-built or aftermarket console that offers space to incorporate your LCD screen setup. You can find hobbyists or small businesses that create custom consoles by searching online or on social media platforms like Facebook.
When planning your installation, take into account the size and shape of your dashboard, as well as the amount of modification you are willing to make. Each vehicle is unique, so you may need to get creative to find the best solution for your specific dashboard space. Remember always to follow best practices for safety and consult professionals or online resources if you're unsure about any part of the installation process.
Asus Monitor Model: A Quick Identification Guide
You may want to see also

Adding a console
One option is to purchase a custom-built or aftermarket console that offers customizable spaces to add a screen setup. These consoles can often be found through hobbyists or small businesses on platforms like Facebook or vehicle-specific forums. It's worth exploring these options to find something that fits your needs and can accommodate your screen setup.
Another approach is to build your own console. This option provides more flexibility in terms of design and customization but requires more effort and expertise. You can modify an existing centre console by cutting it to fit your vehicle and mounting your components inside. Alternatively, you can fabricate a completely custom console using modern materials like fibreglass to create a housing for your screen and other components.
When adding a console, it's important to consider the size and type of screen you plan to use, as well as any additional components or sensors you want to incorporate. Ensure that you have sufficient space and mounting options within the console for all your components. Additionally, think about the placement of the console in your vehicle and any necessary modifications to accommodate it.
In summary, adding a console to your custom LCD gauge monitor setup can be achieved through purchasing a custom or aftermarket console or building your own. Consider your budget, modification capabilities, and vehicle requirements when choosing the best option for you. With careful planning and execution, you can create a seamless and professional-looking installation for your custom LCD gauge monitor.
Unlocking ASUS Monitor Key Lock: A Step-by-Step Guide
You may want to see also
Frequently asked questions
Touchscreen LCDs present a more professional, finished look in your vehicle.
Touchscreen LCDs require a lot more work to install, are usually more expensive, and often involve heavy modification of your dashboard.
You can use your phone or tablet as a monitor, which is a great option for most people as they are very easy to install and require little to no vehicle modification.


