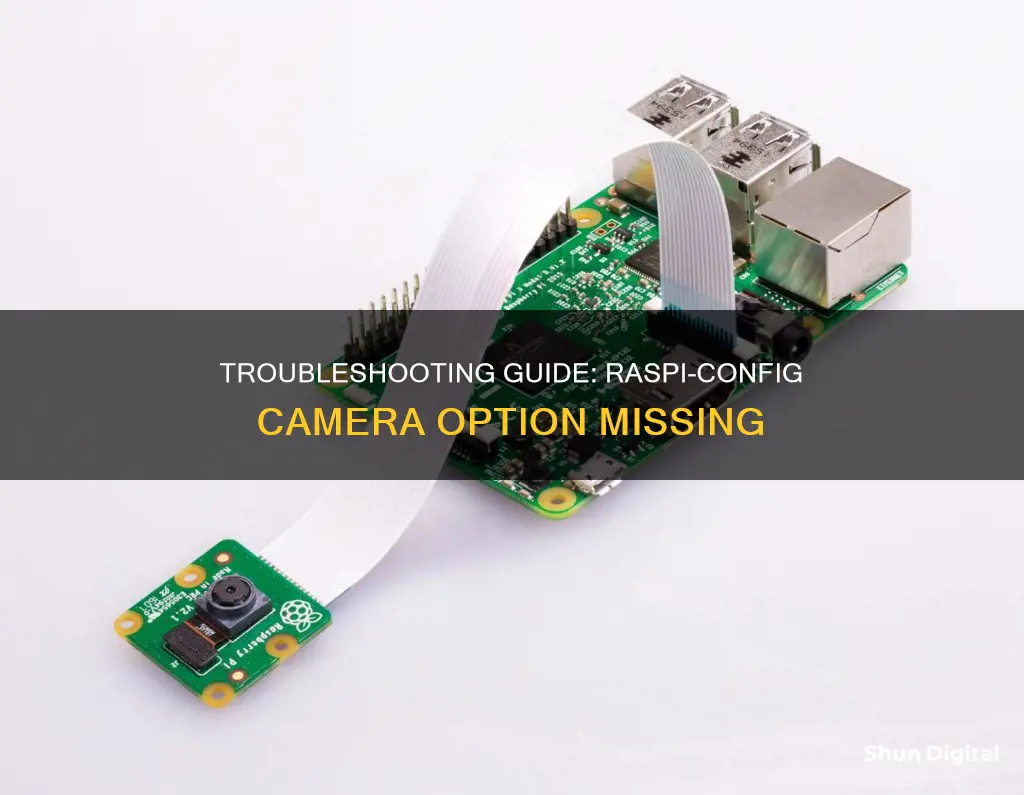
If you're unable to see the camera option on raspi-config, it could be due to outdated software or the use of newer Raspberry Pi OS versions like Bullseye and Bookworm. In such cases, updating your software or changing to a different OS version like Buster may resolve the issue. Additionally, you can try enabling the Legacy Camera option in the Interface Options of raspi-config and then rebooting. However, note that the legacy camera interfaces are deprecated and may not be supported in future updates.
| Characteristics | Values |
|---|---|
| Problem | The "Camera" option is missing from the raspi-config menu |
| Possible Causes | Outdated software, unsupported OS, or incorrect settings |
| Suggested Fixes | Update software, change OS version, enable "Legacy Camera" option, use libcamera, or check hardware connections |
What You'll Learn

The camera interface is disabled by default on the Raspberry Pi OS
Please note that these camera interfaces are deprecated and will not be supported in the future, so use them with caution and check for updates. If you are using the latest Raspberry Pi OS, the legacy camera is disabled and will not show up in raspi-config.
If you are still having issues with the camera not being detected, you can try the following:
- Check if the camera is supported.
- Try using a powered USB hub to plug in the camera, as it may not be getting enough power.
- Install the tool "luvcview" to test out the camera: "sudo apt-get install luvcview".
- Make sure your software is up to date by running "sudo apt-get update" and "sudo apt-get upgrade".
- Try changing from Bullseye to Buster.
Insignia Smart TV Camera Location Guide
You may want to see also

The camera may not be supported or connected, or it could be defective
If you don't see the camera option on raspi-config, it could be because your camera is not supported or connected, or it could be defective.
Firstly, check your Raspberry Pi's software version by running the following command:
Uname -a
If your software is too old, you may need to update it by running:
Sudo apt-get update
Sudo apt-get upgrade
Then, try to enable the camera in raspi-config again. If this doesn't work, try updating raspi-config itself by selecting the "update raspi-config" option in the menu.
If you still cannot see the camera option, try changing your operating system version. For example, if you are on Bullseye, changing to Buster may fix the issue.
Additionally, you can try enabling the "legacy camera" option in raspi-config, but note that this may not have any effect.
If none of these solutions work, your camera may be defective or not connected properly. Try connecting the camera to another device to see if it is recognised. If the camera works on another device, ensure that your Raspberry Pi is set up correctly and that the camera is connected securely.
Concealing Your LG 4K TV Camera: A Step-by-Step Guide
You may want to see also

The software may be too old
If you are unable to see the camera option on raspi-config, it could be because the software is too old. This issue is common when using older versions of the Raspberry Pi OS, such as Bullseye or Buster. The camera port is disabled by default on these older versions, and you need to manually enable it.
To check which version you are running, open a terminal window and type `cat /etc/os-release`, then hit enter. If you are running Bullseye or Buster, your software may be too old, and you will need to update it.
First, make sure your software is up to date by running the following commands in a terminal window:
Sudo apt-get update
Sudo apt-get upgrade
Then, enable the camera port by starting the raspi-config tool:
Sudo raspi-config
Next, go to "Interface Options" > "Camera" and select "Yes" to enable the camera interface. Exit raspi-config and accept the reboot for the changes to take effect.
If you are using the Raspberry Pi OS Desktop version, you can also enable the camera through the graphical interface. Go to Preferences > Interfaces and ensure that the "Camera" option is checked.
After updating your software and enabling the camera, try running the following command to test your camera:
Libcamera-still -o test.jpg
You should see a preview window pop up for about 5 seconds, and an image file should be created in the current directory. If this doesn't work, you may need to try other troubleshooting steps, such as re-seating the camera cable or checking your hardware connections.
TLC Roku TV: Are There Cameras and Mics?
You may want to see also

The OS may be unable to find the camera automatically
If you are unable to see the camera option on the Raspberry Pi OS, it may be because the OS is unable to find the camera automatically. This could be due to a number of reasons, including outdated software, incorrect connections, or unsupported hardware. Here are some potential solutions to this issue:
- Check your software version: Ensure that you are running the correct OS version. Older versions of the Raspberry Pi OS, such as Buster, required users to manually enable the camera in the raspi-config menu. Newer versions, such as Bullseye and Bookworm, have deprecated the legacy camera interface, so the option may not appear in the menu.
- Update your software: If you are running an older version of the OS, try updating to the latest version. This can be done by running the commands "sudo apt-get update" and "sudo apt-get upgrade" in the terminal.
- Verify camera connections: Check that the camera is properly connected to the Raspberry Pi. Ensure that the cable is securely plugged into the correct port, with the blue side of the cable facing the Ethernet port.
- Enable the legacy camera: If you are using an older version of the OS that requires manual camera enablement, open a terminal and type "sudo raspi-config". Go to "Interface Options", then "Legacy Camera", and enable the camera. Reboot your Raspberry Pi.
- Check firmware updates: Ensure that your firmware is up to date. This can be done by running the command "sudo apt-get update" in the terminal.
- Try a powered USB hub: If your camera is not detected, try plugging it into a powered USB hub to ensure it is getting enough power.
- Check camera support: Verify that your camera is supported by the Raspberry Pi. You can do this by running the command "vcgencmd get_camera" in the terminal. If "supported=0" is returned, it means the camera is not enabled or supported.
- Switch OS versions: If you are using a newer OS version with camera issues, you may need to switch to an older version. Some users have reported success by switching from Bullseye to Buster.
- Use libcamera: If using the latest Raspberry Pi OS (Bookworm), the camera may already be enabled by default when using libcamera. Try running the command "libcamera-still --list-cameras" to check if the camera is available.
Stream Yi Camera Footage to Your TV
You may want to see also

The camera may not be enabled
If you are unable to see the camera option on raspi-config, it may be because the camera is not enabled. This could be due to a number of reasons, including outdated software or an unsupported camera.
Firstly, check that your software is up to date by running the following commands in the terminal:
Sudo apt-get update
Sudo apt-get upgrade
If your software is up to date and you are still unable to see the camera option, try enabling the legacy camera option. To do this, open a terminal and type:
Sudo raspi-config
Then, navigate to Interface Options and select Legacy Camera. Reboot your device and check if the camera option is now available.
If you are using the Raspberry Pi OS release of Bullseye, you may need to enable legacy camera support as it uses the new libcamera API. This can be done by following the same steps as above and enabling the legacy camera option.
If you have an older camera that is not supported by the latest version of the operating system, you may need to downgrade to a previous version or use a different camera. Additionally, ensure that your camera is properly connected and supported by running the following command:
Vcgencmd get_camera
If the output shows `supported=0 detected=0`, it means that the camera is not enabled or detected. In this case, try using a powered USB hub to plug in the camera as it may not be getting enough power. You can also install the following tool to test your camera:
Sudo apt-get install luvcview
Troubleshooting Apple Watch Camera Issues
You may want to see also
Frequently asked questions
Your software might be too old. Try doing a sudo apt-get update and sudo apt-get upgrade.
Try selecting the bottom option - update raspi-config.
Change from bullseye to buster.
Open a terminal, type sudo raspi-config, go to Interface Options and then Legacy Camera and reboot.
The Pi OS release of Bullseye changed to a new libcamera API. Using the old tools requires Legacy Camera Support to be enabled.


