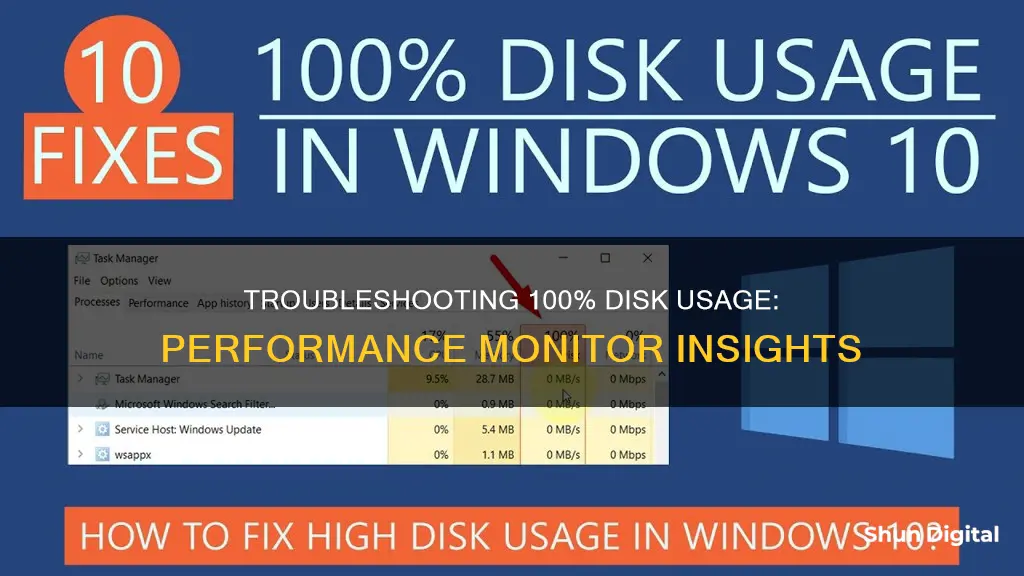
If your performance monitor shows 100% disk usage, it means your hard drive is overworking. This can be caused by a variety of issues, including high CPU or memory usage, background processes, insufficient disk space, and more. A slow computer is indicative of this problem, as are long load times for photos, videos, games, and streaming services.
There are several ways to resolve this issue, including restarting your computer, updating Windows, disabling the Superfetch service, resetting virtual memory, and performing a clean boot.
| Characteristics | Values |
|---|---|
| Restart your computer | Click the "Start" icon. Go to "Shut down or sign out > Restart." |
| Check for malware | Your security software should be able to deal with this. |
| Update Windows | Click the "Start" icon. Go to "Settings > Update & Security settings > Windows Update." |
| Fix disk error | Enter the following command: chkdsk E: /f /r /x |
| Stop the Superfetch Service | Press Windows + R or type Run in the Windows 10 search box. Type services.msc into the "Open" box and click the "OK" button. Now find "Superfetch". Right-click it > select "Properties" > click "Stop" on the pop-up windows > click "Disabled" from the 'startup type' drop-down menu. |
| Reset Virtual Memory and Increase the Ram | Press the Windows key + Pause/ Break key at the same time. Then, choose Advanced System Settings on the left panel. Go to the "Advanced" tab, then click "Settings". Go to the "Advanced" tab again, and choose Change in the Virtual memory section. Make sure that the Automatically manage paging file size for all drives checkbox is NOT ticked. Select your Windows drive (usually C:), and enter an Initial size and Maximum size for your virtual memory. Once you've entered your virtual memory values, click Set, then click "OK" to continue. |
| Clean Up Junk Files and Running Memory | Download and install EaseUS CleanGenius on your PC. Navigate to "Cleanup" and click "Scan." EaseUS CleanGenius will start immediately to scan all the useless files, select system junk files and invalid entries, and click "Clean" over all your PC. |
| Perform a Clean Boot on Windows 10 | Type msconfig in the start search and hit "Enter" to open "System Configuration." Click the "General" tab, and then click "Selective Startup." Clear the "Load Startup Items" checkbox, and ensure that "Load System Services" and "Use Original boot configuration" are checked. Click the "Services" tab. Select the "Hide all Microsoft services" checkbox. Select the item and then select "Disable all." Click "Apply/OK" and restart the computer. |
| Upgrade the Hard Drive to a Larger One | Connect the alternative hard disk to the computer (If it is a new hard disk, initialize it to an MBR disk). Go to the "Clone" tab, click "Clone OS Disk" or "Click Data Disk". And then click "Next" to continue. Select the source disk that you want to copy or clone. Then, select "Next". Choose the wanted HDD/SSD as your destination and click "Next" to continue. Check the warning message and click "Yes" to confirm. You can select "Autofit the disk", "Clone as the source" to customize your disk layout. Click "Start" to start cloning process. |
What You'll Learn

Restart your computer
Restarting your computer can be an effective first step in reducing disk activity and improving performance. When you restart your computer, you give it a fresh start by flushing your computer's RAM and stopping all the short-term tasks and data that may be slowing it down. This can also help to plug memory leaks and improve overall performance.
To restart your Windows device, simply open the Start Menu, click on Power, and select Restart.
While this may not help you identify the root cause of the issue, it is a good first step and may resolve the problem. If the issue persists, there are several other fixes you can try, including updating Windows, disabling certain services such as Superfetch and Windows Search, resetting virtual memory, and checking for malware or disk errors.
Monitoring Oracle 11g Performance: Tips and Tricks
You may want to see also

Check for malware
If your computer is running slowly and your Task Manager is showing 100% disk usage, it could be that your machine has been infected with malware.
If you have antivirus software installed, it should have caught the issue. However, nothing is perfect, so force your antivirus package to scan your hard drive for a potential infection. This could be time-consuming, but it might be necessary to identify and remove malicious software.
If you don't have antivirus software, install a dedicated cybersecurity solution such as Avast Free Antivirus or AVG AntiVirus FREE. These will scan your system and eradicate threats to your hard disk.
Anti-Glare Monitors: How to Spot and Verify?
You may want to see also

Update Windows
Updating Windows can be an effective way to fix 100% disk usage issues. Microsoft periodically releases updates to address problems and install new features, which can help improve overall system performance, including that of your hard drive.
Here's how to update Windows:
- Open the Start menu and click on Settings.
- Select "Update & Security".
- Choose "Windows Update" from the left sidebar and check for available updates.
- Download and install any available updates.
It's important to keep your system up-to-date to maintain security and fix bugs. While updates can be resource-intensive and cause temporary spikes in disk usage, they are crucial for the health of your device.
If you're experiencing 100% disk usage, it's worth checking for updates and installing them if available. This simple step can help resolve various issues, including high disk usage.
The Origin Story of ASUS Monitors: Where Are They Made?
You may want to see also

Fix disk error
If your Windows Task Manager is showing 100% disk usage, your hard drive is working at maximum capacity, which can cause performance issues for your computer. Here are some ways to fix this error:
- Restart your device: A simple restart can work wonders for your computer. This will flush your computer's RAM, stopping all the short-term tasks and data that are slowing down your computer.
- Update Windows: Microsoft periodically releases updates to address problems and install new features. These updates can sometimes resolve 100% disk usage issues.
- Reduce startup apps: Some programs run on startup by default. Limiting the number of startup apps is a quick and easy way to lower disk usage.
- Update device drivers: Your device drivers are how your software communicates with your computer hardware. Updating your disk driver can help get you below 100% disk usage by allowing your disk to communicate better with the programs it interacts with.
- Check for viruses: A computer virus or other malware may be the reason for high disk usage. If this is the case, a virus removal tool can get rid of infections and help to fix the issue.
- Clean junk files: Junk files are temporary files that your computer creates when you perform a task like browsing the internet or viewing an image. These files are only used once but can slow down your system and cause performance issues if they are not regularly deleted.
- Change energy options: Changing your energy options to "High Performance" could give your system a boost, although this may not directly impact 100% disk usage.
- Check for disk errors: A disk at 100% usage can be caused by errors on the disk, which can occur due to malware, corruption, power issues, physical damage, or other reasons. Running CHKDSK can help to check for errors on your Windows 10.
- Disable Superfetch: Superfetch is a Windows feature designed to improve performance by optimising your RAM. However, if you don't have the latest hardware, Superfetch can cause high disk usage. You can try disabling it, but if that doesn't help, re-enable it to reap the performance-boosting benefits.
- Reset virtual memory: Virtual memory is a storage management technique that lets your computer's RAM borrow space from your hard drive when it's overloaded. If you check your RAM and see that it's smaller than your main hard drive, adding more RAM to your system may be the best solution. If this isn't possible, you can try resetting your virtual memory.
- Disable Windows Search: Windows Search helps you search your computer, but it also pulls items from Bing, which can slow down your system. Disabling Bing will put less stress on your disk.
- Perform a clean boot: As a last resort, you can perform a clean boot to see what's causing 100% disk usage. This will restart Windows with a limited number of drivers and startup programs, allowing you to reinstall third-party programs one by one to identify any that are causing the issue.
Choosing the Right Monitor: Measure for the Perfect Fit
You may want to see also

Disable Superfetch service
Superfetch is a Windows feature that preloads the apps you use most frequently. By loading these programs in advance, Superfetch aims to speed up your PC. However, it can sometimes slow down your computer, especially if you have a hard disk drive (HDD).
Using the Services App:
- Open the Start Menu, search for "services", and launch the Services app. Alternatively, open the Run prompt by pressing the Windows key + R, then type "services.msc" and click OK.
- Scroll until you see "SysMain", right-click on it, and click "Stop".
- Right-click on "SysMain" again and select Properties. Under the General tab, change the Startup type to "Disabled" or "Manual" if you want to enable it when needed.
- Click OK and reboot your system.
Using the Command Prompt:
- Open the Start Menu, type "cmd", and select "Run as administrator". Click Yes when prompted.
- In the Command Prompt, type: "sc stop 'SysMain'" and press Enter.
- Next, type: "sc config 'SysMain' start=disabled" and press Enter.
- Close the Command Prompt and restart your computer.
Using the Registry Editor:
- Before editing the registry, it is recommended to back up the registry and create a System Restore point in case something goes wrong.
- Open the Start menu, search for "regedit", and select it from the results. Alternatively, open the Run prompt by pressing Windows key + R, then type "regedit" and click OK.
- In the Registry Editor, navigate to the following key: "HKEY_LOCAL_MACHINE\System\CurrentControlSet\Services\SysMain".
- In the right pane, double-click on "Start" and set the "Value data" to "4". Save the changes and reboot your computer.
Using Windows PowerShell:
- Open Windows PowerShell (Admin) and enter the following command: "net.exe stop 'sysmain'".
- Wait a few moments to check if your computer's performance has improved.
Disabling Superfetch can be beneficial if it is causing high disk usage, high CPU temperatures, or slowdowns. However, if disabling Superfetch does not improve your system's performance, you should turn it back on, as it is generally a helpful feature.
Honda HRV: Blind Spot Monitoring Availability and Variants
You may want to see also
Frequently asked questions
This could be due to a number of reasons, such as a temporary system glitch, a search loop, or a faulty/outdated device driver.
Try restarting your computer. If that doesn't work, you can try disabling certain services, such as Superfetch, BITS, and Windows Search. You can also check for problematic programs, run a virus scan, and update your drivers.
Some other common fixes include resetting virtual memory, disabling antivirus software, and checking the health of your disk.
If none of the above solutions work, it could be an indication of a hardware problem, such as a faulty hard drive or a power supply issue.


