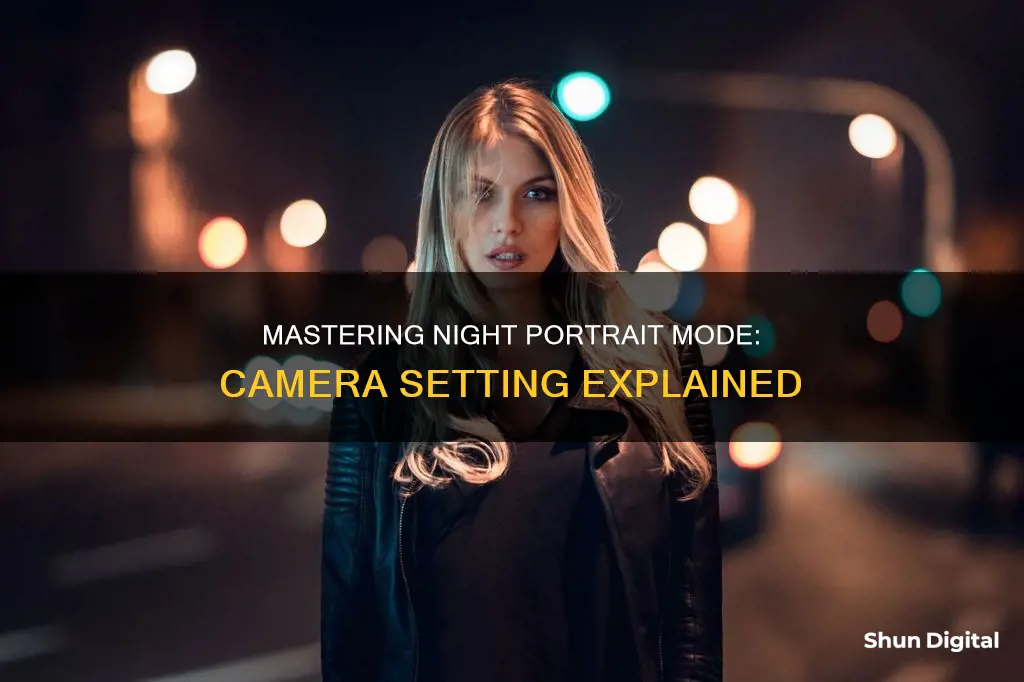
Night portrait mode is a camera feature that allows you to take detailed shots of a person standing in front of a nighttime background. When done well, night portrait photography can produce stunning, artistic, and creative results. However, it is considered a more advanced photography topic due to the challenges of shooting in low-light conditions. To capture a good night portrait, you will need to adjust your camera settings, including the aperture, shutter speed, and ISO, to compensate for the limited lighting while maintaining image quality.
| Characteristics | Values |
|---|---|
| Purpose | Capturing evenly exposed shots of a person standing in front of a nighttime background |
| Flash | Fires to enhance detail in the foreground |
| Shutter speed | Slows to capture a detailed, naturally lit backdrop |
| Camera | Takes several shots in rapid succession at different exposure levels |
| Tripod | Required for stability |
| Lighting | Use streetlights, neon signs, phone flashlights, etc. |
| ISO | 800 or above |
| Aperture | f/2.8 is ideal |
| Shutter speed | 1/30 of a second |
What You'll Learn

How to use night portrait mode on your smartphone
Night portrait mode is a setting on your camera that is designed to capture well-lit shots of a person standing in front of a nighttime background. When used correctly, night portrait mode will illuminate the subject and capture details in the background, resulting in a beautiful, ethereal image.
Step 1: Open your camera app
Locate and open the camera app on your smartphone. This is usually done by tapping an icon on your home screen.
Step 2: Find the night mode setting
Once you are in the camera app, navigate to the night mode setting. The location of this setting will vary depending on your phone model and operating system. On a Samsung Galaxy phone, for example, you would swipe and tap "MORE", then tap "NIGHT".
Step 3: Frame your shot
Point the camera at your subject and ensure they are standing in front of a nighttime background. Ensure there is enough distance between the subject and the background to achieve a good depth effect. Also, try to find a well-lit area, as this will improve the quality of your photo.
Step 4: Adjust settings (optional)
Depending on your phone model, you may be able to adjust certain settings such as the exposure duration and zoom. You can also adjust the level of background blur before or after taking the shot. Play around with these settings to find the best configuration for your photo.
Step 5: Take the photo
When you are happy with the framing and settings, it's time to take the photo! Simply press the shutter button to capture the image. Remember to keep your hand steady, as night mode photos are created by stitching together multiple shots.
Step 6: View and edit your photo
After taking the photo, you can view it in your phone's gallery or photo app. From here, you may be able to edit the photo to adjust the saturation, exposure, and contrast levels.
By following these steps, you can capture stunning night portraits that are full of light and detail. Remember to experiment with different settings and techniques to find what works best for you and your phone's camera. Happy shooting!
Understanding Camera Raw and Lightroom: Are They Similar?
You may want to see also

The best camera settings for night portraits
Night portrait photography is a type of portrait photography that is taken in low-light conditions, usually after the sun has set. It can be tricky to get right, but when done well, it can be stunning. Here are some tips for getting the best camera settings for night portraits:
Use Manual Mode or Aperture Priority Mode:
Avoid using Auto mode, as it will likely result in blurry or poorly exposed images. Instead, opt for Manual mode or Aperture Priority (AV) mode. Manual mode gives you full control over your camera settings, while Aperture Priority mode allows you to control the aperture and ISO while the camera selects the shutter speed.
Adjust Aperture, Shutter Speed, and ISO:
These three settings together determine the exposure of your photo. The aperture adjusts the depth of field, the shutter speed affects scene sharpness, and the ISO influences overall image quality. For night portraits, consider using a wide aperture (e.g. f/2.8) for a shallow depth of field effect, or a narrower aperture (e.g. f/8) for a sharper background. Choose a slow shutter speed (e.g. 1/160s or slower) to allow more light to enter the camera. Finally, set your ISO to 800 or above for a high ISO, keeping in mind that higher ISO values will introduce more noise to your image.
Use a Tripod:
Night photography often requires slow shutter speeds, which can lead to blurry images if your camera isn't steady. Invest in a sturdy tripod to keep your camera stable and reduce the risk of camera shake.
Pay Attention to Lighting:
Night portraiture relies on artificial lighting, such as streetlights, neon signs, or off-camera flashes. You can also use natural light sources like the moon or city lights. Play around with different light sources and positions to achieve the desired effect.
Experiment with Different Techniques:
Try using long exposures, continuous lighting, or black-and-white photography to create unique and artistic night portraits. You can also use light painting by shining a flashlight or phone flashlight on your subject during a long exposure.
Remember that night portrait photography takes practice, so don't be afraid to experiment with different settings and techniques to find what works best for you.
Launching Adobe Camera Raw: A Quick Guide
You may want to see also

How to use artificial light and natural light for outstanding effects
Night portrait photography is a challenging art that, when done well, can produce breathtaking results. The key to success lies in understanding how to use artificial and natural light to your advantage. Here are some tips to help you master this technique and create outstanding effects:
Using Artificial Light:
- Add an Artificial Light Source: Consider using an additional light source, such as a flash, to illuminate your subject and enhance your night portraits. This will give you more control over the lighting conditions and help you achieve sharper, well-exposed images.
- Use Continuous Lighting: Continuous lights, such as LED panels, provide constant illumination, allowing you to see the effects in real time. They are portable, lightweight, and often come with colour temperature adjustments, making them ideal for night portrait photography.
- Modify the Light: Use reflectors or diffusers to bounce light off surfaces and redirect it towards your subject. This will help soften shadows, reduce harsh glare, and create a more flattering effect.
- Experiment with Different Angles: Play around with the positioning of your light source to find the most flattering angles. Try using a light stand or an assistant to hold and aim the light as needed.
- Use a Tripod and Flash: By mounting your camera on a tripod and using a flash, you can capture a long exposure with a burst of light, freezing your subject while also illuminating the background.
Using Natural Light:
- Know When to Shoot: The best times for night portrait photography are the "blue hour" (20 minutes before/after sunset) and the "golden hour" (the last hour before sunset and the first hour after sunrise). These periods offer softer, warmer light that is more flattering to your subjects.
- Modify Natural Light: Use reflectors to bounce natural light towards your subject and fill in heavy shadows. Natural reflectors like walls, buildings, or cars can work, but portable reflectors designed for photographers are more versatile and effective.
- Adjust Your Camera Settings: Switch off Auto mode and use Aperture Priority, Shutter Priority, or Manual mode. Modify your aperture, ISO, and shutter speed to ensure proper exposure and prevent blur due to camera shake or subject movement.
- Find the Right Lighting Direction: Pay attention to the direction of natural light. For outdoor portraits, identify the position of the sun and use sidelight or backlight to create a three-dimensional effect. For indoor portraits, windows can serve as your main light source.
- Choose the Perfect Background: Select a background that complements your subject and their clothing. Look for areas with low contrast and darker tones to make your subject stand out.
- Include a Catchlight: Ensure there is a bright light source, such as the sun or a reflector, in front of your subject to create catchlights—small spots of light in their eyes that add life and depth to your portraits.
Charging Muvi Cameras: A Quick Guide to Powering Up
You may want to see also

How to capture gorgeous nighttime backgrounds
Night portrait photography is a challenging but rewarding endeavour. It can be tricky to get right, but when done well, it can produce stunning and artistic results. Here are some tips to help you capture gorgeous nighttime backgrounds:
Use the Right Gear
Having the right equipment is essential for successful night portrait photography. Here are some key items to consider:
- Camera: Look for a camera with good low-light performance, especially one with a high ISO range and large sensor.
- Lens: A lens with a low aperture setting is ideal, such as f/2.8 or lower. Prime lenses are excellent for night portraiture as they offer wider apertures at a lower price.
- Tripod: A tripod is crucial for stabilising your camera during long exposures, preventing blurry images.
- Flash: While not necessary, a flash can help illuminate your subject and freeze motion during slower shutter speeds. An off-camera flash provides more flexibility and control over your lighting.
- Light Stand: A light stand allows you to mount your flash and position it as needed.
- Modifiers: Flash modifiers like umbrellas, softboxes, and grids can help you achieve specific lighting effects.
Understand the Exposure Triangle
Mastering the exposure triangle is key to successful night portrait photography. Here's how each element of the triangle—aperture, shutter speed, and ISO—impacts your images:
- Aperture: A wider aperture (lower f-stop number) lets in more light but sacrifices depth of field. A narrower aperture (higher f-stop number) preserves depth of field but lets in less light.
- Shutter Speed: A slower shutter speed lets in more light but can result in blurry images if your subject or camera moves.
- ISO: A higher ISO compensates for low light levels but can create a grainy or noisy image.
Choose the Right Camera Mode
The right camera mode will give you control over your settings and help you achieve the desired exposure. Here are some options:
- Manual Mode: This gives you full control over aperture, shutter speed, and ISO. It's ideal for experienced photographers who want maximum flexibility.
- Aperture Priority Mode (AV): In this mode, you set the aperture and ISO, while the camera automatically selects the shutter speed. It's a good choice if you want control over depth of field but need assistance with exposure.
- Night Scene Mode: This mode fires the flash and uses a longer shutter speed. While it doesn't offer much control, it can be useful for beginners.
Find the Right Lighting
Lighting is critical for night portrait photography. Here are some tips for achieving the best lighting:
- Artificial Lighting: Look for sources of artificial light, such as streetlights, neon signs, or even a phone flashlight, to illuminate your subject.
- Off-Camera Flash: Using an off-camera flash gives you more flexibility and control over your lighting setup. You can use it to light your subject from different angles and create various effects.
- Continuous Lighting: Continuous lights, such as LED panels, constantly illuminate your subject, allowing you to see the lighting effects in real time. They are a good alternative to flash for beginners.
- Natural Lighting: While less common, natural light sources like moonlight or light from buildings can also be utilised for night portrait photography.
Compose Your Shot
The composition of your image is essential to creating a visually appealing night portrait. Here are some tips:
- Pay Attention to the Background: The background can make or break your shot. Look for interesting backgrounds with spots of light, such as streetlights or neon signs. Use wide apertures to create a shallow depth of field and make your subject stand out.
- Use Reflective Surfaces: Urban areas often have reflective surfaces like car windows or puddles that can add intrigue to your images. Experiment with different angles to capture unique reflections.
- Include Negative Space: Don't be afraid to include negative space in your composition. It can create a minimalistic and powerful image, especially when combined with the dramatic backdrop of the night.
- Frame Your Subject: Leave some negative space around your subject to ensure they remain the focus of the image. Use the rule of thirds to create balanced and eye-catching compositions.
D-Link Cameras: Privacy Mode, Really Private?
You may want to see also

The pros and cons of using a tripod
Using a tripod can greatly improve your night portrait photography, but it does come with some drawbacks.
Pros:
- A tripod allows you to shoot at any ISO, aperture, and without any camera shake, which is essential for night photography.
- It enables you to use a lower ISO, maximising dynamic range and minimising noise and grain.
- It gives you more freedom with settings, allowing you to use a smaller lens aperture and more precise focusing.
- It can help you capture long exposures, which is a technique used in night photography to create motion blur in water or capture star trails.
- It offers improved stability, allowing you to freeze the frame and spend more time evaluating the composition, focus point, etc.
- It slows you down, encouraging you to think more carefully about composition and light, resulting in more powerful and artistic shots.
- It frees up your hands, which is useful when juggling filters and lenses.
- It acts as a "save point," allowing you to return to the same viewpoint and settings even after exploring different angles.
- It is useful for panning during action photography, following moving subjects smoothly.
Cons:
- Tripods can be cumbersome, heavy, and expensive.
- They may be restrictive for photographers who work by instinct, seizing shots as they walk into a scene and finding angles that "look right."
- Finding a lightweight tripod that is also sturdy and stable can be challenging and expensive.
- They require time to set up and position, which may be a drawback when quick shooting is required, such as in wildlife photography.
- They may have many small parts that can get damaged or lost, especially when used outdoors in sandy or windy conditions.
- They may not be suitable for moving subjects or low-light sports photography, as tripod photography doesn't freeze action.
Charging Your Xiaomi Yi Camera: A Quick Guide
You may want to see also
Frequently asked questions
Night portrait mode is a setting on some cameras that allows you to capture detailed shots of a person standing in front of a nighttime background. It typically involves using a flash to enhance the foreground and slowing the shutter speed to capture a well-lit background.
Night scene mode also fires the flash and selects a longer shutter speed, but it doesn't give you as much control over your settings as night portrait mode does.
The ideal settings depend on the desired effect and lighting conditions. However, a good starting point is a high ISO (800 or above), a wide aperture (f/2.8 or wider if possible), and a slow shutter speed (1/30s or below) to capture more light.
In addition to your camera, a tripod is highly recommended to prevent camera shake during long exposures. A flash can also be useful, especially an off-camera flash that you can position more creatively. Other useful gear includes a light stand, flash modifiers, and a constant light source like an LED panel.
Experiment with camera movement and long exposures to create light streaks and abstract effects. Try using a wide aperture to create a shallow depth of field, or use a slow shutter speed to capture light trails from moving cars or the stars in the night sky. Play with lighting by seeking out spots of light, using continuous lighting, or adding colour grading during post-processing.


