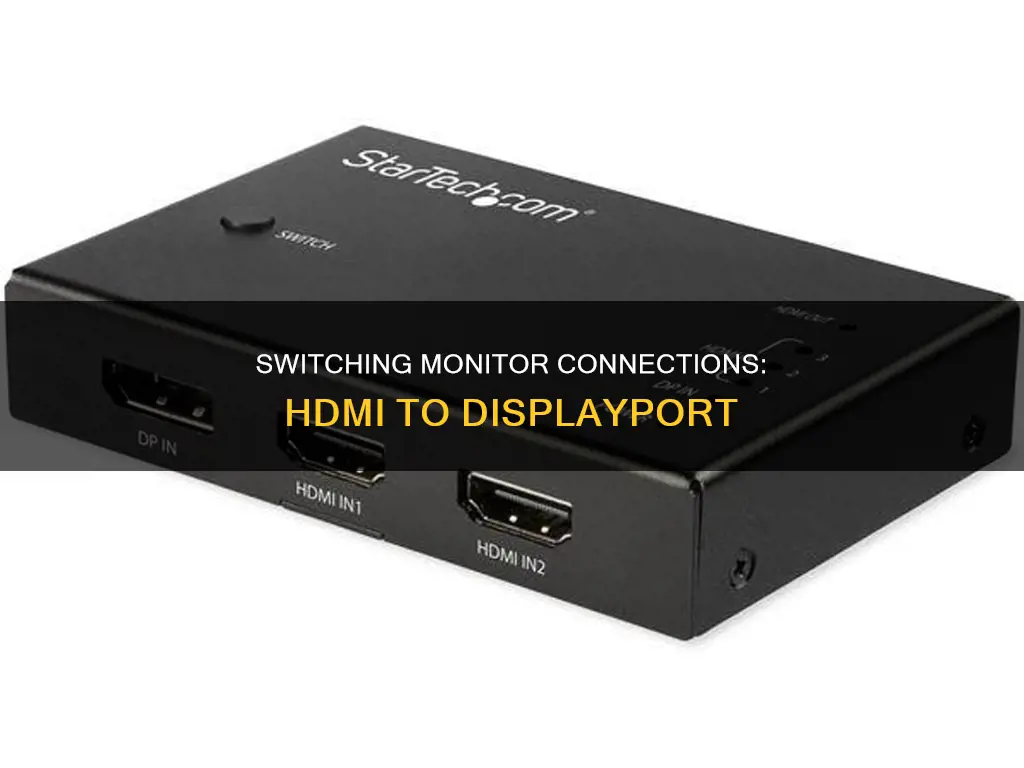
If you want to switch your monitor from HDMI to DisplayPort, you can use an adapter or a KVM switch. Adapters are available on Amazon and can be either passive or active. Passive adapters are cheaper but can only convert DisplayPort signals to HDMI, not the other way around. Active adapters can convert HDMI to DisplayPort but are more expensive. You can also use a KVM switch to connect multiple computers or laptops to a single set of keyboard, mouse, and monitors. KVM switches support various display modes and can be switched between devices using a mouse click, keyboard hotkey, push button, or wired remote.
| Characteristics | Values |
|---|---|
| Switching from HDMI to DisplayPort | Use a DisplayPort to HDMI adapter |
| Use a DisplayPort switcher | |
| Use a KVM switch | |
| Use a DVI-to-HDMI connection | |
| Use a docking station with dual video outputs |
What You'll Learn

Use a DisplayPort to HDMI adapter
If you're looking to switch your monitor from HDMI to DisplayPort, one option is to use a DisplayPort to HDMI adapter. This can be a simple solution, but it's important to note that not all adapters are created equal. There are two types of DisplayPort to HDMI adapters: passive and active. Passive adapters are generally less expensive, but they may not work with all devices. Active adapters are more expensive and use additional chips to perform the conversion, making them more compatible with a wider range of devices.
To determine which type of adapter you need, first check if your device supports dual-mode DisplayPort (also known as DP++). This information can usually be found in the product specifications or by looking for a
Another factor to consider is the direction of the conversion. Most DisplayPort to HDMI adapters are one-way, meaning they only work from a DisplayPort source to an HDMI sink. Converting from HDMI to DisplayPort typically requires an active adapter with additional power, and even then, there may be issues with reduced resolution or refresh rates.
When purchasing a DisplayPort to HDMI adapter, it's important to read reviews and choose a reputable brand to ensure compatibility and optimal performance. Additionally, some devices, such as newer laptops and tablets, may only support one type of connection (either HDMI or DisplayPort), so it's important to check the specifications of your device before making a purchase.
In summary, using a DisplayPort to HDMI adapter can be a straightforward way to switch your monitor from HDMI to DisplayPort, but it's important to consider the type of adapter, device compatibility, and direction of conversion to ensure a successful connection.
Removing the BenQ GW2480 Monitor Stand: A Step-by-Step Guide
You may want to see also

Use a KVM switch to connect multiple devices
Using a KVM switch is a great way to connect multiple devices to a monitor, especially if you have two computers and two monitors. A KVM switch allows you to control multiple computers from one set of peripherals, making it easy to switch between devices without the hassle of unplugging and plugging in cables.
Step 1: Choose the Right KVM Switch
There are a few things to consider when choosing a KVM switch:
- Compatibility: Make sure the KVM switch is compatible with your computer's ports and operating system.
- Number of Computers: Determine how many computers you want to connect to the KVM switch.
- Distance: Consider the distance between the computers and the KVM switch.
- Peripherals: Choose a KVM switch that supports the type of peripherals you have, such as USB 3.0 for high-power devices like 4K webcams.
Step 2: Prepare Cables, Adapters, and Hubs
Once you've chosen the right KVM switch, gather the necessary equipment. You may need adapters or a docking station if your devices' connector types are incompatible with the KVM switch. Additionally, some KVM switches may not come with HDMI cables, so you'll need to purchase those separately.
Step 3: Connect to Your Computing Devices
For each device, connect both the video output and USB port to the KVM switch. The ports are usually grouped and numbered, so make sure to put each cable in the right group to match the USB control and video output.
Step 4: Connect to Your USB Peripherals
If you're using a hotkey to switch between devices, connect your keyboard to the USB port marked for keyboard connection. For high-power USB devices, use a USB 3.0 port if available.
Step 5: Power Up the KVM Switch
Connect the power cable to the KVM switch and plug it into a power outlet. The power indicator should light up when the KVM switch is powered on.
Step 6: Test the KVM Switch
Finally, test the KVM switch by switching between the connected computers and ensuring that the monitor, keyboard, and mouse are responding as expected.
Here's an example of a KVM switch that can be used to connect multiple devices to a monitor:
The 2 Port HDMI + DisplayPort KVM Switch Dual Monitor 4K 60Hz CKL-622DH is perfect for connecting two desktops or laptops with HDMI and DisplayPort interfaces to share one set of peripherals, including a keyboard, mouse, and two monitors. It supports multiple switching modes, including mouse click, keyboard hotkey, push button, and wired remote. It also has USB pass-through technology for broader compatibility with wired and wireless keyboard and mouse devices. This KVM switch is compatible with multiple platforms and devices, including Windows, Linux, Mac, servers, webcams, game consoles, and more.
Removing the Lens on Your VTech VM342 Monitor
You may want to see also

Use a DisplayPort splitter to connect multiple devices
If you want to connect multiple devices to a single DisplayPort jack on your monitor, you can use a DisplayPort splitter. However, it's important to note that even with a splitter, you won't be able to use both computers at the same time and will need to ensure one is turned off while using the other to avoid any issues. Additionally, splitters do not offer a way to switch between the two computers.
A DisplayPort splitter will allow you to connect two computers to one DisplayPort input on your monitor. This can be useful if you want to use the full resolution of 2560x1440 px and don't want to use another port or adapter. For example, if you have a Windows computer with a standard DisplayPort output and a MacBook Pro with a Mini-DisplayPort output, you can use a splitter to connect both to a single DisplayPort input on your monitor.
Another option to achieve a similar setup is by using a DisplayPort to Dual-Link DVI adapter, although this option tends to be more expensive and may not include audio support.
It's worth mentioning that DisplayPort splitters are generally priced similarly to Dual-Link DVI adapters. Additionally, you can run audio separately to the screen for whichever computer you are using.
When considering a multi-monitor setup, "daisy chaining" is a useful term to know. It describes the ability to connect multiple devices together using a single connection between each pair of devices. This results in a less cluttered system configuration.
Ankle Monitors: ICE's Latest Move to Track Immigrants
You may want to see also

Use a graphics card software to switch between outputs
If you want to switch between HDMI and DVI outputs on your graphics card, you can usually do this via your graphics card software installed on your computer, which typically runs on the taskbar.
For example, if you have an Nvidia graphics card, you can use the Nvidia control panel to switch between outputs. To do this, go to Start > Control Panel, select the Nvidia control panel, and click on "Set up multiple displays". Then, turn off the display you want to swap out, and turn on the one you want to swap in. Make sure to do these steps in order.
You can also switch between outputs by opening the Screen Resolution settings on your computer. Right-click on your desktop and select "Screen Resolution". Then, select the display you wish to stop using, and change the "Multiple Displays" property to "Disconnect this display". Finally, select the display you wish to start using, and change the "Multiple Displays" property to "Duplicate" or "Extend", depending on your preference.
Removing Monitor Job in Employee Central with SuccessFactors
You may want to see also

Use a docking station with dual video outputs
If you're looking to switch from HDMI to DisplayPort, a docking station with dual video outputs is a great option. This setup allows you to connect multiple devices, such as keyboards, monitors, and phones, with ease.
IOGear Dock Pro
The IOGear Dock Pro is a versatile and reliable docking station that can be used vertically or horizontally. It offers an impressive array of ports, including three USB-A 3.0 ports, SD/MMC/Micro SD card slots, a 3.5mm audio in/out jack, a gigabit ethernet port, and both HDMI and DisplayPort outputs. One of its standout features is the ability to support up to four displays, making it a powerful option for those with extensive setups. It is compatible with most devices and can be powered by a power supply or USB-C for added versatility. However, it only has one USB-C port outside of the cable to the host device, and it can get warm during extended use.
Kensington SD5760T
The Kensington SD5760T is a slim and minimal docking station that provides a good assortment of ports. It offers dual HDMI outputs, a Thunderbolt 4 port, a Thunderbolt 4 host port, a USB-C 3.2 Gen2 10Gbps port, two USB-A 3.2 Gen2 10Gbps ports, two USB-A 3.2 Gen1 5Gbps ports, a gigabit ethernet port, and an audio combo jack. Additionally, it includes UHS-II 4.0 SD/Micro SD card readers. This docking station is ideal for those seeking fast USB-A ports and dual HDMI outputs. However, it only has one additional Thunderbolt port, and it is on the pricier side.
Plugable USB 3.0 and USB-C Universal Laptop Docking Station
This docking station is a great option for those using Windows, Mac, or ChromeOS. It features two HDMI ports, six USB ports, gigabit ethernet, and audio connectivity. It supports dual 4K monitors and provides a driverless setup for added convenience. This docking station is a good choice for those seeking a straightforward and compatible solution.
UGREEN 7-in-1 Revodok Pro USB-C Docking Station
The UGREEN Revodok Pro offers dual 4K HDMI monitor support, along with two USB-A and one USB-C 10Gbps data transfer ports. It also includes a 100W PD charging port, an SD card reader, and two additional USB 2.0 ports. This docking station is compatible with a wide range of devices, including MacBook Air/Pro, ThinkPad, and iPad Pro. It provides a good balance of features and performance at a reasonable price.
Baseus Laptop Docking Station
The Baseus Laptop Docking Station is a versatile option that can be powered by a DC port or USB-C, making it suitable for both desktop and on-the-go use. It features dual 4K@120Hz HDMI outputs, a 100Mbps LAN port, three USB ports, an SD card reader, and up to 85W PD charging. This docking station is compatible with a variety of devices, including iPhone 15, Mac, Dell, HP, Surface, and Steam Deck. It offers a good balance of portability and functionality.
Dismounting an ASUS Monitor: Step-by-Step Guide
You may want to see also
Frequently asked questions
You will need to purchase an adapter.
You will need an active HDMI to DisplayPort adapter.
You can buy one from Amazon.
They are considerably more expensive than passive varieties.
A passive adapter can convert a DisplayPort signal to HDMI, but not the opposite.


