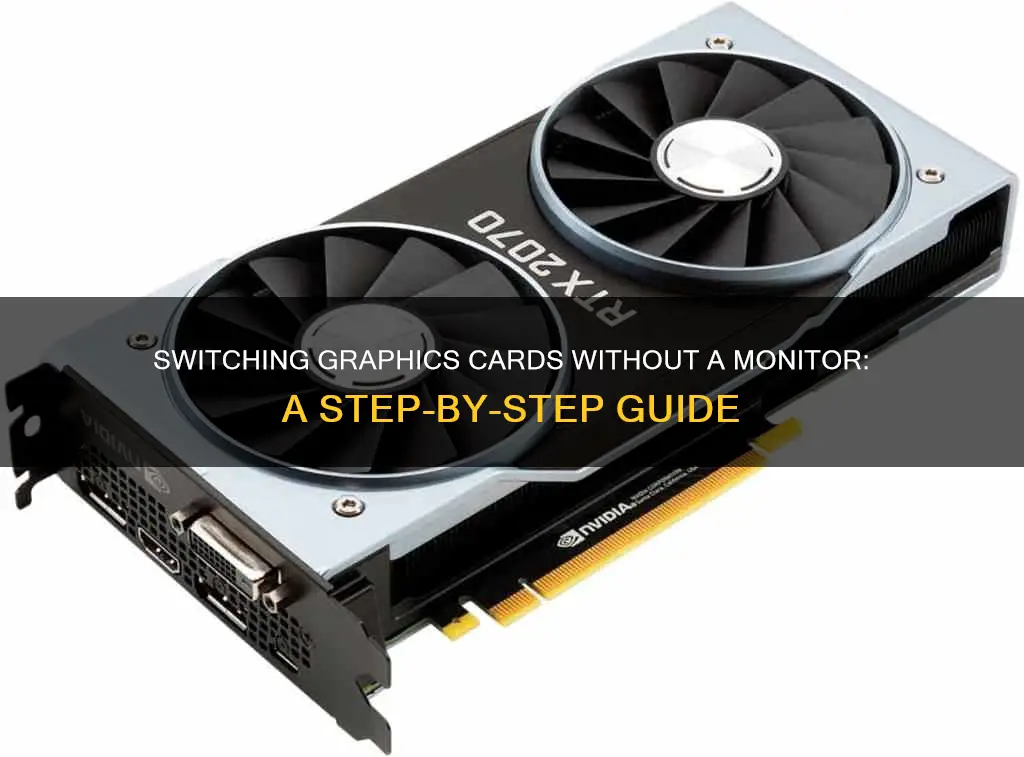
If you're looking to switch graphics cards on your laptop without using a monitor, there are a few methods you can try. Firstly, ensure that both your dedicated GPU and integrated GPU are installed and functioning. This can be done by opening the Start Menu, typing Device Manager, and checking under Display Adapters that both GPUs are listed. Once confirmed, you can try manually switching between the GPUs by right-clicking on the desktop and selecting the relevant control panel, such as the Nvidia Control Panel or AMD Radeon Settings. From there, navigate to the 3D or switchable graphics settings and choose your preferred graphics processor or mode. Additionally, updating your GPU and audio drivers can help resolve display switching problems and improve compatibility. Keep in mind that switching to a dedicated GPU may drain your laptop battery faster.
| Characteristics | Values |
|---|---|
| Reasons for switching graphics cards | To improve video performance and resolve issues with FPS, video quality, and resolutions for gaming and multimedia |
| Laptops with two GPUs | Dell laptops, ASUS gaming laptops |
| Steps to switch graphics cards | 1. Open the Nvidia Control Panel. 2. Click on "Manage 3D Settings". 3. Under the "Preferred graphics processor", choose your preferred setting. |
| Steps to assign a specific GPU | 1. Right-click on the desktop and select the Nvidia Control Panel. 2. Switch to "Manage 3D settings" in the left-hand pane. 3. Switch to the "Program Settings" tab. 4. Choose the relevant app under "Select a program to customize". 5. Choose the GPU you prefer under "Select the preferred graphics processor for this program". |
| Steps to update GPU drivers | 1. Press Windows Key + R, type devmgmt.msc, and hit Enter to open Device Manager. 2. Expand Display adapters and right-click each GPU (e.g. Intel HD Graphics and NVIDIA) to select "Update driver software". 3. Click "Search automatically for updated driver software" and restart your PC after updating. |
What You'll Learn

Check if both GPUs are working
To check if both GPUs are working, you can try the following methods:
- Check your GPU usage stats with GPU-Z: Download and load up two copies of GPU-Z, setting one to monitor the second GPU. Switch both to the sensors tab and tick the box to continue refreshing the screen while GPU-Z is in the background. Then, load up a game and check the GPU load stats. If the GPU load on both GPUs is reasonable, then the game is using both GPUs. Keep in mind that background programs can also load your GPUs, so if the usage is above 10%, it's likely that your game is utilising both cards.
- Show SLI visual indicators: In the Nvidia Control Panel, you can enable the option to "Show SLI visual indicators". This will display an indicator on your screen, showing whether SLI is active and if both GPUs are being used.
- Check your system information: Right-click on your desktop and look for Nvidia graphics settings or search for "system information" in your Windows search bar. This will provide information about your system, including the detection of your GPU.
- Try different cables and ports: Ensure that your GPU is connected to the correct port on your monitor and try using different cables (HDMI, DVI, DisplayPort) to see if there's an issue with the connection.
- Update your BIOS: If you're experiencing issues with a new GPU, it's possible that your BIOS needs to be updated to ensure compatibility with the latest hardware. Check your motherboard's website for the latest BIOS updates and follow the instructions to flash the new BIOS.
Troubleshooting an ASUS Monitor Not Detecting HDMI on MacBook Pro
You may want to see also

Update integrated GPU and NVIDIA GPU drivers
To update your integrated GPU and NVIDIA GPU drivers, you can use either NVIDIA's GeForce Experience software or go to NVIDIA's driver download page.
Using NVIDIA's GeForce Experience:
- Download and install the GeForce Experience software from NVIDIA.
- Follow the prompts and install the software, creating an account as you do so.
- Go to the Drivers tab in the top right corner of the app.
- Click "Check for Updates." If an update is already queued up, skip this step.
- Click "Download" next to the update.
- Choose your installation type. "Express Installation" is recommended for most users.
- Wait for the driver to install, then restart your PC.
Updating NVIDIA GPU Drivers Manually:
- Go to NVIDIA's driver download page.
- Fill out the dropdowns to match your graphics card. Specify if you're using a desktop or notebook GPU in the "Product Series" section.
- Under "Download Type," select the appropriate option for your usage. Gamers should use the "Game Ready Driver," while creatives may opt for "Studio Drivers."
- Click "Search." The website will display the latest available driver.
- Click "Download." The driver will be saved to your downloads folder.
- Open the launcher in your downloads folder.
- Click OK to select the extraction path.
- Wait while the driver is extracted.
- Choose whether you want to install the driver or both the driver and GeForce Experience. Click "Agree and Continue."
- Choose the installation type. "Express" is recommended, while "Custom" lets you select specific components.
- Wait for the installation to complete, then restart your PC.
Maximizing Performance: BenQ Monitors for the Ultimate Experience
You may want to see also

Update audio drivers
Updating your audio drivers can fix various sound issues and enhance your overall listening experience. Here are the steps to update your audio drivers on a Windows or macOS device:
Windows:
- Open the Windows Start menu by clicking the button with the Windows logo, usually in the taskbar's lower-left corner.
- Type "Device Manager" in the search bar and select it from the results.
- In the Device Manager, expand the "Sound, video and game controllers" section by clicking the arrow icon beside it.
- Right-click on your audio driver (e.g., "Realtek(R) Audio") and select "Update Driver."
- Choose "Search automatically for updated driver software." Windows will now look for the latest drivers.
- If a newer driver is found, follow the on-screen instructions to install it.
Alternatively, you can use Windows Update to update your audio drivers:
- Open the Settings app by pressing Windows + i on your keyboard.
- Select "Update & Security" from the menu.
- In the sidebar on the left, click "Windows Update."
- On the right pane, select "Check for Updates."
- If updates are available, download them by selecting "Download Now."
- Once the updates are downloaded, install them by clicking "Install Now."
- Finally, restart your Windows PC to apply the changes.
You can also download the latest drivers directly from your audio card manufacturer's website. Visit their website, choose your device model, and download the appropriate drivers. Then, run the downloaded file, and Windows will install the updated drivers.
MacOS:
- Click the Apple icon in the upper-left corner of the menu bar and select "System Preferences."
- Click "Software Updates."
- Your Mac will check for any available updates.
- Click "Update Now" to install all available updates, including driver updates.
- Alternatively, click "More Info" to see all updates and choose which ones to install.
Understanding Monitor Resolution and Picture Size
You may want to see also

Change the preferred GPU
To change the preferred GPU on a Windows 10 or 11 device, follow these steps:
Firstly, ensure your discrete graphics card is the main source of display. Verify in Device Manager/Display Adapters if the Discrete Graphics Card is greyed out. If it is, enable it in the BIOS settings or video card settings. Then, connect the video cable to the Discrete Graphics Card's port instead of the motherboard's back panel.
Next, you need to associate your desired applications with the GPU so your computer knows which one to use. By default, Windows decides which GPU to use for each application. From the Start Icon, type "Graphics Settings" and click the result from the System Settings. Browse your applications. If your application is not on the list, you will need to browse for the folder where the .exe file is located. Click on the application name/icon and set the application to your preferred GPU.
If you are using an Nvidia graphics card, you can also set your preferred GPU using the Nvidia Control Panel. Click on 3D Settings > Manage 3D Settings. Click on the Program Settings tab. Then, on the Global Settings tab, locate and select the Preferred Graphics Processor option. From the list, select the High-performance Nvidia Processor. You can also add programs individually, using the drop-down option. For the preferred graphics processor, select High-performance Nvidia Processor and click Apply.
Studio Monitors: Max Output Level—Good or Bad?
You may want to see also

Check which GPU is running an application
If you want to check which GPU is running a particular application, you can use the Task Manager. To do this, go to the Task Manager Processes tab, right-click on one of the columns, and click "GPU" to enable usage tracking. Then, scroll to the right when you're in the Performance tab to see GPU usage.
Alternatively, if you're using an Nvidia GPU, you can right-click on your desktop and select "NVIDIA Control Panel." Then, select "View" or "Desktop" in the toolbar and check "Display GPU Activity Icon in Notification Area." Finally, hover your mouse over the "GPU Activity" icon in the Windows taskbar to see a list of applications using the GPU.
For AMD GPUs, right-click on your desktop and select "AMD Radeon Settings." From there, click on "System" and then "Switchable Graphics." The Running Applications view will be displayed by default, showing you a list of recent and current applications using the GPU.
It's worth noting that by default, Windows defines the best GPU for each application based on preloaded profiles. Applications with specific GPU requirements will show a Lock icon next to their name and will always run on the Integrated GPU (Power-Saving Mode).
LCD Monitors: Can They Connect to Wi-Fi?
You may want to see also
Frequently asked questions
If you have an integrated GPU and a dedicated GPU, you can switch between the two by going into your Nvidia Control Panel. From there, you can navigate to the 3D settings and select the "preferred graphics processor" option.
On a Windows device, open the Start Menu, type "Device Manager", and select it from the results. Under "Display Adapters", expand the list and check if there are two GPUs listed.
Yes, open the Nvidia Control Panel, switch to the "Program Settings" tab, and choose the relevant app. Then, under "Select the preferred graphics processor for this program", choose the GPU you prefer.
Laptops have two GPUs to balance good performance and frugal battery use. The dedicated GPU is used for high-performance tasks like gaming, while the integrated GPU handles everyday tasks such as web browsing and video streaming.
On Windows 10, open the Task Manager and switch to the "Performance" tab. You should see two GPUs listed, with the active one showing an increased usage percentage.


