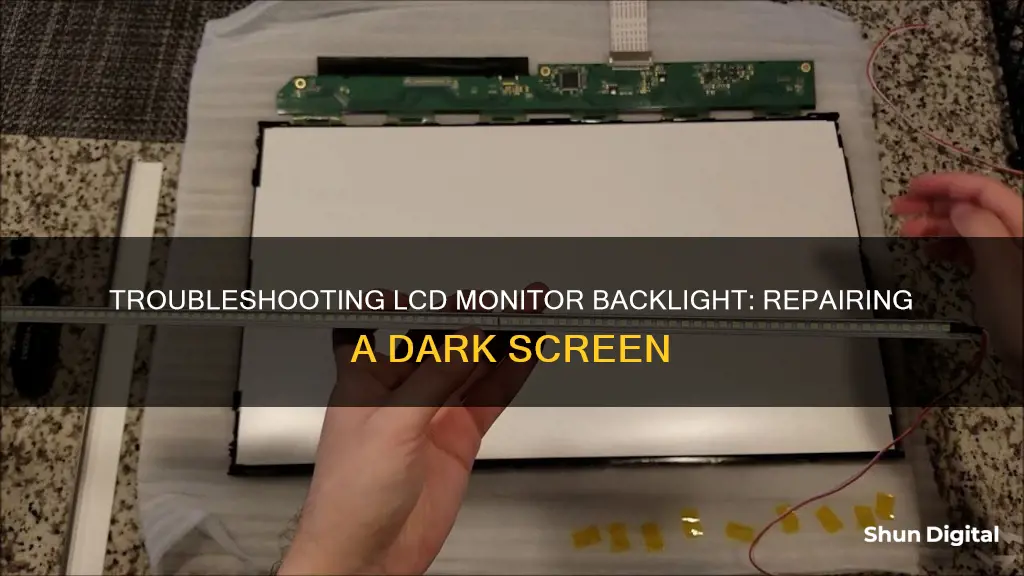
There are several reasons why your LCD monitor may not be displaying an image. If the power indicator lights are not turning on, the power supply is likely broken. This could be due to a blown capacitor, which you can replace yourself or by taking it to a professional repair service. If the power indicator lights are on but the screen is black, the monitor's backlight may be at fault. You can try replacing the backlight with a new working one, which is usually a cheap and simple repair. Alternatively, you can attempt a more creative fix by using the shell of a CRT monitor and an ordinary lightbulb to illuminate the LCD panel.
| Characteristics | Values |
|---|---|
| Problem | No backlight |
| Possible causes | High voltage inverter circuitry, bad power transistors, capacitors, thermal stress on the circuit board, broken solder joints |
| Solution | Replace the backlight |
| Tools | Small Phillips Screwdriver, Torx Screwdriver, Electrical Tape, Soldering Iron |
| Materials | Replacement CCFL (Cold Cathode Fluorescent Tube) |
What You'll Learn

Diagnose the problem
Diagnosing the problem with your LCD monitor is the first step to repairing it. There are several things you can check to identify the issue.
First, check your warranty. If it is still active, it is best to contact the manufacturer to repair the monitor for free or at a reduced price. If your warranty has expired, the next step is to check the power indicator lights. If your monitor won't display an image, turn it on and observe the lights at the edge of the monitor. If the lights turn on, there may be an issue with the power supply or one of its attachments. This could be caused by a blown capacitor. Other signs of a blown capacitor include a loud humming noise, lines across the screen, and multiple images. If the power indicator lights do not turn on, the power supply is likely broken, and you may need to repair or replace it.
If your monitor displays a black screen but the power indicator light is on, shine a flashlight on the monitor. If you can see the image when you point a light at the screen, the monitor's backlight is likely faulty and may need to be replaced.
If most of the screen works but a few pixels are stuck on one colour, you can try to fix this by keeping the monitor on and gently rubbing a pencil tip (or other blunt, narrow objects) wrapped in a damp, non-abrasive cloth over the stuck pixel. You can also try using stuck pixel repair software or purchasing hardware designed to plug into your monitor to repair dead pixels.
If your screen has spiderweb cracks or black splotches, this is a sign of physical damage, and the monitor may be beyond repair. However, if you want to try repairing it before replacing the monitor, you can try gently rubbing the scratch with a clean eraser or purchasing an LCD scratch repair kit.
If the picture on your monitor responds to input but displays a messy image, such as jumbled multicoloured squares, the AV (audio-visual) board may be damaged. In this case, you may need to replace the damaged parts or order a replacement board and install it.
Additionally, the main control buttons may be faulty, and you can try cleaning them with a metal cleaner or jostling them to attach a loose connection. If necessary, locate the circuit board they are attached to and re-solder any broken connections.
Monitoring Gas and Electricity Usage: Smart Meter Revolution
You may want to see also

Disconnect the power
Disconnecting the power is the first step when attempting to repair an LCD monitor with no backlight. This is an essential safety precaution to reduce the risk of electric shock. Before proceeding with any repairs, unplug the monitor from the power source. If the monitor is connected to a laptop or another battery-powered device, it is crucial to remove the battery. These steps are necessary to ensure your safety and prevent accidental damage to the device.
It is important to note that some components inside a laptop may still hold a charge even after the battery is removed. Therefore, it is advisable to exercise caution and refrain from touching any internal components until you have identified them. If you are unsure about handling electronic equipment, it is always recommended to seek professional assistance.
Additionally, it is good practice to work in a static-free environment and wear static-free clothing. Keep the work area clear of any objects that could generate static electricity, such as wool, metal, paper, lint, or dust. Working in a dry or wet environment should be avoided, as an ideal humidity level for this type of work is between 35% and 50%.
Before beginning any repairs, it is crucial to ground yourself to discharge any static electricity from your body. This can be done by touching the metal chassis of the monitor while it is still plugged into a grounded outlet but turned off. This simple step can help protect both you and the delicate electronic components from potential damage caused by static electricity.
In summary, disconnecting the power is a critical first step when repairing an LCD monitor with no backlight. It ensures your safety and reduces the chances of accidental damage to the device. By taking the necessary precautions, such as working in a static-free environment and grounding yourself, you can create a safer environment for repairing your LCD monitor.
Asus Monitor Model: A Quick Identification Guide
You may want to see also

Shine a flashlight on the monitor
If you can see the display on your LCD monitor when you shine a flashlight on it, it could be that the backlight is broken. This is mostly unfixable, and a repair would likely cost as much as a new monitor.
However, some people have found success with unconventional methods. One user on Hackaday found that shining a light on a corroded flexible circuit board fixed their Samsung TV. They soldered a USB light to a power rail on the TV and hot-glued it in place so that the light shone on the offending circuit. They noted that this is a very strange fix, and it is unclear why it works.
Another user on Reddit suggested a life hack:
> "When the signal goes through and you can see it if you shine a flashlight on the panel, but the backlight doesn't come on until you reboot the display."
Biggest Battle: Nintendo vs. Cab Monitor Size Wars
You may want to see also

Replace the backlight
If your LCD monitor is displaying a black screen but the power indicator light is on, the monitor's backlight may be faulty. You can replace it by following these steps:
Step 1: Disconnect the power source and open up the monitor. Unplug the monitor or remove the battery if it's a laptop. Then, unscrew the plastic case at each corner and carefully pry it apart with a plastic putty knife.
Step 2: Locate the backlight. The backlight is usually glass lights located just behind the glass display. You may need to unscrew additional panels or gently pull back flexible covers to find them. Be cautious as some components can deliver an electric shock. Avoid touching any circuit boards unless you are wearing rubber gloves.
Step 3: Purchase exact replacements. If you're unsure about the type of lights, take a photograph and show it to an employee at an electronics store. Provide the size of the lights or the size and model of your monitor for assistance in finding the correct replacement.
Step 4: Remove old lights and insert new ones. Exercise caution if the backlight is a cold cathode fluorescent light (CCFL) as these contain mercury and may require special disposal according to local laws. Gently remove the old backlight and insert the new one in its place.
Step 5: Test the display. Reattach all cables, panels, and components, and power on the monitor. If the monitor still won't light up, the problem may be with the circuit board powering the backlight, known as the "inverter" board. You can order a replacement inverter board and carefully install it, following a guide dedicated to your specific model.
Before attempting any repairs, it is important to note that most new computers come with a warranty. Check if your warranty is still active, and contact the manufacturer for repair or replacement options. Attempting repairs yourself may void the warranty. Additionally, always disconnect the power source before opening up any electronic device to avoid the risk of electric shock.
Turning Off Timer on Your ASUS ROG Swift Monitor
You may want to see also

Try additional repairs
If your LCD monitor is still not lighting up, the issue may be with the circuit board that powers the backlight. This is called an "inverter" board, and it is usually located near the backlight, with one "cap" for each strip of light. Before attempting to replace the inverter board, confirm that the monitor displays an image when you shine a light on the screen. If it does not, you may have not connected it correctly after replacing the light. Check for loose connections.
If the monitor still doesn't work, the problem could be with the high-voltage inverter circuitry, such as bad power transistors, capacitors, or thermal stress on the circuit board leading to broken solder joints. Fixing these problems can often be a short-term solution, as the bulbs have a limited lifespan, and the high-voltage power supplies are prone to failure.
If you decide to replace the backlight, be very gentle. The lights contain mercury and are very fragile. Do not use any force when removing the CCFL (Cold Cathode Fluorescent Tube) or it will break. Loosen the wires from the LCD first, then gently remove the CCFL. Take your new CCFL and insert the lamp exactly where the old tube was located. Again, be gentle, and this step will be easy. After inserting the new CCFL and routing the cables correctly, reassemble the LCD the same way you took it apart.
Cleaning LCD Monitors: Removing Dust Easily
You may want to see also
Frequently asked questions
The problem likely stems from the high-voltage inverter circuitry, such as bad power transistors, capacitors, or thermal stress on the circuit board leading to broken solder joints.
First, disconnect the power source and open up the monitor. Then, locate the backlight and purchase exact replacements at an electronics store. Finally, remove the old lights and insert the new ones.
You will need a replacement CCFL (Cold Cathode Fluorescent Tube), small and Torx Phillips screwdrivers, electrical tape, and a soldering iron.


