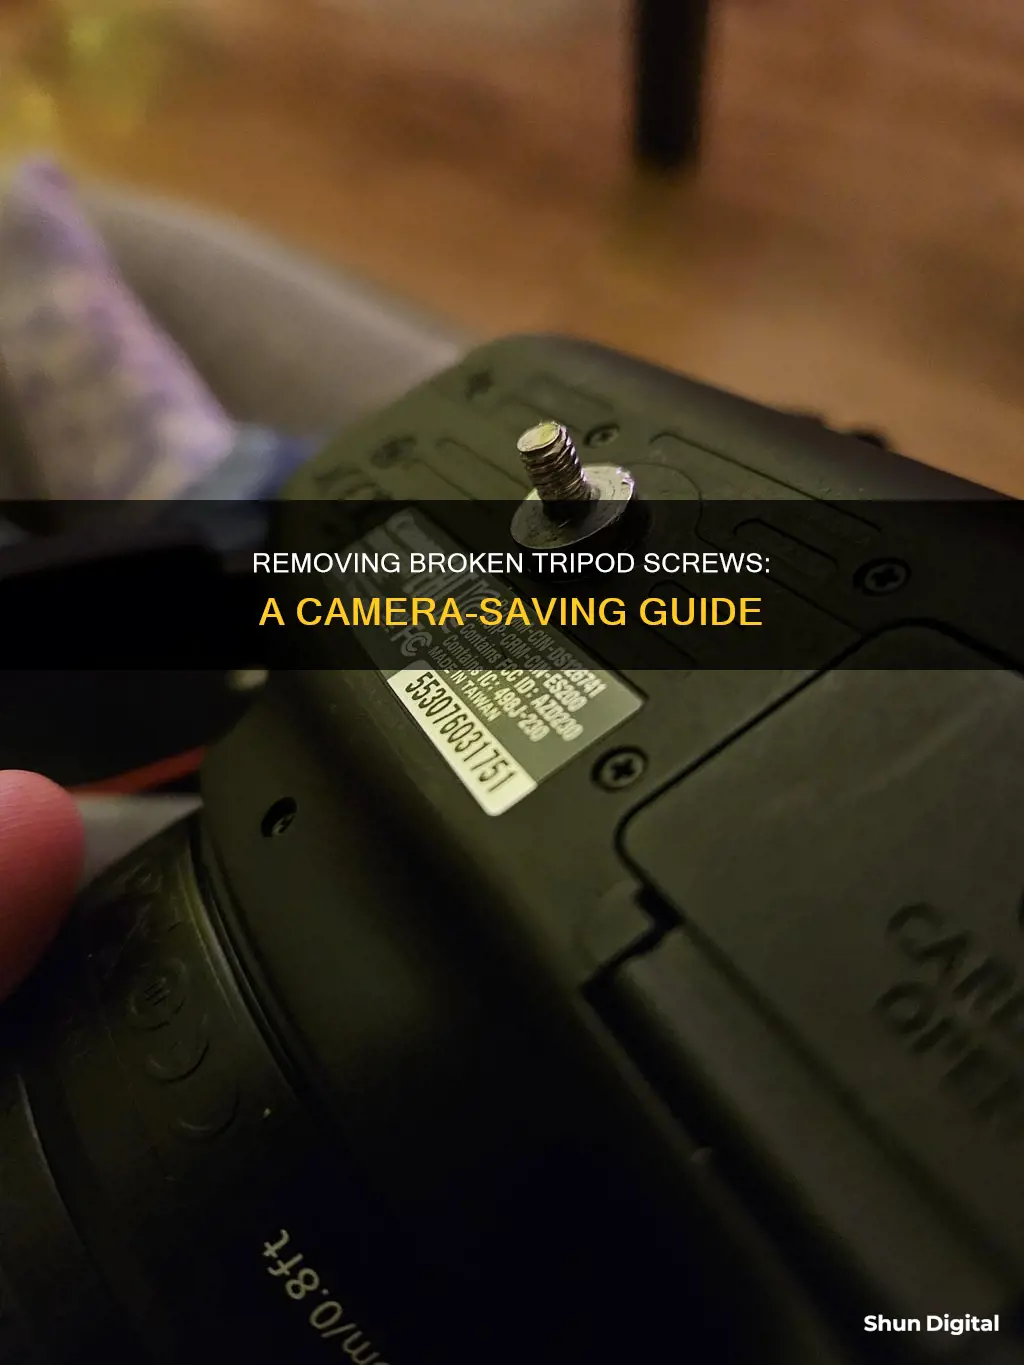
Removing a broken tripod screw from a camera can be a tricky task, but with the right tools and techniques, it is possible. One common suggestion is to use a screwdriver or needle-nose pliers to try and rotate the screw out. If that doesn't work, creating more friction by adding rubber or using a wrench with two nuts tightened against each other might do the trick. For more complex or challenging breaks, cutting a slot into the screw with a Dremel tool or drilling a small hole to use a screw extractor might be necessary. It's important to be cautious when attempting these methods to avoid causing further damage to the camera.
| Characteristics | Values |
|---|---|
| Use pliers | If enough of the screw thread is accessible, use pliers to grip and twist the screw out |
| Super glue | Super glue a thin, sturdy bar of metal to the screw and rotate it out; be careful not to get glue on the threads |
| Drill | Drill a small pilot hole and use a left-hand drill bit to remove the screw; lubricate the threads with alcohol |
| Screwdriver | Cut a slot in the screw head using a Dremel tool and unscrew it |
| Two nuts | Screw two nuts onto the thread and tighten them against each other, then use the bottom nut to unscrew the post |
What You'll Learn

Use a screwdriver or pliers to rotate it out
If the broken tripod screw is protruding from the camera, you can try to rotate it out with a screwdriver or pliers. If the screw broke off flush with the camera, you will need to file a slot into the screw head to use a screwdriver. If you can't get a grip with pliers, you can try to use two nuts tightened against each other to gain purchase. If the screw is broken off inside the camera, you will need to remove the bottom plate to access it.
Undoing Edits in Adobe Camera Raw: A Comprehensive Guide
You may want to see also

Drill it out
If you're looking to remove a broken tripod screw from your camera, one method is to drill it out. Here's a step-by-step guide on how to do this:
Step 1: Choose the Right Drill Bit
Before you start drilling, ensure you have the correct drill bit size. It's important to select a bit that is smaller than the broken screw. This will help you drill a centred hole without veering off and damaging the internal threads of the camera. If you're unsure, start with a smaller bit (1/16 inch or smaller) to create a shallow pilot hole before moving on to a larger bit.
Step 2: Drill the Screw
Drill a hole in the centre of the broken tripod screw. It's crucial to apply only light pressure and drill cautiously to avoid breaking the drill bit inside the screw. Breaking the bit would make the removal process much more challenging.
Step 3: Use a Screw Extractor
After drilling, the next step is to use a screw extractor. These are readily available at hardware stores and are designed to remove broken screws. Choose an extractor that fits the approximate size of your screw. Insert the extractor into the hole and tap it firmly with a hammer. Then, push down on the extractor while twisting it counterclockwise with locking pliers or a tap wrench. This action should engage the threads of the extractor with the screw, allowing you to twist it out.
Step 4: Alternative Methods
If the screw extractor doesn't work as smoothly as expected, there are a few alternative methods you can try. Firstly, you can tap the extractor into the screw with more force. Additionally, applying heat from a heat gun may help loosen the stuck threads. For metal screws, you can apply a penetrating lubricant and let it soak for about 30 minutes before attempting extraction again. Lastly, you can try enlarging the hole with a slightly larger drill bit and then reinserting the extractor.
Hooking Up a DVR to a Camera and TV: A Guide
You may want to see also

Use a screw extractor
If your tripod screw breaks off inside the camera, you can use a screw extractor to remove it. Here's a step-by-step guide:
Step 1: Assess the Situation
Before attempting any repairs, carefully examine the broken screw. How much of the screw is still protruding from the camera? Is it possible to grip the screw with pliers and attempt to remove it? If the screw is only slightly broken and you can get a good grip on it, you may be able to simply twist it out.
Step 2: Gather Your Tools
If the screw is more severely broken and cannot be easily gripped, you will need to use a screw extractor. Screw extractors can be purchased at most hardware stores and are relatively inexpensive. You will also need an electric drill. If possible, borrow or purchase a drill press, as this will help ensure that you drill straight and do not damage the camera body.
Step 3: Prepare the Drill
Drilling into your camera can be intimidating, so take the necessary precautions. Use a drill bit that is smaller than the threaded hole, such as a 3/16-inch or 1/8-inch bit for a 1/4-inch threaded hole. Choose a drill bit with a pilot point tip to help ensure the bit does not drift and damage the camera body. Place masking tape on the drill bit as a depth marker to prevent drilling too deeply.
Step 4: Drill a Hole
With your drill prepared, it's time to drill a hole in the broken screw. Place the drill bit at the center of the broken screw and drill a small hole. Drill slowly and carefully to avoid damaging the camera body. Drill only as deeply as necessary to create a hole for the screw extractor to grip.
Step 5: Use the Screw Extractor
With the hole drilled, it's now time to use the screw extractor. Choose a screw extractor that matches the size of the drill bit you used. Insert the screw extractor into the hole you drilled and twist it into the broken screw. Once the screw extractor has a firm grip, slowly and carefully twist the broken screw out of the camera.
Step 6: Clean Up
With the broken screw removed, you can now clean up any metal shavings or debris that may have fallen into the camera. Use a can of compressed air to blow out any debris, being careful not to blow it further into the camera body. If necessary, you can also use a small brush or cotton swab to gently remove any remaining debris.
By following these steps, you can safely and effectively remove a broken tripod screw from your camera using a screw extractor. Remember to work slowly and carefully to avoid damaging your camera, and always take the necessary precautions when working with power tools.
Where is the Camera on My Smart TV?
You may want to see also

Cut a slot and use a flat screwdriver
If your tripod screw is broken and stuck inside your camera, one of the methods to remove it is to cut a slot and use a flat-head screwdriver. Here is a step-by-step guide on how to do it:
Step 1: Get the Right Tools
You will need a Dremel multitool with a small engraving bit, a cutting or grinding disc, or a similar tool. Make sure the cutting or grinding disc is well-used and about half the size of a new one. You will also need a flat-head screwdriver.
Step 2: Cut a Slot
Use the multitool to cut a slot into the broken screw. The slot should be big enough for the flat-head screwdriver to fit into. Be careful not to cut too deep and damage the internal threads of the camera.
Step 3: Unscrew
Once the slot is cut, insert the flat-head screwdriver into it and use it to unscrew the broken tripod screw from the camera. Be gentle and careful during this process to avoid further damage to the camera.
Tips:
- If the screw broke due to a fall or a knock, it might be easier to remove than if it broke due to over-tightening.
- Before attempting to remove the screw, try using vice grip pliers to see if you can simply unscrew the broken piece.
- If you are not comfortable with this method, consider taking your camera to a repair shop.
The Camera's Eye: Watching You, Watching It
You may want to see also

Use super glue to attach a sturdy bar of metal and rotate it out
If your tripod screw is broken and stuck inside your camera, one possible solution is to use super glue to attach a sturdy bar of metal and rotate it out. Here are some detailed instructions on how to do this:
First, make sure you have the necessary materials: super glue, a sturdy bar of metal (such as a screwdriver or a dowel rod), and some painters tape (optional). It is also recommended to have some nail polish remover or rubbing alcohol on hand in case any glue gets on the threads of your camera.
Next, apply a generous amount of super glue to the broken screw inside your camera. Be careful not to get glue on the threads of your camera, as this could cause further issues. You can use painters tape to help protect the threads if needed. Make sure to put enough glue on the broken screw so that it goes up the sides of the metal bar, ensuring a strong adhesion.
Once the glue is dry, carefully attach the metal bar to the broken screw. Hold it firmly in place for a few seconds to ensure a strong bond.
Now, try to rotate the metal bar counterclockwise to unscrew the broken piece from your camera. Be gentle but firm, as you don't want to break the screw further or damage your camera.
If the screw is too tight to rotate by hand, you can try using a pair of pliers to get more leverage. Just be careful not to apply too much force, as you don't want to strip the threads or damage your camera.
If you are successful in removing the broken screw, great! Clean up any remaining glue with nail polish remover or rubbing alcohol. If the screw is still stuck, you may need to try a different method, such as using a screw extractor or drilling a small hole to insert an easy out tool.
Remember to always be cautious when performing any kind of repair on your camera, as further damage is possible. If you are unsure or uncomfortable with any of these steps, it may be best to seek professional help from a camera repair specialist.
Disable Camera and Microphone on Your TV: A Step-by-Step Guide
You may want to see also
Frequently asked questions
You can try twisting it out with a pair of pliers or rubber. If there is a bit of the screw sticking out, you can cut a slot in it with a hacksaw and then unscrew it.
You can use a screwdriver, a drill, a Dremel, or a screw extractor. If you use a drill, make sure to use a left-hand drill bit and drill in reverse.
You can use super glue or epoxy to attach a screwdriver, a dowel rod, or a cheap screwdriver to the broken screw, and then twist it out. Make sure not to get glue on the threads of the screw.


