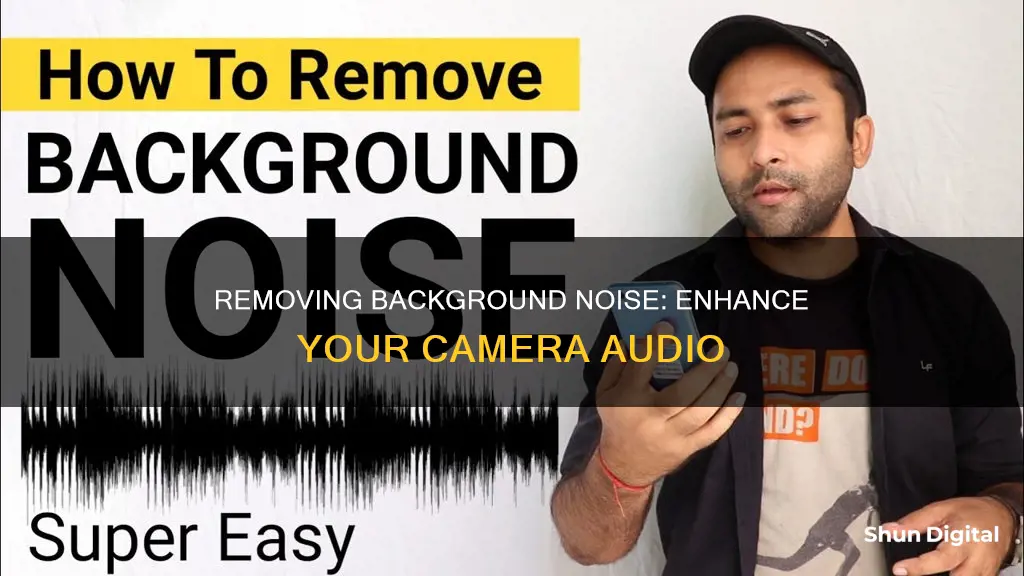
Background noise can be a nuisance, whether you're filming a video or recording audio. It can be anything from a buzz, murmur, hiss, or high-pitched sound, and it can negatively impact the quality of your content. Luckily, there are several ways to remove background noise from your recordings, and in this article, we will explore some of the best methods and tools available. From using AI-powered software to simple tips and tricks, we will provide you with all the information you need to achieve crisp and clear audio for your videos and recordings. Stay tuned, and let's dive into the world of background noise removal!
| Characteristics | Values |
|---|---|
| Software | PowerDirector, Media.io, VEED, Kapwing, Descript, Riverside |
| Noise Types | Wind, Rain, Traffic, Ticking Clock, Humming, Buzzing, Murmur, Hiss, High-Pitched Sound |
| Noise Sources | Fan, Electrical Equipment, Plosive Sounds, Clothing |
| Noise Reduction Techniques | Spectral Subtraction, Adaptive Filtering, Wiener Filtering, AI |
| File Types | MP3, M4A, OGG, MP4, MOV, VOB, MTS, AVI, FLAC, WEBM, WEBP, HEIC, MKV, FLV |
What You'll Learn

Use noise reduction settings during recording
Using noise reduction settings during recording is an effective way to minimise unwanted sounds and enhance the quality of your audio tracks. Here are some detailed instructions on how to utilise noise reduction settings during your recording sessions:
Choose the Right Recording Location
Start by selecting a quiet location for your recording. This may seem obvious, but it's crucial to minimise background noise. Avoid busy streets, airports, or construction sites, as these places can be loud and unpredictable. Instead, opt for isolated spaces like a closet, basement, or soundproof booth. If you can't find a completely quiet place, use sound-absorbing materials such as curtains, blankets, or foam panels to cover the walls and windows of your recording space to dampen external noise.
Select the Right Microphone
The type of microphone you use can significantly impact the amount of background noise in your recordings. Invest in a high-quality, directional microphone that focuses on capturing sound from a specific direction while minimising ambient noise. Different types of directional microphones, such as cardioid, supercardioid, and hypercardioid, offer varying sensitivity patterns. Choose the one that best suits your needs. For instance, if you're recording a single person, a cardioid microphone that picks up sound from the front and rejects sound from the sides and back might be ideal. On the other hand, for group recordings or instrument capturing, a supercardioid or hypercardioid microphone, which have narrower angles and reject more side noise, would be a better choice.
Position the Microphone Strategically
The placement and settings of your microphone play a crucial role in capturing clear audio. Place the microphone close to the sound source, ensuring it doesn't cause distortion or pops. Angle the microphone away from noise sources like windows, doors, or computer fans. Using a pop filter or windscreen can help reduce plosive sounds and wind noise, respectively. Additionally, consider using a shock mount or stand to minimise handling noise and vibrations.
Select Appropriate Audio Equipment
The quality of your preamplifier and audio interface can also affect background noise. Choose a low-noise preamp to ensure that the initial signal from your microphone is clean and free from unwanted noise artefacts. The built-in amplifiers in cameras are typically lower in quality than dedicated amplifiers, so investing in separate equipment might be beneficial.
Adjust Recording Levels
Using higher gain levels for the primary microphone can help minimise background noise during post-processing. Aim for a robust signal without pushing it to the point of clipping or distortion. This technique requires some experimentation to find the optimal settings for your specific recording scenario.
By following these steps and making use of noise reduction settings during recording, you can effectively minimise background noise and improve the overall quality of your audio tracks. Remember to experiment with different setups, placements, and settings to find what works best for your unique recording environment.
Removing Nest Cameras: A Step-by-Step Guide
You may want to see also

Use AI-powered tools to remove background noise
AI-powered tools are a great way to remove background noise from your camera recordings. These tools are designed to identify and eliminate unwanted sounds, enhancing the overall quality of your audio. Here are some popular options:
- Media.io: Media.io is an online AI noise reducer that supports various audio and video formats, including MP3, WAV, MP4, and MOV. It can remove different types of background noise, such as wind, rain, and traffic sounds, without damaging vocals and background music. Media.io also allows you to adjust the volume of the background noise and offers an unlimited free trial for registered users.
- Cleanvoice AI: Cleanvoice AI is a popular choice among podcasters as it can remove background noise and reverb from audio recordings and video podcasts. It is easy to use and does not require any installation or editing tutorials. Cleanvoice AI can handle various types of background noise, including cafe noise, traffic sounds, and white noise.
- Podcastle: Podcastle is an AI-powered audio and video creation platform that offers background noise removal, transcription, and editing tools. With Podcastle, you can easily remove background noise by uploading your file and selecting the "Magic Dust" option. The platform also allows you to cut, fade, trim, and add music to your recordings.
- Riverside: Riverside offers AI-powered background noise removal features for both video and audio recordings. You can enable noise reduction during your recording session, or use their "Magic Audio" feature to enhance sound quality, cancel echo, and reduce background noise during post-production. Riverside's mobile app also allows you to remove background noise from your recordings on the go.
- PowerDirector: PowerDirector is a video editing app available on iOS and Android devices, as well as Windows and macOS. It offers a user-friendly interface and powerful background noise removal features. With its "AI Audio Denoise" tool, you can select the type of audio (dialogue or music) and adjust the settings to remove background noise effectively.
These AI-powered tools offer convenient and efficient ways to remove background noise from your camera recordings, improving the overall quality and professionalism of your content.
USB Camera Content: Viewing and Understanding Your Footage
You may want to see also

Record in a quiet environment
Recording in a quiet environment is the best way to ensure that your audio is free from unwanted background noise. Here are some tips to help you minimise background noise during video recording:
Optimise Your Acoustic Environment
If you are recording indoors, you can optimise your acoustic environment by using sound-absorbing materials such as curtains, carpets, foam panels, or acoustic tiles. These materials help minimise reflections and echo, creating a quieter recording space and improving the overall audio quality.
Use a Directional Microphone
Consider investing in a high-quality directional microphone, such as a shotgun microphone. These microphones focus on capturing sound from the desired source while minimising background noise, resulting in clearer recordings. Attach the microphone to your camera or use an external audio recording device.
Attach a Pop Filter or Windscreen to Your Microphone
A pop filter is a mesh screen placed in front of a microphone to minimise plosive sounds like "p" and "b" sounds. Windscreens are made of foam or furry material and reduce wind noise and other air disturbances. These tools are very helpful for reducing background noise.
Position the Microphone Close to the Subject
Place the microphone as close to the subject as possible without interfering with the shot. This helps capture clear audio from the intended source while reducing ambient noise.
Be Mindful of Clothing Noise
When recording, it is recommended to wear clothing made from materials that are less likely to generate unwanted rustling or scratching sounds. Opt for fabrics like cotton, microfiber, or silk. Avoid wearing clothing with rough textures, sequins, or accessories that can cause disruptive audio artifacts.
By following these tips, you can significantly reduce background noise during video recording, resulting in clearer and more professional-sounding audio.
Locking Your Camera on Omegle TV: A Step-by-Step Guide
You may want to see also

Use a directional microphone
One of the most effective ways to remove background noise from your camera recordings is to use a directional microphone. This type of microphone is designed to focus on capturing sound from a specific direction, while minimizing sound from other sources. By using a directional microphone, you can significantly reduce unwanted background noise and improve the clarity of your recordings.
There are a few different types of directional microphones that you can choose from, each with its own unique characteristics:
- Shotgun Microphone: This type of microphone is highly directional and is commonly used in film and video production. It is designed to focus on capturing sound from a narrow field in front of it, making it ideal for recording speech or dialogue.
- Cardioid Microphone: Cardioid microphones pick up sound from a heart-shaped pattern in front of and to the sides of the microphone. They are often used for recording vocals or instruments in a studio setting, as they can effectively reduce sound from the rear and minimize ambient noise.
- Hypercardioid Microphone: Hypercardioid microphones have a tight pickup pattern, capturing sound from a narrow field in front of the microphone while rejecting sound from the sides and rear. This makes them ideal for use in noisy environments or for recording loud sound sources.
When choosing a directional microphone, it's important to consider the polar pattern, which indicates the direction and sensitivity of the microphone. Different polar patterns will affect the sound pickup, so selecting the right one for your specific needs is crucial.
Additionally, here are some tips to maximize the effectiveness of your directional microphone:
- Attach the microphone to your camera: By mounting the microphone directly to your camera, you can ensure that it captures sound from the same direction as your video recordings.
- Use a microphone stand: If you're using an external microphone, consider investing in a microphone stand to minimize unwanted noise caused by movement or bumps.
- Position the microphone close to the sound source: The closer the microphone is to the desired sound source, the clearer the audio will be, and the less ambient noise will be picked up.
- Use a pop filter or windscreen: Pop filters and windscreens can help reduce plosive sounds ("p" and "b" sounds) and minimize wind noise, respectively, resulting in cleaner recordings.
By following these tips and investing in a high-quality directional microphone, you can effectively reduce background noise from your camera recordings and achieve clearer and more professional-sounding audio.
Hacking School Security Cameras: A How-To Guide
You may want to see also

Use a pop filter or windscreen
A pop filter or windscreen is an essential tool to reduce unwanted noise when recording audio. They are especially useful when recording indoors, and their affordability means they are a great addition to any recording setup.
A pop filter is a tool that minimises the unwanted audio effects caused by plosive sounds, such as the 'p' and 'b' sounds. It is usually made of fabric or a fine mesh, held in front of the microphone on a mounting arm. When you speak, the rush of air associated with plosive sounds is intercepted and dispersed by the pop filter, preventing it from reaching the microphone’s sensitive diaphragm. This results in cleaner, smoother audio, free from harsh popping noises.
Pop filters offer several advantages:
- Plosive Sound Elimination: They reduce plosive sounds, ensuring clean and distortion-free recordings.
- Enhanced Clarity: By dispersing airflow, pop filters maintain the clarity and flow of spoken words, which is crucial for professional-grade audio production.
- Minimised Post-Processing: With fewer unwanted pops, editing time is significantly reduced, allowing for a more streamlined production process.
- Improved Mic Longevity: Pop filters prevent direct exposure to moisture and saliva, contributing to the longevity and durability of your microphone.
- Versatility: Pop filters are compatible with a wide range of microphones, making them a versatile and cost-effective addition to your setup.
A windscreen, on the other hand, is a protective cover made of foam or similar materials that fits over the microphone. While it also helps to reduce plosive sounds, its primary purpose is to shield the microphone from environmental factors that can degrade recording quality, such as wind, moisture, and dust.
The advantages of using a windscreen include:
- Environmental Protection: Windscreens protect microphones from wind, moisture, dust, and other outdoor elements, guaranteeing optimal recording quality.
- Versatile Application: They are suitable for a variety of microphones and are essential for field recording, live broadcasting, and outdoor settings.
- Reduced Ambient Noise: The foam material of windscreens provides sound absorption, minimising background noise and interference.
- Durability: Windscreens add a protective layer to microphones, increasing their lifespan by preventing damage from physical contact and environmental factors.
- Portability: Their lightweight design and easy installation make them convenient for on-the-go recording, especially for location sound professionals.
Both pop filters and windscreens are effective tools for reducing unwanted noise, and in some challenging recording conditions, using both together can provide the best results. The right choice depends on your specific recording environment and needs. If you primarily record indoors and need crystal-clear speech, a pop filter is ideal. However, if you often record outdoors or want a versatile option, a windscreen is a better choice.
Fire TV's Camera: Active Even When Idle
You may want to see also
Frequently asked questions
You can use an online tool such as Media.io or VEED.IO to remove background noise from a video on your computer. Simply upload your video file and select the type of noise you want to remove, then download and save the processed video.
Yes, Media.io is a mobile-responsive site that works on mobile browsers such as Chrome and Firefox. You can also use VEED.IO's video background noise removal tool on your mobile browser.
Media.io offers a free online tool to remove background noise from videos. You can also use Audacity, a free and open-source audio editing software available on Windows, Mac, and Linux.
Background noise removal typically involves techniques such as spectral subtraction, adaptive filtering, and Wiener filtering. These techniques analyse the audio signal and separate the desired audio from the background noise based on statistical analysis and frequency characteristics.


