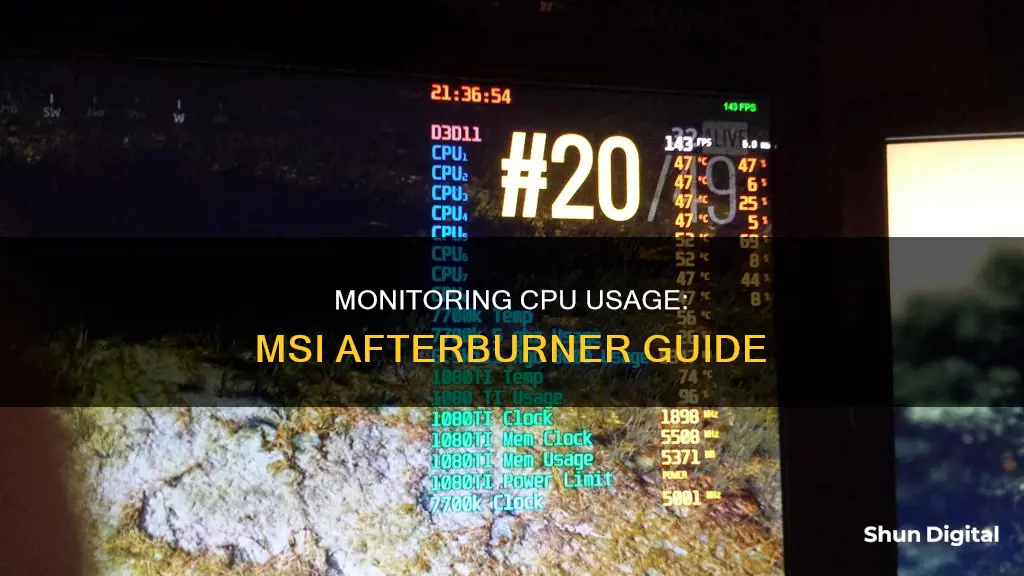
Monitoring your CPU usage is an important task, especially when gaming or performing other intensive tasks. MSI Afterburner is a popular tool for this purpose, but some users have reported issues with it not displaying CPU usage and temperatures. There are several troubleshooting steps you can take to resolve this issue, including updating to the latest GPU drivers, ensuring that the Show in OSD box is checked in the Afterburner settings, and running necessary software as an administrator. By following these steps, you can effectively monitor your CPU usage with MSI Afterburner and maintain optimal performance.
What You'll Learn

Download hwinfo
To download hwinfo, you can visit the official website at www.hwinfo.com. From there, you can find the download section to get the latest version of HWiNFO for your operating system.
HWiNFO is a system information and diagnostic tool that provides in-depth analysis and monitoring of your computer's hardware components. It supports a wide range of systems, including Windows and DOS, and is trusted by thousands of users, including large enterprises and hardware manufacturers.
The latest version of HWiNFO at the time of writing is v8.12, which offers several improvements and enhancements over previous versions. Here are some key features and changes introduced in version 8.12:
- Added LPDDR5(X) SPD support: This allows for better compatibility and performance with the latest memory technologies.
- Improved monitoring of DDR5 DIMM voltages: Enhanced voltage monitoring for DDR5 memory modules provides more accurate and detailed information.
- Ability to specify custom OSD coordinates: Users can now customize the on-screen display (OSD) by specifying their preferred coordinates.
- Enhanced enumeration and monitoring of network adapters: HWiNFO has improved its detection and monitoring capabilities for network adapters, providing more detailed information.
- Updated real-time monitoring with PresentMon: The integration of PresentMon in HWiNFO has been updated to provide more accurate real-time monitoring of system performance.
- Fixed reporting of GDDR6X clock: The reporting of the GDDR6X clock has been adjusted to match the command clock, ensuring accurate readings.
- Enhanced support for AMD CPUs: HWiNFO has improved its support for AMD CPUs, including the detection of DDR5 modules on next-generation AMD processors.
- Asynchronous sensor polling: This improvement enhances the responsiveness of HWiNFO, especially at higher sensor polling rates.
- Enhanced sensor monitoring on ASRock, ASUS, and GIGABYTE motherboards: HWiNFO has made specific enhancements to improve sensor monitoring on motherboards from ASRock, ASUS, and GIGABYTE, offering more detailed insights for users with these systems.
By downloading and installing HWiNFO, you'll be able to gain valuable insights into your computer's hardware, including information about your operating system, storage capacity, RAM, CPU, memory speed, and temperatures. This tool is particularly useful for users seeking driver updates, computer manufacturers, system integrators, and technical experts.
Monitoring Electricity Usage: A Guide to Tracking Your Power Consumption
You may want to see also

Check parameters and Show in OSD box
To set up MSI Afterburner's OSD, you'll need to download HWInfo64 to get extra CPU info and set it up to work with RTSS. You can then paste this text into Notepad and save it as a .ovl file, before loading that into the RTSS Overlay editor.
You can access the RTSS Overlay editor by going to Setup > Plugins > Overlay Editor. Once you've set up the OSD, you can check parameters and show them in the OSD box. This will allow you to monitor your CPU usage and other hardware stats.
The OSD can be customised with different fonts and colours, and you can also choose which parameters to display. For example, you can choose to show your CPU usage, RAM usage, GPU usage, or other metrics. You can also enable a frametime graph, which is useful for catching any stutters in your games.
The OSD can be toggled on and off with a button or a key, so you can easily hide it when you don't need to check your performance. Having the OSD on may cause a small performance hit, as RTSS is constantly polling hardware and grabbing and logging numbers, but this is unlikely to cause a noticeable FPS drop unless your CPU and GPU are already at 100%.
Electricity Monitors: Accurate or Deceitful?
You may want to see also

Update GPU drivers
It is important to keep your GPU drivers up to date to ensure you are getting the best performance and visual experience from your computer. Outdated drivers can cause sluggish and glitchy performance and can also pose a security risk.
For Windows 11:
- Open the Windows Start menu and click on Settings.
- Select Windows Update.
- Click on "Check for updates". All available updates, including GPU drivers, will be installed automatically.
For Windows 10:
- Click on the Start menu and then click on Settings.
- Select "Update & Security", and then click on "Check for updates".
- Any GPU driver updates will be installed automatically.
For Windows 7:
- Open the Windows Start menu and go to the Control Panel.
- Click on "System and Security", and then "Windows Update".
- Click on "Check for Updates" if you don't see any results. This will check for regular Windows updates and also look for new drivers.
- Look for GPU driver updates that mention manufacturer names such as Intel, NVIDIA, or AMD Graphics.
- If you see a GPU driver update, click on the Install button and wait for the installation to complete.
Alternatively, you can update your GPU drivers manually by downloading the latest drivers from the official websites of Intel, NVIDIA, or AMD. Once you have downloaded the driver, you can install it by following the steps below:
- Open the Windows Start menu and type "Device Manager". Click Open.
- Click on "Display adapters", then right-click on your graphics card and select "Update Driver".
- Click on "Browse my computer for driver software" and select the driver that you have downloaded.
- Click on "Let me pick from a list of available drivers on my computer".
- Click on "Have Disk" and then "Browse". Find the folder containing the new driver and double-click on the .inf file.
- Click on "Next" to install the driver. Your display may go blank temporarily, but when it comes back, the installation should be complete.
Monitoring Children's Internet Usage: A Guide for Parents
You may want to see also

Update MSI Afterburner and hwinfo
When updating MSI Afterburner and HWInfo, there are a few things to keep in mind to ensure compatibility and functionality between the two programs. Here are some detailed steps and considerations:
First, it is important to check for any updates for both MSI Afterburner and HWInfo. Keeping the software up to date ensures that you have access to the latest features, improvements, and bug fixes. Check the official websites or the update sections within the programs to find the latest versions.
If you are encountering issues with MSI Afterburner and HWInfo not working together, there are a few troubleshooting steps you can try. One common issue is related to the Shared Memory Support setting in HWInfo. By default, this setting is disabled in HWInfo version 7 and later, which can cause compatibility issues with MSI Afterburner. To resolve this, go to the main settings in HWInfo and enable Shared Memory Support. This will allow MSI Afterburner to read sensor data from HWInfo.
It is worth noting that the Shared Memory Interface (SHM) in HWInfo64 (non-Pro) is run-time limited to 12 hours. After 12 hours of usage, you will need to enable Shared Memory Support again.
Additionally, if you are using an older version of MSI Afterburner, you may need to update to a newer version that is compatible with the latest HWInfo releases. In some cases, rolling back to an older version of HWInfo that is known to work with your MSI Afterburner version may be a temporary solution until official compatibility is restored.
Another consideration is the specific features you want to use between the two programs. For example, if you want to display sensor values from HWInfo via the MSI Afterburner On-Screen Display (OSD) server, you may need to refer to specific instructions provided by HWInfo or MSI. This may involve configuring the OSD settings within MSI Afterburner to display the desired HWInfo sensor data.
Lastly, if you encounter persistent issues, it is recommended to seek support from the official forums or communities for MSI Afterburner and HWInfo. There, you can find a wealth of knowledge and assistance from other users who have encountered similar problems. The development teams are also usually active in these forums and can provide guidance or updates on known issues.
Monitor Data Usage: Simple Tips for Combating Overage
You may want to see also

Run software as administrator
Running MSI Afterburner as an administrator will allow the program to access restricted parts of your Windows 10 system that would otherwise be off-limits. This can be necessary for certain programs to work correctly, such as utility programs that require deep access to perform diagnostics on your file system, configure storage devices, or change the settings of certain devices installed in your system.
There are several ways to run a program as an administrator on Windows 10. Here are the steps you can follow:
From the Start Menu
- Open the Start Menu.
- Find the shortcut of the program you want to launch in the All Apps list.
- Right-click or press-and-hold on the program icon.
- Click or tap on the "More" option in the contextual menu.
- Select "Run as administrator" from the "More" menu.
Using a Keyboard Shortcut
- Open the Start Menu.
- Locate the shortcut of the program you want to launch as administrator.
- Hold down both the Ctrl and Shift keys on your keyboard.
- Click or tap on the program's shortcut.
From the Desktop Shortcut
- Find the desktop shortcut for the program.
- Right-click or press-and-hold on the shortcut.
- Select the "Run as administrator" option from the contextual menu.
From the Taskbar Shortcut
- Right-click or press-and-hold on the program's taskbar shortcut.
- Right-click or press-and-hold again on the program's name.
- Choose "Run as administrator" from the menu that opens.
From the Right-Click Menu
- Open File Explorer and find the program's executable file.
- Right-click or press-and-hold on the file.
- Click or tap on "Run as administrator" in the contextual menu.
From File Explorer's Ribbon
- Find the program's main executable in File Explorer.
- Select it and click or tap on the "Manage" tab in the ribbon.
- Click or tap on the "Run as administrator" button in the "Application Tools" section.
By running MSI Afterburner as an administrator, you will be granting it elevated privileges, which can be necessary for certain functionality to work as expected. However, it is important to exercise caution as this also grants the program access to restricted parts of your system, which could potentially be exploited by malicious software.
Monitoring KWH Usage: A Simple Guide to Energy Tracking
You may want to see also
Frequently asked questions
To monitor CPU usage with MSI Afterburner, ensure that you have downloaded hwinfo and that the latest versions of your GPU drivers, MSI Afterburner, and hwinfo are installed. Also, ensure that the “Show in OSD” box is checked in the Afterburner settings.
If MSI Afterburner is not displaying CPU usage, try right-clicking on the HWINFO64 taskbar and opening the settings. Check the "Shared Memory Support" box to enable your CPU temp to appear on the OSD in-game.
To display GPU and CPU usage on-screen or in-game, ensure that you have downloaded hwinfo and that the latest versions of your GPU drivers, MSI Afterburner, and hwinfo are installed. Also, ensure that the “Show in OSD” box is checked in the Afterburner settings.


