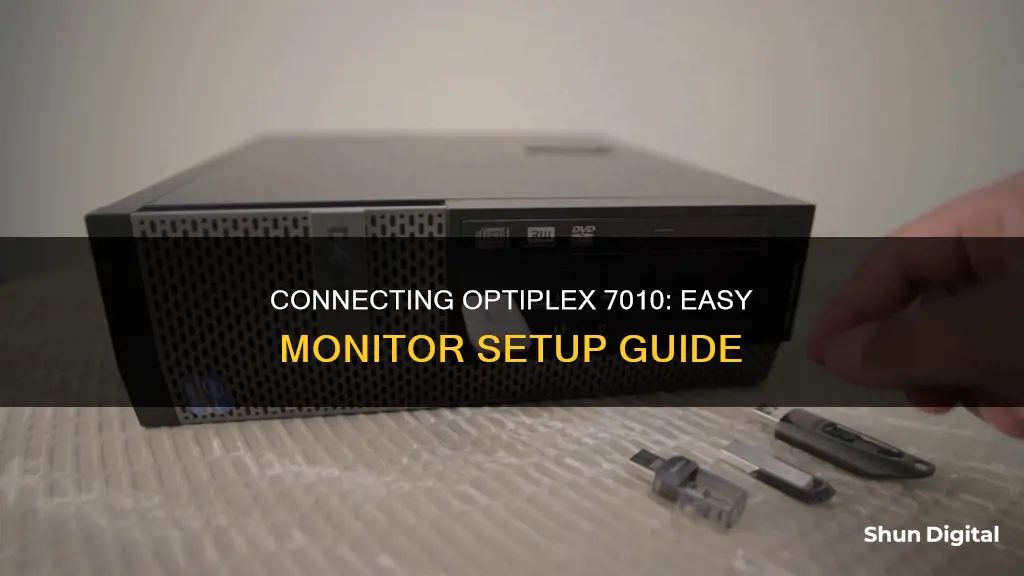
The Dell OptiPlex 7010 is a desktop computer that can be connected to one or more monitors. The specific ports available on the OptiPlex 7010 depend on the model, but they typically include VGA, DVI, HDMI, and DisplayPort options. To connect a monitor to the OptiPlex 7010, users will need to power off the computer and monitor(s), connect the desired cable (VGA, DVI, HDMI, or DisplayPort) from the monitor to the corresponding port on the OptiPlex, and then power on the monitor(s) and computer.
For users looking to set up multiple monitors with their OptiPlex 7010, there are a few additional considerations. Firstly, it is important to ensure that the computer's BIOS settings are configured to enable multiple displays. This can be done by accessing the BIOS during the boot-up process (usually by pressing F2) and checking or changing the relevant settings. Additionally, some OptiPlex 7010 models may require the use of adapters or splitters to connect multiple monitors. For example, one user reported success by using a combination of DisplayPort to DVI adapters and a DVI splitter to connect three monitors. Another user recommended using either two native Display Port monitors and one VGA monitor, or two ACTIVE Display Port to DVI (or other adapter types) and a VGA monitor to achieve a three-monitor setup.
What You'll Learn

Connect the monitor using VGA, DVI, HDMI, or DisplayPort cable
To connect your monitor to your Dell OptiPlex Tower 7010, you can use a VGA, DVI, HDMI, or DisplayPort cable. The steps to do this are:
- Power off your computer and monitor.
- Attach a VGA cable from your VGA monitor to one of the VGA ports on the back of your Dell OptiPlex.
- If your computer only has DVI ports, attach a DVI-to-VGA adapter to the DVI port and connect the VGA cable to the adapter.
- If your monitor is a DVI monitor, plug a DVI cable directly into a DVI port.
- If your OptiPlex requires a Y-adapter, plug the single connection end of the Y-adapter into the VGA port, and plug the monitor's VGA cable into one of the two VGA ports on the adapter.
- Power on your monitor and computer.
- Log in to Windows.
You can also connect two monitors to your Dell OptiPlex Tower 7010. To do this, simply repeat the steps above for the second monitor. Once both monitors are connected, press "Win-P" and click "Extend" to use both monitors as one large desktop.
If you are connecting three monitors to your Dell OptiPlex 7010, you may need to install an additional video card. One user recommends installing an EVGA GeForce 210 512MB DDR3 PCI-E 2.0 card and checking the "Allow Multiple Monitors" box in the Video settings of your BIOS. Another user suggests using either two native Display Port monitors and one VGA monitor, or two ACTIVE Display Port to DVI (or other) adapters and a VGA monitor connected to the VGA port.
Monitoring PlayStation Usage: Parental Control and Time Management
You may want to see also

Connect the keyboard and mouse to the computer
To connect the keyboard and mouse to your Dell OptiPlex Tower 7010, first locate the USB ports on the back of the computer tower. There should be two USB 2.0 (480 Mbps) ports and two USB 3.2 Gen 1 (5 Gbps) ports. You can also use the two USB 2.0 ports with Smart Power On on the back of the tower.
Once you have located the USB ports, take the USB cable for your keyboard and plug it into one of the available ports. Make sure the cable is pushed in firmly. Repeat this process with the mouse, connecting it to another available USB port.
If you are using a wireless keyboard and mouse, you will need to insert the provided USB receiver into one of the available USB ports. This will allow your computer to communicate with the wireless devices.
After connecting your keyboard and mouse, you can proceed to the next steps of connecting the Ethernet cable or joining a wireless network, connecting the monitor, and powering on the computer.
Connecting a Desktop to a Projector: Monitor Setup
You may want to see also

Connect the power cable to the computer
To connect the power cable to your Dell OptiPlex 7010, first ensure you have the correct power cord for your device. The OptiPlex 7010 uses a 3-prong power cable. You can purchase a replacement or additional power cord from Amazon or the Dell website.
Once you have the correct power cable, follow these steps:
- Plug the power cord into the power port on the back of the computer tower. The power port is usually located near the rear of the tower and is often labelled with a power symbol or the word 'POWER'.
- Plug the other end of the power cord into a power outlet.
- If your power outlet is controlled by a switch, make sure the switch is in the 'on' position.
- Press the power button on your Dell OptiPlex 7010 to turn it on.
Note: If you are connecting multiple devices, such as external hard drives, you may need additional power adapters or splitters to ensure you have enough power connections.
GamePlus on ASUS Monitors: What You Need to Know
You may want to see also

Connect the Ethernet cable to the computer
To connect the Ethernet cable to your Dell OptiPlex 7010, first locate the Ethernet port on the back of the computer tower. The OptiPlex 7010 has two RJ45 Ethernet ports, one 1 GHz port, and one optional 2.5 GHz port. Once you've located the port, follow these steps:
- Plug one end of the Ethernet cable into the appropriate port. The cable should click into place.
- Connect the other end of the Ethernet cable to your router or network source.
- Ensure the cable is securely connected to both the computer and the network source.
- You can now access the internet through your wired connection.
Note: If you prefer a wireless connection, you can connect to a Wi-Fi network instead of using an Ethernet cable.
Desktops and Monitors: What Cables Are Included?
You may want to see also

Press the power button and turn on the computer
Now that you have connected the keyboard, mouse, Ethernet cable, monitor, and power cable to your Dell OptiPlex 7010, you are ready to turn on your computer.
To do this, simply press the power button, which is located on the front panel of the computer tower. The power button should be clearly labelled and is typically larger than the other buttons. Once you have located the power button, press it firmly.
If you have connected your computer correctly, pressing the power button will initiate the boot-up process. You will know that your computer is turning on as internal fans will begin to spin, and you may see lights on the front panel of the tower illuminate. You may also hear a series of beeps, which is the computer's POST (Power-On Self-Test) code, indicating that the hardware is functioning correctly.
After pressing the power button, the computer will go through its boot sequence, and you will see images and text displayed on your monitor. You may be prompted to enter the BIOS (Basic Input/Output System) settings, especially if this is the first time you are turning on the computer. If so, follow the on-screen instructions to configure the BIOS settings according to your preferences.
Once the boot sequence is complete, you should be taken to the operating system's login screen or desktop environment, depending on your settings. At this point, your Dell OptiPlex 7010 is fully turned on and operational.
If you encounter any issues during the boot-up process, such as the computer failing to turn on or displaying errors, refer to Dell's troubleshooting resources for guidance on resolving common issues.
Connecting Your Nikon D3300 to a Monitor
You may want to see also
Frequently asked questions
First, power off your computer and monitor. Then, attach a VGA cable from your VGA monitor to one of the VGA ports on the back of your Dell OptiPlex. If your computer only has DVI ports, attach a DVI-to-VGA adapter to the DVI port and connect the VGA cable to the adapter. If your monitor is a DVI monitor, plug a DVI cable directly into a DVI port.
If you want to connect two monitors to your Optiplex 7010, you can do so by plugging the second monitor into the second VGA or DVI port on the OptiPlex or its Y-adapter. This follows the same procedure as connecting the first monitor. Then, power on your monitors and computer and log in to Windows.
Press "Win-P" and click "Extend" to use both monitors as one large desktop.
You can manually configure your monitors by right-clicking on an empty area of the desktop and selecting "Screen Resolution." Click each displayed monitor and manually select its screen resolution from the Resolution drop-down menu. You can also drag the monitors' graphics to simulate your physical arrangement.
You will need to install an additional video card. Once the additional video card is installed, an error message will appear stating that there is a non-standard video setup present. Choose F2 and go to the Video settings, then check the "Allow Multiple Monitors" box. By default, the multiple monitor option is turned off.


