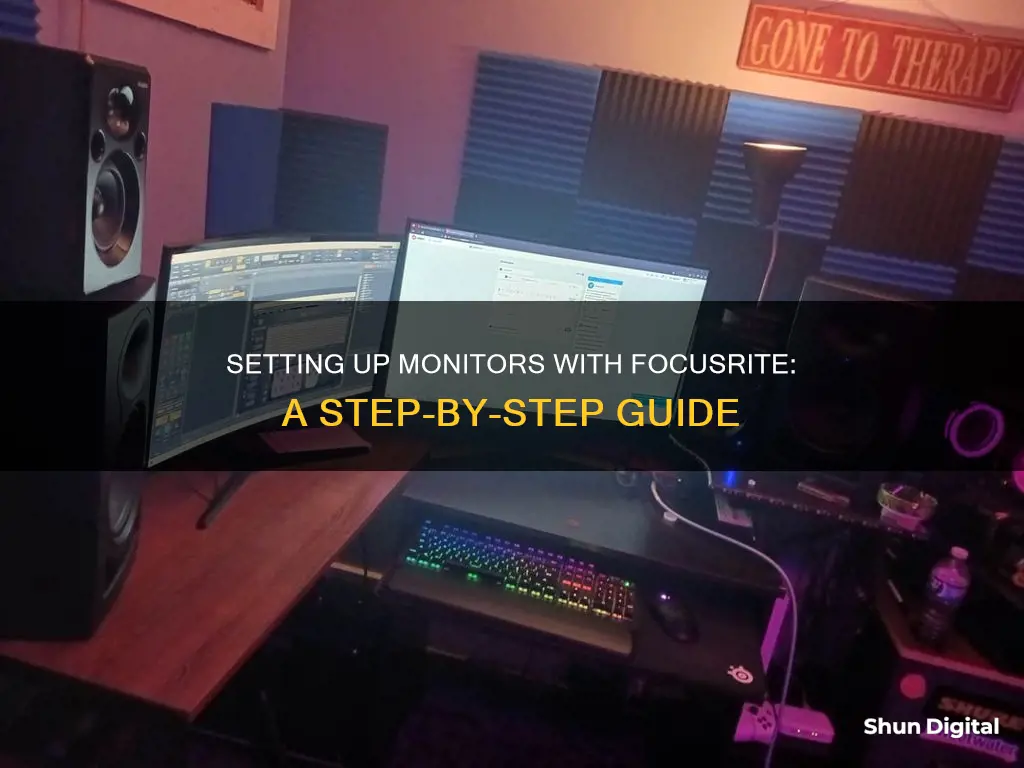
Setting up studio monitors requires more than just connecting the equipment. To hook up monitors to a Focusrite audio interface, you'll need to consider the type of cables and connectors required, as well as the positioning of the monitors in the studio. The Focusrite Scarlett 2i2, for example, requires two male-to-male TRS cables or male-to-male TRS-XLR cables to connect to speakers. The type of cable and connectors will depend on the specific model of your Focusrite interface and studio monitors. In addition to the cables, you'll also need to ensure you have a power supply for the monitors.
| Characteristics | Values |
|---|---|
| Cable type | Optical cables (lightpipe cables) |
| Cable features | Carries more than one channel of digital audio with one connection |
| Signals accepted | ADAT, S/PDIF, TOSLINK |
| Connector types | 1/4" TS, 1/4" TRS, XLR |
| Connector features | TS: Tip, Sleeve. TRS: Tip, Ring, Sleeve. XLR: X Latching Resilient Rubber Compound |
| Connector preference | TRS (due to balanced or grounded connections) |
| Speaker type | Studio monitors (special speakers/near-field monitors) |
| Speaker features | No tonal enhancements in terms of frequency and amplitude |
| Speaker placement | Symmetrical, 60-degree angle between speakers, not directly onto the wall |
| Power supply | Power cables for each monitor |
What You'll Learn

Choosing the right cables
Cable Type
The most common type of cable used to connect studio monitors to an audio interface is a balanced cable. Balanced cables help reduce interference from nearby cables or electronic devices, minimising noise or hiss in your monitors. Look for inputs on your monitors marked as "Balanced" or "BAL" to confirm compatibility with balanced cables.
Connector Types
The specific connectors you need will depend on the inputs and outputs of your monitors and audio interface. Common connector types include:
- 1/4" TRS jacks: These connectors have three contacts, denoted as Tip, Ring, and Sleeve (TRS). They are commonly used for balanced connections and provide better noise rejection than TS connectors.
- XLR connectors: These connectors are often used in professional audio equipment and are known for their durability and secure connection.
- TS connectors: While less commonly used for studio monitors, TS (Tip, Sleeve) connectors can be used in some cases. However, they may not offer the same level of noise rejection as TRS connectors.
Cable Length
Consider the length of the cables you need based on the setup of your studio. Ensure you have enough length to comfortably connect your monitors to the audio interface, taking into account the distance between the equipment and any positioning requirements.
Cable Quality
While it's important to choose high-quality cables, there is no need to spend excessively on premium options. Opt for cables that offer good value for money, as extremely expensive cables may not provide any significant benefits.
Compatibility
Before purchasing cables, carefully check the inputs and outputs on your monitors and audio interface. Ensure that the connectors on your cables match the corresponding inputs and outputs on your equipment. For example, if your monitors have XLR female inputs, you would need a TRS male to XLR male cable.
By considering these factors, you can choose the right cables to connect your monitors to your Focusrite audio interface, ensuring optimal sound quality and performance.
Troubleshooting ASUS VG248's Generic PNP Monitor Registration
You may want to see also

Power supply for monitors
When it comes to the power supply for monitors connected to a Focusrite audio interface, there are a few things to consider. Firstly, it is important to consult the user guide for your specific Focusrite product to determine the correct power supply requirements. This information can be found in the Downloads section of the Focusrite website.
If you are using a Scarlett audio interface, such as the first-, second-, or third-generation 18i8, 8i6, and 6i6 models, the official Focusrite 12V 1.2A Power Supply is a suitable option. This power supply provides clean and reliable power directly from the source and is designed specifically for these Scarlett interfaces. It has an input voltage range of 100-240V AC, 50-60Hz, and an output voltage of 12V DC.
In addition to the power supply, it is worth considering a power conditioner or a good power strip to protect your equipment. A power conditioner filters your electric power, reducing fluctuations and AC noise, while also safeguarding against power surges. This can be a worthwhile investment to protect your monitors and other gear.
Alternatively, if you are on a tighter budget, a power strip with surge protection can also help protect your equipment from power-related issues. This is particularly important if you have invested a significant amount in your audio equipment.
By ensuring you have the correct power supply and considering additional protection with a power conditioner or power strip, you can ensure your monitors connected to your Focusrite interface are receiving the appropriate power they require.
GamePlus on ASUS Monitors: What You Need to Know
You may want to see also

Speaker placement
The ideal placement for monitors is to form an equal-sided triangle with the monitors aimed straight at you. The height of the monitors is also important; you want the tweeters to be at the height of your ears when you are sitting at your desk.
To achieve the correct height, you can use speaker stands or isolation pads/desk stands if your desk has platforms for monitors.
If your room is rectangular, place your monitoring system on the shorter wall so that you face it. This setup minimises the amount of sound that bounces off the wall behind you.
Regarding the distance between the monitors and the wall, opinions vary. Some people recommend placing the monitors 'close to the wall', while others suggest keeping them 'far from the wall'. Ultimately, it is best to refer to the manual of your specific monitors, as different monitors may have different requirements.
Don't be afraid to experiment with the positioning and make adjustments until you achieve a good sound.
Adjusting Text Size: Upgrading Monitors, Maintaining Comfortable Viewing
You may want to see also

Speaker angle
When setting up your studio monitors, the ideal placement for the monitors is to form an equal-sided triangle with the monitors aimed straight at you. This means that the speaker angle should be directed towards your position, with the tweeters at the height of your ears while you are seated at your desk.
To achieve the correct height for your Focusrite monitors, you can use speaker stands with height adjustments. Make sure to check the height range of the stands before purchasing to ensure they can be adjusted to the desired level. Alternatively, if your desk has platforms for monitors, you can use isolation pads or desk stands to raise the monitors to ear level.
In addition to the speaker angle and height, the distance between the monitors and the wall should be considered. Refer to your monitor's manual for specific recommendations on the ideal distance from the wall. Fine-tune the sound using the adjustments on the back of the monitors until you achieve a comfortable balance across all frequency ranges.
It is also important to note that the sound from your monitors will bounce off the walls, creating duplicate sounds that overlap with the original audio. To address this issue, consider investing in acoustic treatment for your room to minimise sound reflection and improve the accuracy of your monitor setup.
Removing the Bezel from Your ASUS Monitor: A Step-by-Step Guide
You may want to see also

Sound treatment
- Place your monitors symmetrically in the room, ideally firing down the long axis in smaller rooms.
- Ensure the monitors are at head height, angled towards your head when you are in the listening position.
- Avoid putting the monitors too close to the corners of the room and follow the manufacturer's recommendations on the distance from walls.
- No hardware should come between you and the monitors, and the desk surface should be significantly lower to avoid reflections.
- Avoid placing the monitors midway along any of the room's dimensions, as this can cause bumps and dips in the low-end response.
- Treat high-frequency reflections by absorbing or diffusing them. Acoustic foam panels or high-density Rockwool insulation can be used, but spacing them away from the wall will make them more effective at low frequencies.
- Deal with excess low end by ensuring your monitors are not rear-ported and are not placed in corners, as this will boost the bass end. Use nearfield monitoring to mainly hear the sound directly from the monitors, reducing room effects.
- Address isolation problems by reducing airborne sound leakage and structure-borne vibrations. Seal gaps around doors and windows, and consider double-tacking walls and ceilings with an extra skin of plasterboard to reduce sound transmission.
Troubleshooting the ASUS VP28UQG Monitor's Black Screen Issue
You may want to see also
Frequently asked questions
You will need two male-to-male TRS cables or male-to-male TRS-XLR cables.
The ideal angle is 60 degrees between speakers and 30 degrees between each speaker and the listener.
TS stands for Tip, Sleeve, while TRS stands for Tip, Ring, and Sleeve. TRS connections are preferred because they make balanced or grounded connections, which reject noise or grounded hums that are commonly picked up by long cables.


