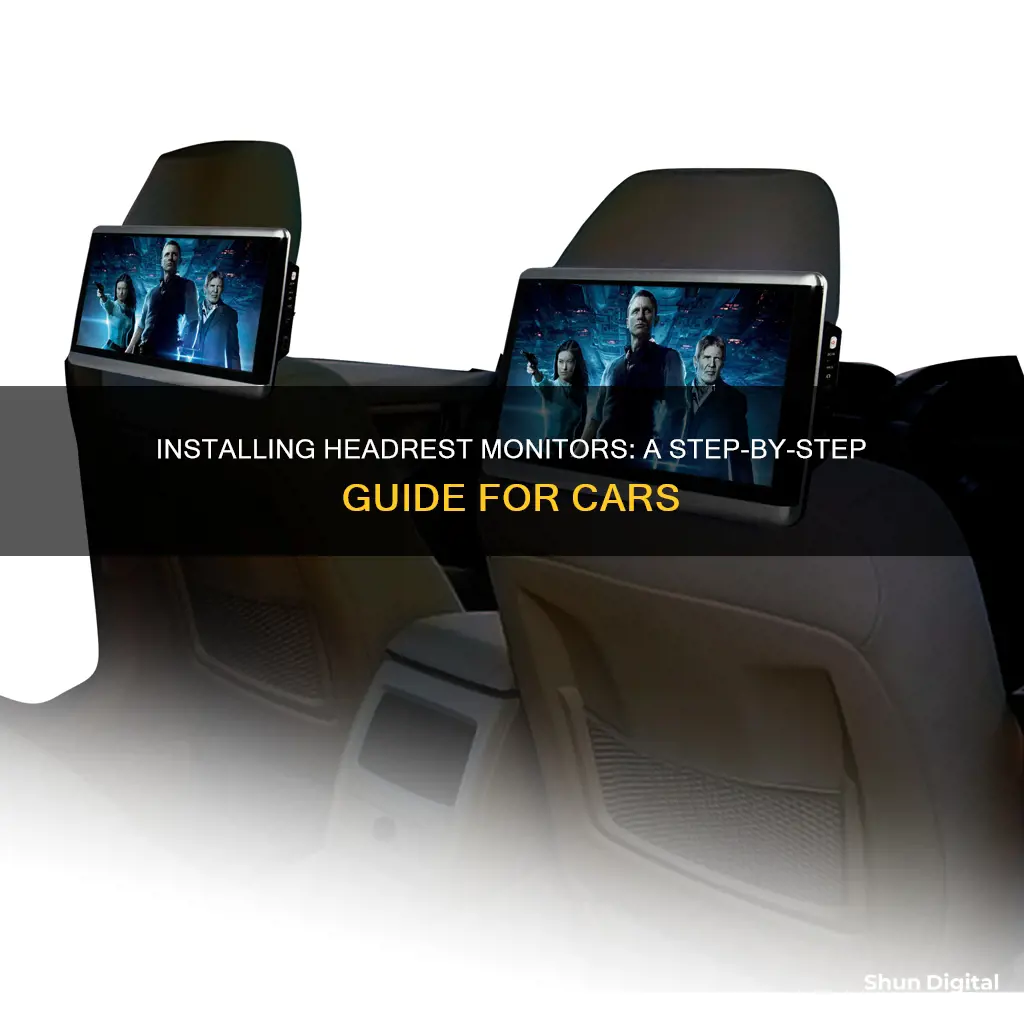
Installing a headrest monitor in your car is a great way to keep your passengers entertained and prevent the age-old complaint of are we there yet from ever escaping their lips. While you can hire a professional to do it, installing a headrest monitor is also a relatively straightforward DIY project if you're electronically savvy and handy. There are two main ways to install a headrest monitor: hardwiring cables into your car or connecting the wiring for the unit. The former is more labour-intensive and requires removing interior trim panels, while the latter is a simpler process that mainly involves running wires through the seat to keep them out of sight. A wide range of headrest monitors are available for purchase online, with prices ranging from $32.92 to $315.99.
What You'll Learn

Hard wire cables into the car
If you're electronically savvy, installing a car headrest monitor can be a DIY project. One way to install the monitor is to hard wire cables into the car. This method is quite labor-intensive as it requires removing interior trim panels. Here's a step-by-step guide:
Step 1: Prepare the Headrest Posts
Start by measuring the diameter of the headrest posts to determine the size you need. Remove the headrest by locating the release mechanism, which could be a button on the mount or a pinhole that requires a paperclip or pen tip to push. Once the headrest is removed, unscrew the current posts and replace them with hollow ones that can accommodate wires. Run the wires through the new posts, screw them into the headrest, and replace the headrest.
Step 2: Remove the Seat-Back
This step requires caution to avoid ripping any seams. Different types of seats have different removal methods. Some seat-backs have snaps, while others have screws at the bottom. For fully upholstered seats, lean the seat back, unclasp it, and pry apart the plastic teeth holding the seat-back to the seat.
Step 3: Run the Wires Down the Seat
Pull back the plastic and carpet lip at the bottom of the seat. Run the wires beneath the metal at the bottom of the seat back and through the upholstery. Ensure the wires are secure and not visible. Then, replace the seat back cover.
Step 4: Connect the Wires
There are typically two wires: the A/V input and the A/V output, which also serves as the power cable. Line up the tabs of the power cable with the RCA output cable and connect them securely. Repeat this process for the A/V input with the other RCA cable.
Step 5: Connect the DC Power Jack
To protect the headrest and fuses, connect the two positive side wires to each other. The ground wire can remain loose. Finally, plug the connector into the outlet in your car, and your headrest monitor should be ready to use!
Remember to disconnect the battery's negative terminal before making any connections. Additionally, ensure all grounds are connected to the same location by using an "add-a-circuit fuse" with the fuse box. Most systems will require a five-amp circuit.
LCD Monitor Lifespan: Degradation and Longevity Explored
You may want to see also

Connect wiring for the unit
To connect the wiring for your headrest monitor, you'll need to follow a few steps to ensure everything is set up correctly and safely. Here's a detailed guide to help you through the process:
Step 1: Prepare the Headrest Posts
Start by measuring the diameter of your headrest posts to determine the correct size for the wires. Remove the existing headrest by pressing the button on the mount or using a paperclip/pen tip to push through the pinhole, depending on your car's design. Unscrew the current posts and replace them with hollow ones that can accommodate the wires. Run the wires through the new posts, screw them into the headrest, and then replace the headrest.
Step 2: Remove the Seat-Back
This step requires caution to avoid ripping any seams. If your seat-back has snaps, pop out the tabs at the bottom and use a screwdriver to gently ease out the sides and top. For seats with screws at the bottom, simply unscrew and slide the seat-back down to remove it. If you have a fully upholstered seat, lean the seat back, unclasp it, and carefully pry apart the plastic teeth connecting the seat-back to the seat.
Step 3: Run the Wires Down the Seat
Now, you'll need to guide the wires down the back of the seat. Pull back the plastic and carpet lip at the bottom of the seat, and run the wires beneath the metal and through the upholstery. Make sure to keep the wires secure and out of sight. Once the wires are in place, replace the seat-back cover.
Step 4: Connect the Wires
You should have two wires: the A/V input and the A/V output, which also serves as the power cable. Line up the tabs of the power cable with the RCA output cable and connect them securely. Do the same for the A/V input, connecting it to the other RCA cable. Ensure all connections are secure and insulated.
Step 5: Final Connections
To complete the installation, connect the DC power jack into the cigarette lighter outlet in your car. Connect the two positive side wires to protect the headrest and fuses, and insulate the positive side. The ground wire can remain loose. With these connections made, you're now ready to enjoy your new headrest monitor!
LED TVs vs LCD Monitors: Radiation Levels Compared
You may want to see also

Replace headrest posts
To replace the headrest posts, you will need to first remove the headrest. Depending on the make and model of your car, the headrest can be removed by either holding a button on the mount while pulling out the post or by pushing in a pinhole with a paper clip or pen tip. Once the headrest is removed, you can then unscrew the current posts.
When choosing replacement posts, it is important to measure the diameter of the posts to ensure they will fit your headrest. You will also need to ensure that the posts are hollow so that you can run wires through them for the monitor. Once you have the new posts, simply run the wires through, screw them into the headrest, and replace the headrest in your vehicle.
If you are unable to find replacement headrest posts that fit your vehicle, there are a few alternative options. One option is to bend the existing posts to adjust the angle of the headrest. This can be done by wrapping the posts in a towel and using a pipe or lever to apply pressure and bend them. However, it is important to be careful when bending the posts as they can break if bent too far.
Another option is to purchase a new headrest from a junkyard or salvage yard that fits your vehicle. You can also try measuring the distance between the prongs on the headrest and searching for a similar model headrest that may be more comfortable. Additionally, you can try adjusting your seat back or using a neck pillow to improve your comfort.
Connecting an ASUS Chromebook to an External Monitor
You may want to see also

Remove the seat-back
To remove the seat-back, you will need to carefully determine how it is attached to the seat. Don't force anything, and be careful with this step because you don't want to rip a seam. Some seat-backs have snaps, so you can pop out the tabs at the bottom of the seat-back, and then take a screwdriver to ease out the sides and top of the seat. Other seats have screws at the bottom of the seat-back. Simply undo the screws and slide the seat-back down to remove it. For fully upholstered seats, you will need to lean the seat back all the way, unclasp the back, and then pry apart the plastic teeth that hold the seat-back to the seat.
If your seat-back has snaps, you can start by prying off the tabs at the bottom of the seat-back with a flat-head screwdriver. Be careful not to apply too much force, as you don't want to damage the surrounding plastic. Once the tabs are removed, use a Phillips-head screwdriver to gently lift the sides and top of the seat-back until it comes free.
If your seat has screws, you will need to identify the type of screw and use the appropriate screwdriver. Again, be careful not to force anything, as you don't want to strip the screws or damage the surrounding plastic. Once the screws are removed, gently slide the seat-back down and lift it away from the seat.
For fully upholstered seats, start by leaning the seat back all the way. You may need to use a lever or flat-head screwdriver to unclasp the back of the seat. Once the clasp is released, use a flat-head screwdriver to pry apart the plastic teeth that hold the seat-back in place. Gently work your way down the sides of the seat-back until it is completely free.
In some cases, you may need to remove additional components, such as the headrest or armrests, to access the screws or tabs holding the seat-back in place. Make sure to keep track of all the parts you remove and store them safely to avoid losing any necessary components.
Smart View: ASUS Monitors' Unique Feature Explained
You may want to see also

Run wires down the back of the seat
To hook up headrest monitors, you'll need to run the wires down the back of the seat. Here's a detailed guide on how to do this:
Step 1: Remove the Seat-Back Carefully
Be cautious and avoid forcing anything during this step. Some seat-backs have snaps, so pop out the tabs at the bottom and then carefully use a screwdriver to ease out the sides and top. For seats with screws at the bottom of the seat-back, undo the screws and slide the seat-back down to remove it. For fully upholstered seats, lean the seat back, unclasp the back, and gently pry apart the plastic teeth holding the seat-back to the seat.
Step 2: Run the Wires Down the Back
At the bottom of the seat, you'll find a plastic and carpet lip that can be pulled back easily. Run the wires beneath the metal at the bottom of the seat back and through the upholstery. Ensure you do this neatly to avoid any damage to the seat.
Step 3: Replace the Seat Back Cover
Once you've run the wires through, carefully replace the seat back cover. Make sure the wires are not pinched or caught in any way that could damage them or affect the seat's functionality.
Step 4: Connect the Wires
You should have two wires: the A/V input and the A/V output, which also serves as the power cable. Line up the tabs of the power cable with the RCA output cable and connect them securely. Repeat this process for the A/V input with the other RCA cable. Ensure all connections are secure and insulated.
By following these steps, you can neatly run the wires for your headrest monitors down the back of the seat, keeping them out of sight and ensuring a tidy installation. Remember to take your time and be cautious throughout the process to avoid any damage to your car's interior.
LCD vs CRT: Which Monitor is Greener?
You may want to see also
Frequently asked questions
The best way to hook up headrest monitors is to hardwire cables into the car. This method is labor-intensive and requires removing interior trim panels. Alternatively, you can connect the wiring for the unit, which is less labor-intensive but still requires careful attention to ensure the wires are safely and correctly installed.
Headrest monitors are a great way to keep your passengers entertained, especially on long journeys. They are also an elegant addition to your vehicle, as they can be installed to look like a factory-installed system.
Yes, if you are handy and electronically savvy, installing headrest monitors can be a do-it-yourself project. However, if you are not confident in your abilities, it is best to hire a professional to ensure the installation is done correctly.


