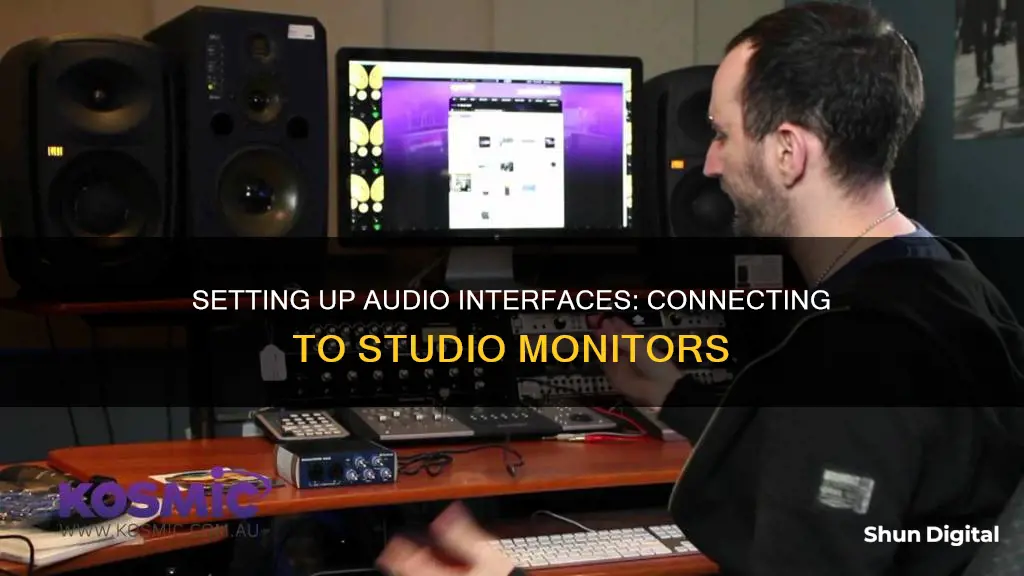
Setting up an audio interface with a monitor is not as simple as it may seem. To start, you'll need to turn down the volume and EQ knobs on your audio interface. Next, connect the interface to your computer using a USB cable, and open your DAW (Digital Audio Workstation) to select your interface in the audio preferences menu. If you're using passive studio monitors, you'll need to plug them into an amplifier, but if you have active (powered) studio monitors, you can connect them directly to the audio interface. The type of connector you'll need depends on the output ports on your audio interface and the input ports on your monitors. Common options include TRS, XLR, and RCA cables. Once everything is connected, adjust the volume and EQ settings on your audio interface and monitors to achieve the desired sound quality.
What You'll Learn

Turn down the volume and EQ knobs on the audio interface
To connect studio monitors to an audio interface, it is essential to first turn down the volume and EQ knobs on the audio interface. This is a crucial step to prevent any potential damage to your equipment and your hearing.
Almost all audio interfaces have multiple volume knobs, including a volume knob and/or a monitor knob at the front. It is important to turn all of these knobs all the way down before proceeding. Similarly, turn down all the EQ knobs (bass, middle, treble) to minimize the risk of damage from excessive vibrations. If your audio interface has additional volume knobs, they should also be turned down completely.
By turning down the volume and EQ knobs, you not only protect your equipment but also ensure a safe listening experience. This step is especially important if you are connecting speakers, as having the volume too high on both devices could damage the studio monitors' cones or cause other permanent damage. Additionally, the powerful vibrations from high volumes and EQ settings can be harmful to your hearing.
It is also recommended to turn down the volume knobs on your amplifier (for passive speakers) or active speakers to further ensure a safe connection process.
Once you have turned down all the necessary knobs, you can safely move on to the next steps of connecting your audio interface to your computer and studio monitors.
Optimize Wix Page Sizing for All Monitors
You may want to see also

Connect the audio interface to your computer
To connect an audio interface to your computer, you'll need to use a cable. Most audio interfaces use a male-to-male USB cable, likely a Type-A to Type-B cable. You can use the cable that comes with your audio interface, or, if you don't have one, you can purchase one—for example, the PWR+ 6 Ft USB Type-A to Type-B Cable is recommended.
Once you have the correct cable, simply plug the audio interface into your computer. Your computer should then recognise the audio interface and install the correct drivers automatically. If it doesn't, you may need to download and install the USB drivers from the support page on your audio interface manufacturer's website.
Understanding FPS Mode on Your ASUS Monitor
You may want to see also

Identify the cables you need
The cables you need will depend on the type of outputs your interface has, so the first step is to check which outputs your interface has. Typically, these will be found around the back of the unit and will usually be 6.35mm TRS jack sockets marked 'Main', 'Line', 'Monitor' or 'Outputs L R' (for left and right outputs).
If your interface has RCA or XLR output ports, you will need to use these instead of the TRS jack sockets. XLR outputs are typically used for microphones, but your interface may have them for studio monitors.
Once you have identified the output ports on your audio interface, you can determine which cables you need. If your audio interface has 6.35mm jack sockets, you will need two balanced TRS cables to connect to the left and right outputs.
If your audio interface has RCA output ports, you will need a pair of 1/4 inch TS to RCA cables. Use a power strip to connect the AC power lines for your monitors, the interface, and your computer's AC power supply to minimise the possibility of creating a ground loop.
If your audio interface has XLR output ports, you will need a pair of XLR cables. These are typically used for more expensive interfaces or larger models designed to double as mixers with multiple channel recording.
If your audio interface has both TRS and XLR outputs, you can choose which type of cable to use. TRS cables deliver a better audio signal over a longer cable run and are less susceptible to electronic distortion and radio interference.
Adapter cables
If you have XLR outputs on your studio monitors and TRS outputs on your audio interface, you will need an adapter cable. Use an XLR Female to 1/4 Inch TRS Adapter cable to connect the two.
Unbalanced outputs
If your audio interface has unbalanced outputs, you will need a different type of cable. Unbalanced outputs require phono connectors and will only work with speakers that have additional unbalanced RCA phono inputs.
Background Bliss: Perfect Sizing for 38-Inch Monitors
You may want to see also

Check your monitor inputs
Now that you have identified the cables you need, it is time to check the inputs on your monitors. With the volume still down and the power off, check the monitor inputs, which are usually located at the back. Monitor inputs can be TRS jack, XLR in, or both. The Yamaha HS8, for example, has both.
If your monitors only have XLR inputs, don't worry. All you need to connect them to your audio interface outputs is a balanced TRS to male XLR cable, which has one connector of each type on each end.
If your monitors have both XLR and TRS inputs, you can use either, but XLR speaker inputs are preferred by some as they lock in place when connected and are thus more stable.
If your monitors have RCA inputs, you will need to use a different method. If your audio interface has RCA outputs, use an RCA-to-RCA cable. If your audio interface only has a headphone jack output, you can use a 1/8" TRS to dual RCA cable to create an unbalanced connection.
If your monitors have TS inputs, you will need to use a TS to RCA cable.
If your monitors have TRS inputs, you will need to use a TRS cable.
If your monitors have both TS and RCA inputs, you will need to use a TS to RCA cable.
Tips for connecting your monitors
- It is recommended to start with the volume setting on your speakers at 50%. You can then make further adjustments using the output volume knob on your audio interface.
- When it comes to cable length, it is better to opt for a longer cable. A 6' cable might seem sufficient, but it often ends up being too short. A 10' cable will give you more flexibility and make it easier to run the cable neatly.
- It is important to understand the difference between balanced and unbalanced cables. Balanced cables deliver a better audio signal over a longer cable run and are less susceptible to electronic distortion and radio interference.
Choosing the Right Screws for VESA Monitor Mounts
You may want to see also

Adjust speaker positioning
Now that your audio interface and studio monitors are connected, it's time to set up your speakers. The placement of your monitors in your studio space is crucial to achieving optimal sound quality.
Firstly, ensure that the tweeter (high-frequency) driver is level with your head. This will ensure that you are receiving a direct and unobstructed signal from the monitors.
Next, create an equilateral triangle with your speakers at two points and your seat at the third. This setup ensures that you are an equal distance from each speaker, allowing you to experience a balanced mix. The monitors should be at least 3 feet apart and angled towards you at approximately a 30-degree angle.
It is also important to position your monitors away from walls and corners. Aim for a distance of at least 2-3 feet to minimise the impact on the EQ response of your speakers. If you are limited in terms of placement options and your mixes sound too boomy or trebly, consider investing in monitors with adjustable EQ settings to compensate for positional impact, such as the JBL 3 series.
To further enhance the accuracy of your sound, use studio monitor stands to elevate your speakers. This will reduce the impact of surface noise and vibration from your workstation, resulting in a purer signal. Additionally, consider using foam pads to isolate the monitors from your desk.
Monitoring Social Media Usage: Strategies for Parents and Educators
You may want to see also
Frequently asked questions
Most audio interfaces connect to your computer using a male-to-male USB cable.
If your audio interface doesn't work, try downloading and installing the USB drivers for your model from the support page on the manufacturer's website.
The cables you need will depend on the type of outputs your interface has and the type of inputs your studio monitors have. Typically, these will be 6.35mm TRS jack sockets marked 'Main', 'Line', 'Monitor' or 'Outputs L R' (for left and right outputs). Alternatively, some interfaces may have a pair of XLR outputs.
You'll want to create a triangle between yourself and the two monitors, which should be facing you at an approximate 30-degree angle. Each monitor should be equidistant from your seat and ideally at least three feet apart. The monitors should also be at ear height to avoid any sound reflection off nearby surfaces.


