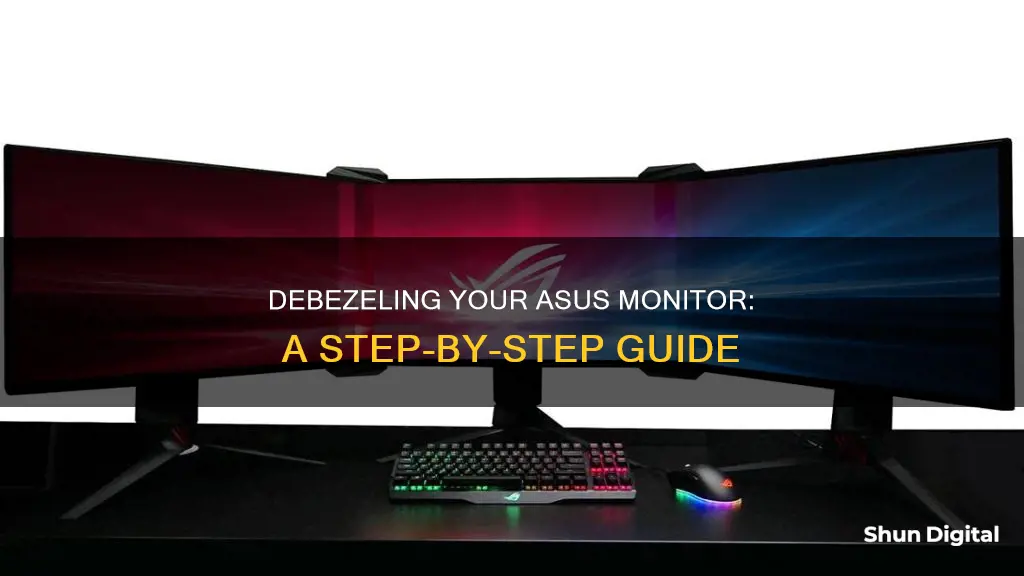
Removing the bezel from an Asus monitor can significantly enhance the gaming experience by reducing the gap between screens and increasing immersion. The process of debezelling involves gently prying off the top plastic casing with a flat-tipped screwdriver, being careful not to rush or force it. This technique can be adapted for other monitors, but it is important to consider how the monitors will be mounted after the bezel is removed, as some models may lose their VESA mount. Additionally, the stand may contain electronics, and the placement of the On-Screen Display (OSD) buttons may need to be adjusted. Overall, debezelling is a relatively straightforward process that can greatly improve the aesthetics and functionality of a multi-monitor setup.
| Characteristics | Values |
|---|---|
| Reasons for debezelling | To decrease the distance between bezels, increase immersion in games, improve aesthetics, and make the monitor setup more stable |
| Tools required | Flat-tipped screwdrivers, electrical tape, washers, bricklayer tool, knife, glue, double-sided tape |
| Time taken | 60-90 minutes |
| Monitors commonly debezeled | ASUS VG236H, ASUS VG248QE, ASUS VG278H, ASUS VE278Q, Dell U2412M, Acer GD235HZ, Samsung S24D590PL |
What You'll Learn

Using a flat-tipped screwdriver to gently pry off the top plastic
To begin the process of removing the bezel from your ASUS monitor, you will need a few tools. It is recommended to have two flat-tipped screwdrivers, as well as electrical tape and washers.
Now, let's focus on the steps involved in gently prying off the top plastic using a flat-tipped screwdriver. This process requires patience and a gentle touch, so take your time and do not rush or force it. Start by inserting the flat-tipped screwdriver under the top plastic at one corner. Gently apply leverage to slowly pry the plastic away from the monitor. You may hear a popping noise as the plastic unhooks from the groove on the other side, but don't worry, you are not breaking anything.
If you encounter resistance, use the second flat-tipped screwdriver to help you. Having two screwdrivers can be especially helpful when trying to remove the bezel from the corners, as these areas can be trickier. Once you have successfully removed a small section of the top plastic, you will begin to see the bare monitor underneath.
Continue working your way around the edges, gently prying and unhooking the plastic. Remember to take your time and be cautious, as applying too much force can damage the plastic. As you work, you may need to adjust your technique slightly to navigate the different areas of the bezel. For example, the corners may require a different approach than the straight edges.
As you make progress, you will start to see more and more of the bare monitor, and the bezel will gradually come off. It is important to work slowly and carefully to avoid any accidental damage. Eventually, you will have successfully removed the top plastic bezel from your ASUS monitor.
Monitoring User Activity on Arris Cable Modems
You may want to see also

Removing the bezel off the corners
It is important to take your time and go slowly. Do not rush or force the bezel off, and use two flat-tipped screwdrivers if necessary. Be prepared for a popping noise as the plastic unhooks from the groove on the other side.
Calibrating Your ASUS 144Hz Monitor: A Step-by-Step Guide
You may want to see also

Covering the exposed silver bezel with electrical tape
Materials Required:
- High-quality electrical tape (preferably 3M electrical tape)
- Flat-tipped screwdrivers
- Washers
Steps to Cover the Exposed Silver Bezel:
- Prepare your workspace by gathering all the required materials and tools. Ensure that you have a clean and well-lit area to work on.
- Inspect the exposed silver bezel and ensure that it is free of any dirt or debris. Use a soft cloth to gently wipe the surface if needed.
- Take the electrical tape and cut or tear off a piece that is slightly longer than the width of the bezel.
- Starting at one end of the bezel, carefully align the edge of the electrical tape with the edge of the bezel.
- Using your thumb or finger, gently press down on the electrical tape, applying a slight amount of pressure to ensure a firm adhesion.
- With your other hand, slowly guide the tape along the bezel, maintaining a straight line as you cover the silver surface. Take your time and work in small sections to avoid creases or air bubbles.
- Once you reach the end of the bezel, cut or tear off the tape, ensuring that it overlaps slightly with the starting point.
- Use your thumb or finger to firmly press down on the tape, especially along the edges, to ensure a strong bond.
- Repeat the process for any additional areas of the exposed silver bezel that need to be covered.
- Inspect your work and make sure that no part of the silver bezel is visible and that the electrical tape is smooth and securely adhered.
- As a final step, carefully examine your work and ensure that no electrical tape has been applied to the screen of the monitor.
By following these steps, you will effectively cover the exposed silver bezel of your ASUS monitor with electrical tape, resulting in a neat and seamless finish. Remember to take your time and work with precision to achieve the best results.
Electricity Usage: Monitored by Companies or Not?
You may want to see also

Custom-fixing the monitor with an angle bracket
Custom-fixing your ASUS monitor with an angle bracket is a great way to ensure a secure and stable setup, especially if you're working with multiple monitors. Here's a detailed guide to help you through the process:
Tools and Materials:
- Angle brackets (preferably aluminium)
- Power drill
- Rivets
- Screws
- Double-sided tape
- Wood panel
- Saw
- Electrical tape (optional)
- Washers (optional)
Steps:
- Remove the Cover: Start by gently prying off the plastic cover of your monitor using a flat-tipped screwdriver. Be careful not to rush or force it, as you don't want to damage the underlying components.
- Unscrew and Unclip: Once the cover is removed, unscrew the top electronic circuit and unclip the panel frame. You can set this frame aside for painting later if you wish.
- Prepare the Angle Bracket: Cut the aluminium angle bracket to the required size. You'll need enough material to attach it to the back plate of the monitor and provide stable support.
- Drill and Secure: Drill holes in the angle bracket and use screws to attach it to the back plate. You can also use rivets for added stability, creating a double-bracket structure.
- Reattach the Panel: Reattach the electronic panel to the angle bracket, ensuring that it is securely fastened. You can also screw on any additional electronic components that were previously attached to the original fixation system.
- Stabilise with Wood: For added stability, attach a piece of wood to the panel using double-sided tape. This will provide a sturdy base for the monitor to rest on.
- Create Space for Electronics: Use a saw to cut small tubes or spacers that will keep the electronics from touching the back plate. This ensures that the components have enough space and don't interfere with each other.
- Check Alignment: Before proceeding, check that your monitors are aligned correctly. This is especially important if you're setting up multiple monitors for a seamless display.
- Final Assembly: Attach your monitors to the custom angle bracket setup using VESA mounts. Make sure to manage your cables neatly to maintain a tidy appearance.
Optional Steps:
- Paint the Frame: If desired, you can paint the frame of your monitor to match your setup or personal preference. Some people prefer to paint it black for a uniform look, while others suggest keeping it silver to act as a mirror and enhance the display.
- Cover with Electrical Tape: If you're concerned about the appearance of the exposed back of your monitor, you can carefully apply electrical tape to cover the silver parts. This will also help insulate the components and give it a cleaner look.
- Prepare for VESA Mounting: If you plan to use VESA mounts, you may need to add washers to the screws. This ensures a secure fit and prevents any damage to the monitor casing.
Custom-fixing your ASUS monitor with an angle bracket gives you a lot of flexibility in terms of monitor placement and arrangement. It's a great way to achieve a unique and immersive multi-monitor setup. Remember to work carefully and refer to online resources for specific details pertaining to your monitor model.
Monitoring CPU and RAM Usage: A Comprehensive Guide
You may want to see also

Cleaning the back of the monitor with compressed air
When cleaning the back of your ASUS monitor with compressed air, it is important to be cautious and avoid causing any damage. Here are some detailed instructions to guide you through the process:
Firstly, ensure that your monitor is turned off before you begin cleaning. This is a crucial step to prevent any accidental damage during the cleaning process.
Now, let's get into the cleaning process. Hold the can of compressed air upright and maintain a distance of at least 6 inches between the nozzle and your monitor. This distance will help prevent any potential damage from the force of the compressed air.
Slowly press the nozzle of the compressed air can and direct the airflow towards the dusty areas on the back of your ASUS monitor. Use slow, controlled movements to avoid spreading dust to other parts of the monitor or blowing it in your direction.
If there are any stubborn dust particles or residue, you can use a soft brush or a microfiber cloth to gently wipe them away. Make sure that the brush has soft bristles, similar to those used for camera lenses.
It is important to be gentle during this process and avoid applying excessive pressure. You don't want to accidentally damage any components or leave scratches on the surface of your monitor.
Additionally, be cautious not to use any liquid cleaning solutions when cleaning the back of your monitor with compressed air. Liquids can seep into sensitive areas and cause damage to the internal components.
By following these instructions, you can effectively clean the back of your ASUS monitor with compressed air, ensuring that it is free of dust and residue while also maintaining the safety of your equipment.
Monitoring GPU Usage: Linux Command-Line Essentials
You may want to see also
Frequently asked questions
You will need a flat-tipped screwdriver to gently pry off the top plastic. Take your time and go slowly, and use a second flat-tipped screwdriver if you need help with the corners.
You will need three important tools: electrical tape, two flat-tipped screwdrivers, and four washers.
Debezelling your monitor can reduce the distance between bezels by up to 2cm, which can enhance immersion in games and increase the level of enjoyment experienced while playing.
To clean the back of your debezelled monitor, use compressed air ONLY, and make sure that the monitor is OFF before spraying it.


