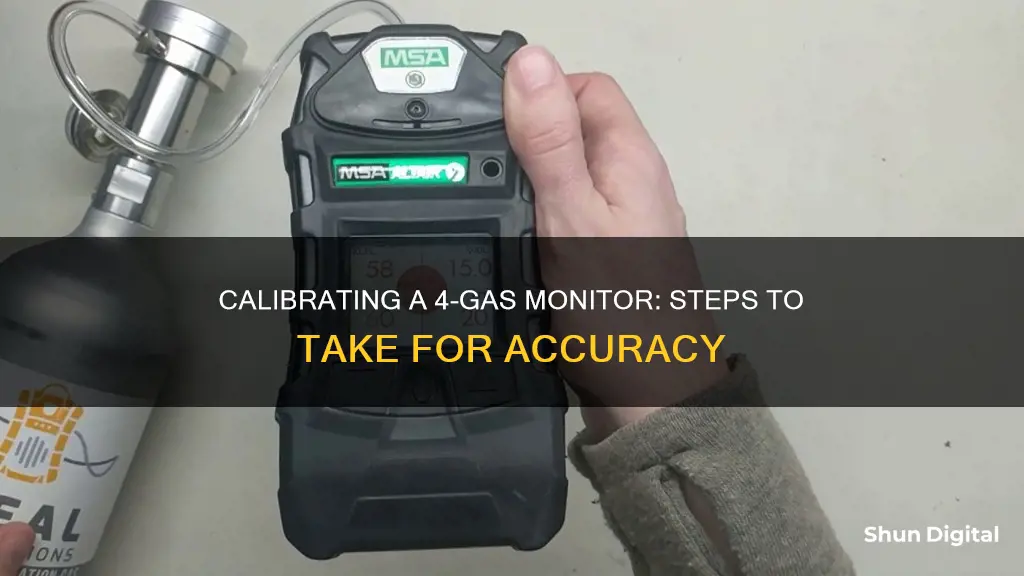
Calibration is essential for the proper functioning of a 4-gas monitor. It ensures the accuracy and reliability of the readings it provides by adjusting its sensors to detect the presence and concentration of gases in the air. This is typically done by exposing the gas detector to known concentrations of gases and comparing the readings to the known values. If the readings are inaccurate, the monitor can be calibrated to improve its accuracy. Calibration also helps identify any issues with the gas detector, such as faulty sensors or damaged components, before they lead to inaccurate readings.
| Characteristics | Values |
|---|---|
| Purpose of calibration | Re-establishes baseline accuracy for sensors |
| Calibration frequency | Every 4-6 months; before each day's use; at least every 180 days |
| Calibration gas | 20ppm Hydrogen Sulfide, 60ppm Carbon Monoxide, 58% LEL Pentane (1.45% Volume Methane as a simulant), 15.0% Oxygen, Nitrogen Balance |
| Calibration procedure | 1. Turn on monitor in normal reading mode 2. Put monitor into calibration mode 3. Confirm and wait for zeroing mode 4. Attach calibration cap and open regulator 5. Attach tubing to regulator and calibration adapter 6. Press button to confirm when prompted to apply calibration gas 7. Screw in calibration adapter and turn on gas 8. Compare calibration gas values on screen with cylinder 9. Turn off gas and remove adapter |
| Bump testing | Exposing the gas detector to a known concentration of gas to ensure it is functioning properly |
What You'll Learn

Calibration gases
For example, a typical 4-gas monitor detects carbon monoxide (CO), oxygen (O2), hydrogen sulfide (H2S), and combustible gases (%LEL). Therefore, the calibration gases used would need to include these specific gases at known concentrations. The user would then expose the monitor's sensors to these calibration gases during the calibration process, allowing them to adjust the device's readings accordingly.
It is crucial to select the appropriate calibration gases that match the gases being detected by the 4-gas monitor. Additionally, users should follow the manufacturer's instructions for preparing and using the calibration gases, including any specific guidelines on attaching regulators, connecting tubing, and opening the calibration gas cylinders.
Monitors for the ASUS ROG G752VT: How Many Can It Handle?
You may want to see also

Bump tests
Bump testing is a crucial step in ensuring the proper functioning of a 4-gas monitor. It is a simple process that can be performed before each use to verify the performance of the gas detector and its sensors. Here is a step-by-step guide on how to conduct a bump test:
Step 1: Prepare the Equipment
Ensure you have the necessary equipment, including the 4-gas monitor, a calibration gas cylinder, a regulator, tubing or hose, and a calibration cup, cap, or adapter. The calibration cup is typically included with the monitor and is used to direct the calibration gas onto the sensors.
Step 2: Connect the Calibration Gas and Regulator
Attach the calibration gas cylinder to the regulator, ensuring they are securely connected. The regulator controls the flow rate of the calibration gas during the test.
Step 3: Power On the 4-Gas Monitor
Turn on the 4-gas monitor and allow it to boot up completely. The monitor should be in regular operating mode during the bump test. Refer to the monitor's user manual if you are unsure how to power it on or navigate to the appropriate mode.
Step 4: Apply the Calibration Gas
Connect the tubing or hose from the regulator to the calibration cup, cap, or adapter of the 4-gas monitor. Ensure a secure connection to prevent gas leakage. If your monitor has an internal pump and no calibration plate, you may need to spray the gas directly into the tube port.
Step 5: Expose the Sensors to Calibration Gas
Open the regulator to release the calibration gas. Allow the gas to flow for about 10 to 20 seconds, or until the monitor's alarm is triggered. The sensors should now be exposed to the target gas, simulating the conditions they would experience in the field.
Step 6: Observe the Monitor's Response
During the gas exposure, observe the monitor's response. A successful bump test will result in both an audible alarm and a visual confirmation on the display, indicating that the sensors have successfully detected the target gas.
Step 7: Terminate the Gas Flow
Once the alarm is triggered or after 20 seconds, close the regulator to stop the flow of calibration gas. Detach the tubing or hose from the calibration cup and carefully coil it up for storage.
Step 8: Evaluate the Results
If the monitor successfully detected the target gas and activated the alarm, your bump test is complete. You can now proceed to use the 4-gas monitor in the field with confidence.
However, if the bump test fails or the monitor does not respond as expected, further action is required. Refer to the manufacturer's guidelines for troubleshooting steps or proceed directly to a full calibration of the device.
It is important to perform bump tests regularly, ideally before each use, to ensure the accuracy and reliability of your 4-gas monitor. Bump testing helps protect workers by verifying the monitor's ability to detect hazardous gases in their work environment.
Enhance Productivity: Dual Monitors via HDMI Port
You may want to see also

Calibration drift
Gas exposure can impact calibration, as high concentrations of the target gas or interfering gases can damage the sensors or cause them to drift. Wear and tear on the physical components of a gas detector, such as the housing, filters, and connectors, can also deteriorate over time, affecting the instrument's overall performance and calibration.
To address calibration drift, routine calibration and maintenance are essential. This includes regular calibration checks at specified intervals, sensor replacement if sensors degrade significantly, and environmental monitoring to control the conditions in which the detector operates. Proper handling and record-keeping are also crucial to ensuring accurate readings and identifying trends in calibration drift.
The natural ageing process of the sensors and electronic components can cause calibration drift. This is unavoidable and occurs even if the monitor has never been used or has been stored away. In addition, extreme environmental conditions, such as temperature and humidity, can contribute to calibration drift. Sensor poisoning, where the sensors are exposed to high concentrations of target gases and vapours, can also cause drift.
Physical impacts, such as dropping the monitor onto a hard surface or submerging it in liquid, can create enough vibration or shock to affect the electronic components and circuitry, leading to calibration drift. Therefore, it is essential to follow the manufacturer's guidelines for calibration and perform regular checks to ensure accurate and reliable readings.
Uncover the True HDR10 Monitor Experience: What to Look For
You may want to see also

Calibration countdown
Calibration is an important process for 4-gas monitors to ensure they are functioning correctly and providing accurate readings. The calibration process typically involves adjusting the device to ensure it is providing accurate readings for the gases being detected. While the specific steps may vary depending on the make and model of the monitor, here is a general overview of the calibration countdown:
180 Days: Many 4-gas monitors provide an on-screen countdown, indicating that calibration is not required until 180 days have passed. This countdown serves as a reminder to users that their device is functioning within the acceptable range.
Before Calibration: Prior to initiating the calibration process, gather all the necessary equipment, including the calibration gas, regulator, tubing, and calibration cap. Ensure you are in a clean air environment to avoid any interference during the calibration.
6 Months: It is generally recommended to calibrate 4-gas monitors every six months, or at least once a year. This recommendation is based on the sensor technology, performance characteristics, and expected drift over time. However, certain situations may require more frequent calibration.
Calibration Initiation: During the calibration process, you will need to hold down the "off" button on the monitor. The unit will display "OFF" and start a blinking, alarming countdown. Once the monitor goes blank, continue holding the button, and it will begin a calibration countdown with "CAL" displayed on the screen.
Calibration Gas Exposure: Once the "CAL" countdown is complete, release the "off" button. The monitor will auto-zero its sensors and then prompt you to apply the calibration gas. Attach the calibration cap, which directs the gas towards the sensors, and open the regulator on the calibration gas cylinder.
Calibration Completion: The monitor will then proceed with the calibration process without any further actions required. Monitor the screen and be ready to remove the gas when prompted. Follow any additional on-screen instructions to conclude the calibration process.
Post-Calibration: After calibration, confirm the accuracy of the device by exposing it to fresh air and verifying that it shows a zero reading for all gases. Ensure that the monitor is functioning properly and that all sensors are responding accurately.
It is important to consult the user manual and follow the manufacturer's guidelines for specific instructions and recommendations. Additionally, bump testing, a simpler procedure than full calibration, can be performed regularly to verify the proper functioning of the monitor.
Eliminating the Temperature Monitor Virus: A Step-by-Step Guide
You may want to see also

Calibration adapter
The calibration adapter is typically included with the purchase of a gas monitor and is designed to be compatible with specific models. For example, the MSA Altair 4 gas monitor uses a dedicated calibration adapter, which is clipped onto the gas detector during the calibration process. This adapter is part number 10089321 and is available from MSA as a replacement part.
Calibration kits, which include the calibration adapter, are also available from third-party suppliers. These kits offer a more affordable alternative to the private-labelled kits provided by gas monitor manufacturers. The calibration adapter is included in these kits to ensure a proper connection between the calibration gas and the monitor, maintaining the accuracy of the calibration process.
When preparing for calibration, it is important to have all the necessary components, including the calibration adapter, within reach. This ensures a smooth and efficient calibration process, reducing the time required for the procedure.
It is worth noting that some gas monitors may not require a separate calibration adapter. For instance, the Honeywell BW and GFG monitors are designed with built-in calibration adapters, eliminating the need for an additional adapter in the calibration kit.
LCD Monitors: Polarized Filter Location and Functionality
You may want to see also


