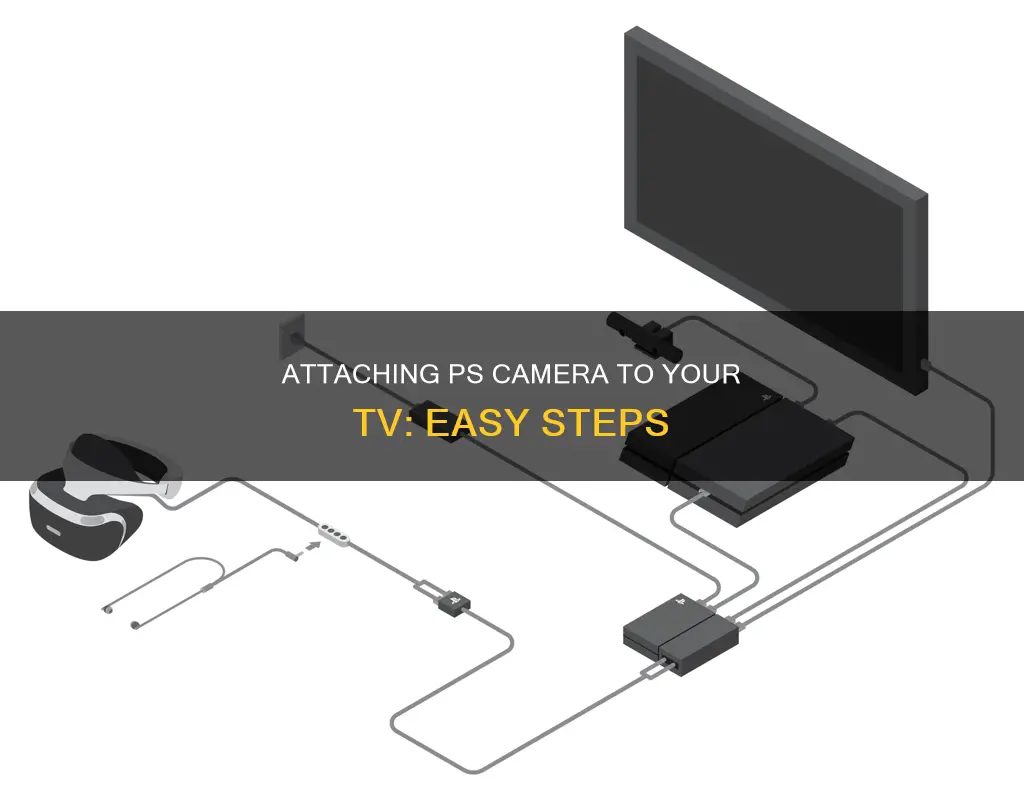
If you're looking to attach your PS camera to the top of your TV, there are a few options to consider. Firstly, the PS camera comes with a bendable mount that can be shaped to fit on top of your TV. This option relies on gravity to hold the camera in place, so it may not be the most stable choice. Alternatively, you can purchase a separate TV clip mount stand specifically designed for the PS camera, which may offer a more secure fit. These are available from online retailers such as Amazon. When attaching the camera, ensure it is positioned six to twelve inches above the player's head for optimal VR experience. Additionally, be mindful of lighting conditions as bright lights or sunlight can cause tracking issues.
| Characteristics | Values |
|---|---|
| Camera height | 6-12 inches above the player's head |
| Distance from camera | 4 feet for sitting games, 6 feet for standing games |
| Camera angle testing | Settings > Devices > PlayStation Camera > Adjust PlayStation Camera |
| Camera mount type | Bendable, hinged, clip-on, or double-sided tape |
What You'll Learn

Using a PlayStation camera clip
Step 1: Prepare the Camera Clip
Take the PlayStation camera clip out of its packaging. Familiarize yourself with its parts, which include a bendable contraption with hinges that allow you to shape it accordingly. This bendable piece is crucial for attaching the camera to your TV.
Step 2: Bend the Camera Clip
Gently bend the hinges of the camera clip to shape it into a configuration that fits securely on top of your TV. The goal is to create a form that sits stably on your TV, either by bracing it against the back or clipping it onto the top. Ensure that the clip is firmly attached before proceeding to the next step.
Step 3: Attach the Camera
Once the camera clip is securely in place, attach the PlayStation camera to it. Ensure that the camera is firmly seated within the clip and that the camera's viewing angle covers the intended play area. Make any necessary adjustments to the clip's position or the camera's angle to achieve optimal coverage.
Step 4: Test the Camera Setup
Power on your PlayStation and go to the Settings menu. From there, select "Devices," followed by "PlayStation Camera." Choose the "Adjust PlayStation Camera" option to test your camera angles. During this process, ensure that your head is inside the box displayed on the screen and press the "X" button on your controller. Repeat this process for different areas of the screen to ensure comprehensive coverage.
Step 5: Address Lighting Concerns
If the camera fails to register your presence during the test, adjust the lighting in the room. Bright lights, lamps, or even sunlight streaming through a window can cause tracking issues. Ensure that the play area is well-lit but avoid excessive illumination that might interfere with the camera's performance.
By following these steps, you can effectively use a PlayStation camera clip to mount your PS4 camera to the top of your TV, ensuring an enjoyable and immersive PlayStation VR experience.
Galaxy Watch 6: Camera Expectations and Realities
You may want to see also

Attaching with double-sided tape
Attaching your PS Camera to the top of your TV using double-sided tape is a cheap and easy fix. You can purchase double-sided tape from most hardware stores, and it will provide a more secure hold than the bendable clamp that comes with the camera.
To attach the camera using double-sided tape, first, clean the surface of your TV and the bottom of the camera's clamp with a soft cloth to remove any dust or debris. This will help ensure that the tape adheres properly. Next, cut a small piece of double-sided tape and place it on the bottom of the camera's clamp. Carefully position the camera on top of your TV, applying a small amount of pressure to make sure the tape sticks well.
You may also want to consider using a stronger adhesive, such as glue, or pairing the tape with another substance like Silly Putty or Blu Tack for added stability. If you're concerned about the stability of the camera, you can also try placing a small piece of tape on each side of the clamp to create a stronger hold.
While double-sided tape can be a good solution, it's important to note that it may leave residue on your TV when removed. As such, it's recommended to use it sparingly and be gentle when removing the tape to avoid damaging the surface of your TV. Additionally, be mindful that the tape's adhesive properties may weaken over time, so it's a good idea to check the camera's stability periodically and replace the tape as needed.
Can Your TV Spy on You?
You may want to see also

Using a bendable contraption to counterbalance the camera
The PlayStation Camera comes with a bendable contraption that counterbalances it on top of your TV. This bendable mount has three segments separated by two hinges, which you can bend to shape so that it sits securely on top of your TV.
The mount relies on gravity to hold onto the TV, and while it may not be super stable, it can be adjusted to ensure your camera doesn't fall forwards or backwards. You can do this by moving the plate with the camera forward and backward until the camera stays in place when you are not holding it.
If you are still worried about the camera falling, you can try using double-sided tape or blu tack to stick the mount to the TV.
Cameras: Are We Being Watched?
You may want to see also

Placing on a shelf above the TV
If you want to place your PS camera on a shelf above the TV, you can follow these steps. Firstly, it is important to ensure that the shelf is stable and can bear the weight of the camera. The camera should be placed around four to six feet high, which is about six to twelve inches above the player's head. This height will provide the optimal viewing angle for the camera to track the player's movements.
You can then proceed to test the camera angles by going to the Settings option on the PlayStation's Home Screen. From there, choose the 'PlayStation Camera' option and select 'Adjust PlayStation Camera'. You will see the camera's perspective on the screen, with a box indicating the ideal position for the player's head. Adjust the camera accordingly so that your head is inside the box, and then press the 'X' button on your controller.
Repeat this process for different areas of the screen to ensure proper calibration. If the camera fails to register you, adjust the lighting in the room as this may improve detection. It is also important to ensure that there are no bright light sources within or behind the play area, as this can cause tracking issues.
Additionally, consider using a camera mount to secure the camera in place. There are various options available on Amazon, such as adjustable TV clip mounts, wall mounts, or desktop screen shelves, which can provide a stable base for your camera setup.
Streaming Roku Camera Footage to Your TV
You may want to see also

Using a microphone stand or speaker pole
Choose the Right Microphone Stand or Speaker Pole
Look for a microphone stand or speaker pole that is adjustable and has a wide base for stability. Make sure the stand or pole is tall enough to position the camera about six to twelve inches above the player's head.
Assemble the Microphone Stand or Speaker Pole
Follow the instructions provided with your chosen stand or pole to assemble it correctly. Ensure that it is stable and secure before proceeding to the next step.
Attach the PS Camera to the Stand or Pole
Use appropriate mounting hardware to attach the PS camera to the stand or pole. You may need to purchase a separate camera mount or bracket designed specifically for the PS camera. Make sure the camera is securely attached and adjusted to the correct height.
Position the Stand or Pole Near the TV
Place the assembled stand or pole near your TV, ensuring that the camera is positioned directly above the TV screen. Adjust the height and angle of the stand or pole so that the camera is about six to twelve inches above the player's head while they are sitting or standing in their usual gaming spot.
Test the Camera Angles
Once you have everything set up, test the camera angles to ensure optimal performance. Go to the PlayStation's Home Screen, choose Settings, select PlayStation Camera, and then choose Adjust PlayStation Camera. Follow the on-screen instructions to adjust the camera angles as needed.
Make Final Adjustments
If necessary, make any final adjustments to the height or angle of the microphone stand or speaker pole to ensure the best experience for the player. You may also need to adjust the lighting in the room to avoid tracking issues.
By following these steps, you can effectively use a microphone stand or speaker pole to attach your PS camera to the top of your TV, providing a stable and adjustable setup for your gaming needs.
Business Surveillance: Watching My Cameras from Home
You may want to see also
Frequently asked questions
The PS camera comes with a bendable clamp/stand that can be shaped to sit on top of your TV.
You can buy adjustable TV clip mounts that are compatible with the PS camera.
The ideal height is about six to twelve inches above the player's head.
You should be at least four feet from the camera if you are sitting, and six feet away if you are standing.
Go to Settings > Devices > PlayStation Camera > Adjust PlayStation Camera. You will see a box on the screen. Move so that your head is inside the box and press X on your controller.


