OBS Studio, or Open Broadcaster Software, is a free and open-source software for live streaming and recording. It offers a range of features, including video and audio capture, and allows users to select a whole monitor to be captured. This paragraph aims to introduce the topic of how to add monitor capture to OBS Studio, providing an overview of the software's capabilities and the steps required to utilise its monitor capture function.
What You'll Learn

Select a whole monitor to capture
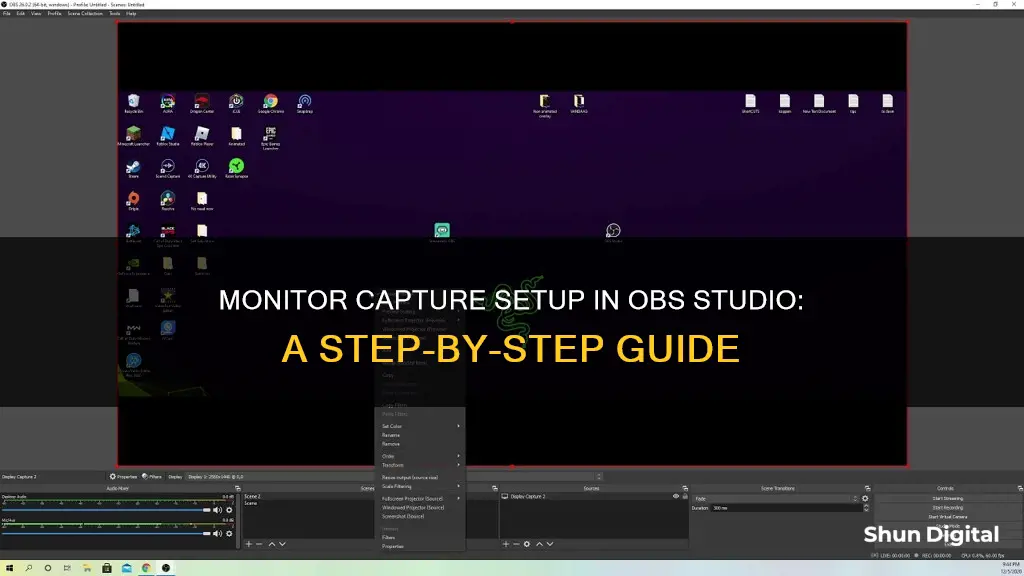
To select a whole monitor to capture in OBS Studio, you need to first add a source to the default scene. You can do this by accessing the Scene button in the bottom left corner of the user interface. Once you've selected the default scene from the drop-down menu, click on the "Add" button at the bottom of the panel marked "Sources".
From the options, choose "Screen Capture" if you're on Linux or "Display Capture" if you're on Mac or Windows. A dialogue box will appear, where you should select "OK". Another box will appear, and if you have more than one monitor, you can select which one you want to record by clicking on the small downward arrow and choosing from the drop-down list. Press "OK" again.
Now, click on the "Settings" button in the bottom right corner of the screen. From the "Output" tab, you can see the "Recording Path" field on the right, which is where your captured video will be stored on your computer. Finally, click on the "Start Recording" button in the lower-right corner to begin recording.
Please note that this method does not work for fullscreen games.
Testing LCD Monitors: A Step-by-Step Guide
You may want to see also

Capture mouse cursor
OBS Studio has a "Capture mouse cursor" option in the window capture settings. This option is available for Windows users but not for Mac users due to limitations of macOS.
To access the "Capture mouse cursor" option, right-click on the display or window capture source, select "Properties", and then enable "Capture cursor". You can turn the cursor capture on and off as needed.
It is important to note that the "Capture mouse cursor" option is only available for certain source types, such as Display Capture and Window Capture. For source types like images and video capture devices, you will need a third-party tool to capture just the cursor. Alternatively, you can display the output of the images and video capture on your screen and use Window Capture or Display Capture to record it, along with the cursor.
Additionally, if you are using a MacBook, you can try using a cps counter to check if mouse clicks are captured. If they are, the cursor capture should work with OBS Studio as well.
Repairing LCD Monitors: Replacing CCFL Lights
You may want to see also

Capture layered windows
To capture layered windows in OBS Studio, you need to activate the "Capture Layered Windows" setting. This setting allows you to capture overlapping windows, which can be useful if you are running a dual-monitor setup or have multiple windows open that you want to include in your stream or recording.
By enabling "Capture Layered Windows", you can capture windows that are on top of each other, ensuring that all the content you need is included in your recording. This feature is particularly useful if you are using Aero on Windows, as it allows you to capture the desired window along with any windows that may be overlapping it.
However, it's important to note that capturing layered windows can be resource-intensive, especially for multi-GPU laptop systems or setups where capturing issues are already present. In such cases, capturing to RAM before uploading to the scene is recommended as a last resort. This ensures that your system can handle the demands of capturing multiple windows simultaneously.
To set up capture layered windows in OBS Studio, follow these steps:
- Open OBS Studio and create or select the scene you want to work with.
- In the Sources panel, add a new window capture source.
- Select the desired window you want to capture from the list of available windows.
- Enable the "Capture Layered Windows" option within the window capture settings.
- Adjust any additional settings as needed, such as the capture size, gamma, visibility, and colour keying.
- Start your stream or recording, and ensure that the layered windows are being captured as expected.
By following these steps, you can effectively capture layered windows in OBS Studio, giving you more flexibility in your streaming or recording setup.
Understanding Stage Monitors: Hot Spots and Their Impact
You may want to see also

Change the gamma of your capture
To change the gamma of your capture in OBS Studio, follow these steps:
- Right-click on the source of the video you want to adjust.
- Select 'Filters' from the menu.
- Click on the '+' icon under the 'Effects Filters' section.
- Choose the 'Color Correction' option and give it a descriptive label.
- Adjust the gamma settings to your desired level. You can also adjust the contrast, brightness, and saturation levels as needed.
By following these steps, you can modify the gamma of your capture to achieve the desired lighting and colour balance for your video content.
It's important to note that OBS Studio provides a range of tools for colour correction, allowing you to enhance the visual quality of your recordings or streams. The gamma setting is just one aspect of colour correction, and you can also experiment with other adjustments to fine-tune your video content.
Additionally, if you're encountering issues with the brightness or darkness of your capture, adjusting the gamma can help improve the overall visibility of your recording or stream. Play around with the settings to see what works best for your specific use case.
Remember that colour correction is a creative process, and you can always reset or adjust the settings if you're not happy with the results. There are also community-created resources and guides available online, which can provide further assistance and tips for utilising OBS Studio's colour correction tools effectively.
Asus Monitors: Are There Built-In Microphones?
You may want to see also

Change the visibility of your capture
To change the visibility of your capture in OBS Studio, you can adjust the display settings and select which windows or applications are included in the capture. Here are the steps you can follow:
- Go to the Display Capture or Application Capture settings in OBS Studio.
- Determine if you want to capture the entire display or specific windows/applications.
- If you choose Display Capture, you can set the area of the display to be captured by cropping the top, left, right, and bottom sections. This will allow you to include or exclude certain windows or applications from the capture.
- If you opt for Application Capture, you can select the specific application or window you want to capture. This is useful if you only want to capture a single window or all windows belonging to a particular application.
- Additionally, you can set the visibility of the mouse cursor. Decide whether you want to include or exclude it from the capture.
- In the case of using a macOS device, you can utilise the macOS Screen Capture source and choose between Display Capture or Window Capture mode.
- For Windows, you can access the Settings > General and enable the "Hide OBS windows from screen capture" option to exclude OBS Studio windows from your capture.
- If you are experiencing issues with capturing specific games or applications, you may need to set OBS to run on a specific GPU. This can be done through the Graphics Settings on Windows 10 and newer versions.
- By following these steps, you can customise the visibility of your capture in OBS Studio, ensuring that only the desired windows or applications are included in the capture.
Monitoring WordPress Performance: Strategies for Success
You may want to see also


