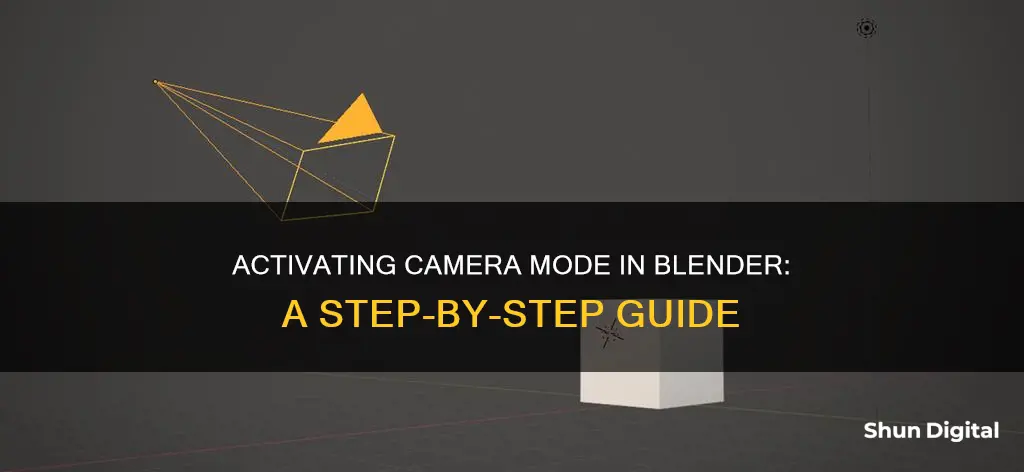
Activating camera mode in Blender is a straightforward process, and there are several methods to achieve this. One common way is to use the hotkeys Ctrl + Numpad 0 to set an object as the active camera. However, this doesn't change the viewpoint. To view from the active camera, simply press Numpad 0 or select View > Viewpoint > Camera from the 3D Viewport menu. Alternatively, you can choose View > Cameras > Active Camera. These methods allow you to switch to the camera view and see through the active camera in your Blender scene.
What You'll Learn

Using hotkeys G and R to move and rotate the camera
Moving the camera in Blender is essential for any animation, as it allows you to frame and visually narrate the action or inaction displayed on screen. The easiest way to move the camera is by using the hotkeys G (Grab/Translate) and R (Rotate) after selecting the camera.
For example, pressing "G" and then "X", "Y", or "Z" locks the movement to the respective axes, allowing you to move the camera left or right, up or down, or forward or backward, respectively. Similarly, pressing "R" and then an axis key rotates the camera along that axis.
You can also press "Shift" and an axis key to lock the movement to the other two axes. For example, pressing "Shift+X" locks the movement to the "Y" and "Z" axes, allowing you to move the camera forward or backward and left or right without affecting its vertical position.
Using the hotkeys G and R provides a quick and efficient way to move and rotate the camera in Blender, giving you precise control over the framing and composition of your animation.
Mastering Camera Raw: Saving Adjustments Like a Pro
You may want to see also

Using the Gizmo to move the camera
To activate the Gizmo, navigate to the top right of your scene region and click on the show Gizmo drop-down menu. Tick the "Move", "Rotate", and "Scale" options under the object gizmo.
A gizmo has three colour-coded axes: X (red), Y (green), and Z (blue). You can drag an axis with the LMB to transform along it. The Move and Scale gizmos have small coloured squares for transforming along two axes at once.
Various modifier keys can be used:
- Hold Ctrl to toggle snapping and make rotation and scaling work in coarse increments.
- Hold Shift and press LMB to allow for finer adjustments.
- Hold Shift before pressing LMB to perform the transformation in the plane that is perpendicular to the clicked axis.
The Gizmo popover has the following settings for object gizmos:
- The orientation to use for the gizmo. By default, this is the viewport's Transform Orientation.
- Show the gizmo to control the location. Dragging the small white circle allows free movement in the viewing plane.
- Show the gizmo to control the rotation. Dragging the large white circle rotates around the viewing direction. Dragging the translucent white disc within that circle allows trackball rotation.
- Show the gizmo to control the scale. Dragging the area between the small and large white circles scales along all three axes.
The latter three options are also available in a pie menu if you have the Grave Accent/Tilde Action in the Keymap Preferences set to Gizmos.
Using Camera and Wi-Fi: How Much Battery Drain?
You may want to see also

Using the Transform tab for granular control
To get more granular control over the camera movement, the Transform tab can be used. Access the Transform tab by pressing "N" to open the context bar and selecting the "Item" tab on the right. The Transform tab can also be accessed from the Object Properties tab. Clicking and dragging the mouse over the transformation values will change them, and values can be entered manually.
The concepts of "spaces" and "space switching" are key to unlocking the full potential of object movement and transformations. By default, all transforms are done in "world space", meaning that a Z translation of 8 meters moves it up vertically by 8 meters in the world, regardless of its initial direction or rotation. Switching the space to "local" via the transformation orientation drop-down at the centre top of the viewport allows you to move the camera according to its own axes. For example, with "local" space enabled, moving the camera on the "Z" axis moves it forward in the direction it is facing.
Switching to "local space" can save time in situations where the camera already has complex transforms in place and a simple movement is needed along the camera's axes. This method of switching between "world space" and "local space" works for any kind of object, not just the camera.
Charging Up: Camera vs. Car
You may want to see also

Switching between world and local space for more intuitive camera movement
Switching between world and local space is a key concept when it comes to camera movement and transformations in Blender. By default, all transformations are done in "world space", meaning that moving an object by 8 meters on the Z-axis will move it up vertically by 8 meters in the world, regardless of its initial direction or rotation.
Switching to "local space" allows you to move the camera according to its own axes. In "local space" mode, moving the camera on the Z-axis moves it forward in the direction it is facing. This can be a real time-saver, especially when the camera already has complex transformations in place, and you only need to make a simple movement along the camera's axes.
Here's how to switch between world and local space:
- Make sure you have selected the camera by clicking on the dashed frame.
- Go to the transformation orientation drop-down menu at the top center of the viewport.
- Switch the space to "local" to move the camera according to its own axes, or switch it to "world" to move it in relation to the world axes.
Remember that these concepts of "world space" and "local space" are not limited to the camera but apply to any kind of object in Blender.
Smart Doorbell Camera: How Long Does the Battery Last?
You may want to see also

Using the Track To constraint to keep the camera pointing at a defined object
To keep the camera pointing at a defined object, you can make use of the "Track To" constraint. This is a preferred method as it offers a more easily controlled constraining mechanism.
Here's a step-by-step guide on how to use the "Track To" constraint:
- Select the camera.
- Navigate to the Object Constraint Properties tab.
- Add a "Track To" constraint.
- Select your target object via the dropdown or eyedropper selector.
- In the "To" section, set the "Track Axis" to "-Z". This ensures the camera points towards the target object.
- In the "Up" section, set it to "Y". This maintains the camera's rotation and ensures it always points at the object.
By following these steps, you can keep the camera pointing at a defined object while maintaining its position. The "Track To" constraint is a powerful tool to create dynamic and intuitive camera movements in your Blender project.
Canon Cameras: Selfie Mode Available?
You may want to see also
Frequently asked questions
To activate camera mode on Blender, press the number "0" (Zero) on the Numpad. Alternatively, you can select "View" > "Cameras" > "Active Camera" or "View" > "Viewpoint" > "Camera" from the 3D Viewport menu.
First, select the camera. Then, add a "Track To" constraint by navigating to the "Constraints" tab in the Object Properties panel. Choose your target object in the "Target" field, set the "Track Axis" to "-Z", and set the "Up" field to "Y". Now, the camera will always point at the target object.
You can move the camera by using the hotkeys "G" (Grab/Translate) and "R" (Rotate) after selecting the camera. Pressing "X", "Y", or "Z" after initiating a Grab or Rotate locks the movement to the respective axes. For example, pressing "G" then "X" or pressing "R" then "Z".
To lock the camera to the view, select the camera, press "N" to open the Properties panel, then check "Lock Active Camera to View" in the View panel. Now, you can control the camera's position with "WASD", zoom with the scroll wheel, and point the camera by moving the mouse.


