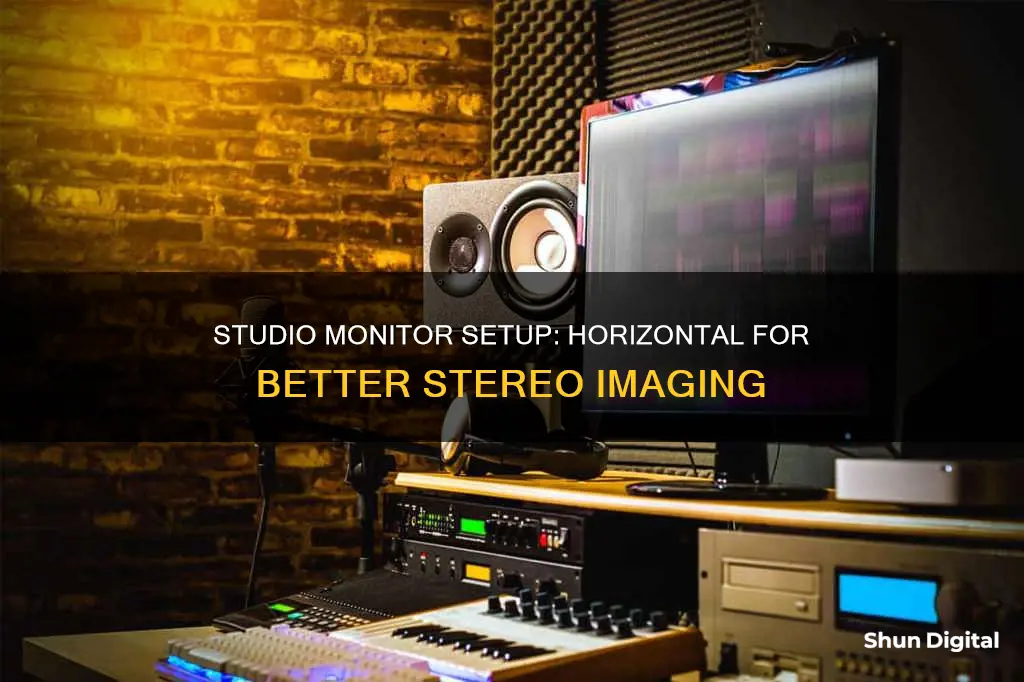
Studio monitor placement is crucial for creating an accurate mixing space. While some monitors can be placed in either orientation, most are designed to be vertical. The underlying premise is that the sound is designed to propagate in a specific way, and placing a vertical speaker horizontally can mess up the stereo image. However, there are valid reasons to place monitors horizontally, such as aligning the tweeters at ear height or avoiding blocking the view into the control room.
What You'll Learn

Stereo image issues
When studio monitors are placed on their sides, the wave dispersion changes from horizontal to vertical. This reduces the width of the stereo image and the "sweet spot", leading to inconsistencies in the listening experience across the room. The perceived tone can change dramatically as the listener moves their head horizontally, an issue known as "comb filtering".
Additionally, placing studio monitors sideways affects the alignment of the woofer and tweeter, resulting in the sound reaching the listener's ears at slightly different speeds and causing phasing and comb filtering issues. The bass driver inside most speakers is designed to be pointed upwards, and placing the monitors sideways can cause bass frequency response issues.
Monitor Bandwidth and Data Usage Like a Geek
You may want to see also

Phasing and comb-filtering issues
When studio monitors are placed on their sides, the wave dispersion is altered. Instead of spreading sound horizontally, as most monitors are designed to do, the sound is dispersed vertically. This change in dispersion can cause phasing issues, as the sound from the left and right channels may not reach the listener at the same time. This can result in a loss of a cohesive stereo image and excessive separation between the channels, making it difficult to achieve an accurate mix.
Additionally, placing monitors sideways can push the woofer and tweeter out of alignment, causing comb-filtering issues. The increased distance between the woofer and tweeter can cause the sound to arrive at the listener's ears at slightly different speeds, resulting in phase interference and a smearing or skewing of the frequency spectrum. This can make it challenging to achieve a clear and accurate sound mix.
To mitigate these issues, it is generally recommended to place studio monitors vertically. This allows the sound to disperse horizontally, maximising the stereo image width and creating a more consistent listening experience across the room. Vertical monitor placement also helps to minimise reflections from the desk, ceiling, and other surfaces, reducing potential acoustic anomalies.
However, there may be situations where placing the monitors horizontally is necessary or preferred. In such cases, it is important to consult the manufacturer's guidelines and make adjustments to the setup, such as moving the monitors closer together or tilting them forward, to minimise phasing and comb-filtering issues.
Finding Monitors: Locating Similar Displays to Your Current One
You may want to see also

Manufacturer recommendations
For example, the Yamaha NS-10 series includes models designed for both vertical and horizontal orientations. The original NS-10M was intended for vertical placement, while the NS-10M Studio was designed for horizontal use. Similarly, the Genelec 1031A studio monitors can be placed horizontally, but the manufacturer recommends rotating the HF driver 90 degrees to maintain proper dispersion. On the other hand, the HS series from Yamaha is meant to be positioned vertically, as they are typical two-way speakers with vertically aligned tweeters and mid/woofers.
In some cases, manufacturers may provide flexibility in placement. For instance, the Eris E5s can be placed horizontally without any issues, while the Neumann KH310 performs best when mounted on its longer side. Additionally, coaxial monitors, such as those designed by Genelec and ME Geithain, can be placed vertically or horizontally due to the coincident alignment of their drivers.
It is worth noting that some manufacturers may provide specific instructions regarding the rotation or alignment of certain components when placing the studio monitors horizontally. For example, rotating the tweeter or HF driver may be recommended to maintain optimal sound dispersion. Therefore, it is always advisable to consult the manufacturer's manual or documentation before deciding on the placement of your studio monitors.
Monitoring Internet Usage: Track Activity by Device
You may want to see also

Acoustic treatment
Symmetry and Speaker Placement: Strive for symmetry in your studio layout. Symmetrical left and right speaker placement is essential for a clear and accurate stereo image. Asymmetrical positioning can lead to a distorted perception of the stereo image. Additionally, place your speakers away from long, flat walls and corners to minimise unwanted reflections.
The Golden Triangle: To create the "sweet spot," form an equilateral triangle with your speaker placement and listening position. Adjust the height of your speakers so that the tweeters are at ear level. This ensures you are within the optimal sound dispersion range.
Reflection Points: Identify the first reflection points, such as the wall behind the speakers, the walls to their sides, and the ceiling. Use acoustic treatment on these surfaces to minimise acoustic reflections that can interfere with the direct sound from the speakers. Consider using stands to position your monitors behind the mixing desk or console if necessary.
Bass Trapping: Pay particular attention to bass frequencies and the potential for standing waves in your room. Place bass traps in corners and strategic locations to absorb low-end frequencies and reduce unwanted bass buildup. This will provide a more accurate representation of the bass response in your mixes.
Diffusion and Absorption: Combine diffusion and absorption techniques to treat mid and high frequencies effectively. Use acoustic panels and diffusers to scatter sound and reduce reflections, creating a more balanced and natural-sounding room.
Monitor Stands and Isolation: Use appropriate monitor stands or isolation pads to ensure optimal positioning and minimise the transfer of vibrations from the speakers to your desk or stands. This helps to maintain clarity and accuracy in your sound.
Room Correction: Consider using room correction software or hardware to dial in an accurate frequency response. This can help compensate for any remaining acoustic anomalies and provide a more trustworthy listening environment.
Remember, every studio space is unique, so experiment with different acoustic treatment techniques and speaker placements to find what works best for your specific setup. The goal is to create an environment that allows you to make informed and accurate mixing decisions.
Measuring Audits: Performance Monitoring Metrics for Success
You may want to see also

Speaker placement
The placement of your studio monitors is crucial for achieving optimal sound quality and accuracy. Here are some guidelines for positioning your speakers:
- Symmetry is Key: Strive for a symmetrical room layout and symmetrical left-right speaker placement. Asymmetrical positioning can significantly alter your perception of the stereo image.
- Create the "Sweet Spot": Form an equilateral triangle between your speakers and listening position. This "sweet spot" is where you'll experience the best sound balance and imaging.
- Optimise Tweeter Height: Adjust the height of your speakers so that the tweeters are at ear level. This ensures you're in the right zone for the monitor's sound dispersion.
- Avoid Long, Flat Walls: Place your monitors on the short wall of a rectangular room to minimise sound reflections from the back wall. Reflections from long walls can interfere with the sound reaching your ears.
- Centre Your Speakers: Position your speakers in the centre of a wall instead of a corner to reduce sound anomalies.
- Consider Reflective Surfaces: Be mindful of reflective surfaces near your speakers, such as your desk, console, walls, and ceiling. These surfaces can create acoustic reflections that impact the sound.
- Follow Manufacturer Guidelines: Refer to your speaker's manual for specific placement instructions. Some speakers are designed for horizontal or vertical placement, and deviating from the recommended orientation can affect sound dispersion and stereo imaging.
- Experiment and Trust Your Ears: While guidelines are essential, don't be afraid to experiment with different placements. Ultimately, trust your ears and choose the setup that sounds best to you.
Speaker Placement: Where to Connect for Optimal Monitoring
You may want to see also
Frequently asked questions
Studio monitors are designed to be placed either vertically or horizontally. When placed horizontally, the tweeter is at ear level, which is optimal for listening.
When studio monitors are placed horizontally, sound waves are dispersed vertically, adding width to the vertical plane. This can reduce inconsistencies when moving around the room and create a more consistent listening experience.
Horizontal placement pushes the woofer and tweeter out of alignment, increasing the distance between them. This can cause the sound to arrive at the listener's ears at slightly different speeds, resulting in comb filtering and phasing issues.
Studio monitors may be placed horizontally to align the tweeters at ear height in bigger studios, to avoid blocking the view into the control room, or to prevent drivers from being blocked by other speakers.


