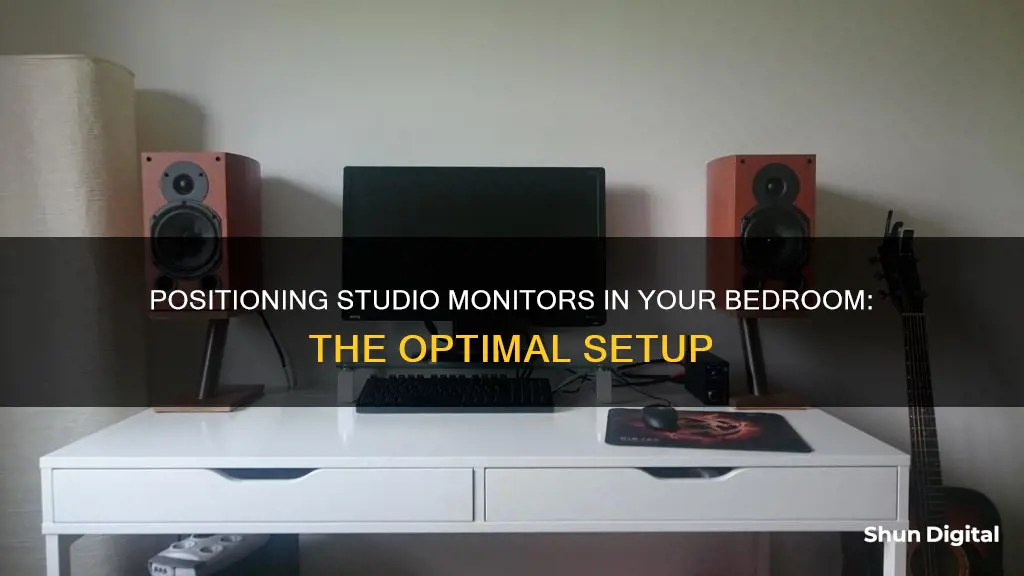
If you're looking to set up studio monitors in your bedroom, there are a few things to keep in mind. Firstly, the placement of your monitors is crucial to achieving optimal sound quality. It is recommended to position your monitors along the short wall of the room to minimise sonic reflections. You should also aim to get your monitors at ear level, with the tweeters of your speakers at head height so that your ears are directly in front of the speakers. Another important factor is symmetry – try to create an equilateral triangle with your monitors and your head, and ensure that your monitors are the same distance from their respective sidewalls. Additionally, it is best to avoid placing your monitors too close to walls, as this can affect the bass response. Finally, consider treating your room with acoustic panels or bass traps to minimise sound reflections and improve the overall sound quality.
What You'll Learn

Avoid corners and windows
When setting up studio monitors in a bedroom, it is important to avoid placing them in corners or near windows. Here are some reasons why:
Acoustic Resonance
Putting studio monitors in corners can lead to a buildup of low-frequency energy due to the reinforcement of bass frequencies caused by the proximity of the walls. This can result in an uneven frequency response, with boomy or overpowering low frequencies, and an inaccurate representation of the audio.
Imbalanced Stereo Imaging
Corner placement can also cause a skewed stereo image, where one side seems louder or imbalanced compared to the other. This is because the soundwaves interact differently in corners, creating an asymmetrical listening experience.
Reflections and Phase Issues
Another issue with corner placement is the increased likelihood of sound reflections and phase cancellation, especially in the low-frequency range. These issues can interfere with the clarity and accuracy of the sound, impacting your ability to make precise mixing and mastering decisions.
Hard Surfaces
Windows are an example of acoustically hard surfaces, which reflect sound in the same way that a mirror reflects light. When the direct sound from the speaker combines with a reflected sound, it creates a technical issue called comb filtering, altering the sound.
To avoid these issues, try to place your studio monitors away from corners and windows, and use acoustic treatment such as absorbers, bass traps, or acoustic panels to minimise any unwanted reflections.
Activating Your ASUS Monitor: A Step-by-Step Guide
You may want to see also

Place monitors on stands
If you're placing your studio monitors on stands, there are a few things to keep in mind to ensure optimal sound. Firstly, the tweeters of your speakers should be at head height (ear level) so that your ears are directly in front of the speakers. This ensures that you're facing the speakers at ear level and can achieve the most consistent and best sound. Speaker stands can help elevate your monitors to the correct height if your desk or console is too low.
The distance between the left and right speakers and the distance from each speaker to the back of your head should be equal, forming an equilateral triangle. This setup creates a natural stereo "sweet spot" that allows you to move around a bit and even have a collaborator sit next to you. You can use a tape measure, a piece of string, or a guitar cable to help set up this triangle.
When positioning the stands, try to place the monitors either almost against the front wall or at least 43 inches (110 cm) away from it. If your speakers are placed close to the front wall, their bass response will be exaggerated. Many monitors provide onboard EQ settings such as whole-space (flat EQ for placement away from any walls) and half-space (slight bass reduction for placement near the front wall) to compensate for this. Additionally, place your speakers at least 44 inches from their nearest side wall to avoid creating uneven bass response due to low-frequency reflections from the front wall.
If your room is small, it's usually best to position the monitors along the shortest wall. This will give more consistent results and help to minimize problems from side reflections. However, in larger rooms, it is often recommended to put the speakers along the longest wall to get the reflective side walls further away.
Lastly, if you're using speaker stands, consider using speaker isolation pads as well. These pads help to mitigate vibrations and resonances by absorbing them before they can transfer to your furniture. They can improve the accuracy of the sound your speaker system produces.
Replacing LCD 2243BW Series Monitors: A Step-by-Step Guide
You may want to see also

Face the short wall
Facing the short wall is often recommended for studio monitor placement in a bedroom or small room. This setup helps to minimise the impact of room acoustics on the sound and can result in a more accurate and balanced mix.
When speakers are placed along the short wall, the sonic reflections that travel from the speaker to the nearby wall and back to your ear arrive earlier and with greater intensity than reflections from a farther wall. This can help to create a more consistent listening experience, particularly in smaller spaces.
In a small room, positioning the monitors along the short wall can also help to avoid bass cancellation in the centre of the room, where you are likely to be sitting. Moving even slightly to the side when facing the long wall can create variable results. Facing the short wall can provide more consistent bass response and reduce the impact of room dimensions on certain frequencies.
To optimise the setup, ensure that the tweeters of your speakers are at head height (ear level) so that your ears are directly in front of the speakers. This will provide the most consistent and optimal sound.
Additionally, consider the materials and surfaces in your room. Acoustically hard surfaces, such as windows, drywall, or plaster walls, can reflect sound and alter the overall sound. You can use absorption or diffusion techniques to manage these reflections and improve the accuracy of your studio monitors.
Facing the short wall in your bedroom studio setup can provide benefits such as improved sound consistency, reduced room acoustic impact, and more optimal bass response.
Performance Monitor Analysis: A Step-by-Step Guide to Success
You may want to see also

Position monitors at ear level
When setting up studio monitors in your bedroom, it is important to get them at ear level. This means positioning the tweeters of your speakers at head height so that your ears are directly in front of the speakers. The directional pattern of sound emanating from the speaker, known as horizontal and vertical dispersion, varies as you move from the front and centre of the speaker. Therefore, for the most consistent and best sound, set up so that you are facing the speakers at ear level. If your speaker stands, console or desk won't allow you to get your monitors high enough, then use speaker stands to elevate them.
The ITU Standard Monitor Heights for freestanding studio monitors that are not tilted down are typically 47-55 inches (120-140 cm) off the floor. You want the tweeters to be firing right at your ears in the listening position. If you do tilt your speakers towards the listening position, don't angle them more than 15 degrees from vertical.
The high-frequency content is the most directional, so for the best imaging, your tweeters should be pointed directly at your ears. How critical this is depends on the off-axis response of your speakers. Your mid-range and bass drivers are less directional, so they don't need to be positioned as precisely.
To quickly check if your speakers are set up properly, from the reference point, you should only see the front baffle of the speaker, not the sides of the speaker cabinets. You can experiment with speaker distance by moving your speakers along a 30-degree line. Check the manufacturer's documentation for guidelines on listening distance and speaker-wall distance.
Your studio reference monitors should be at least 47 inches (120 cm) off the floor. Don't let your tweeters sit in the vertical centre of the room, even if it means you have to orient your tweeters slightly off-axis with your ears.
LCD Monitors: Wave Simulation Safe?
You may want to see also

Avoid hard surfaces
To avoid hard surfaces, it's important to understand how sound behaves in a room. Every solid surface in a room constitutes a potential boundary for sound to reflect off, to varying degrees. This can cause phase cancellations and other unwanted acoustic interactions.
Hard surfaces reflect sound in the same way that a mirror reflects light. Windows, drywall or plaster walls, mirrors, and any non-absorptive, non-diffusible surfaces are all examples of hard surfaces. When the direct sound from a speaker combines with a reflected sound, the sound is altered—this is called "comb filtering".
To avoid unwanted reflections and vibrations, it's best to avoid placing monitors directly on hard surfaces like a console or desktop. Instead, invest in monitor stands to separate the monitors from the rest of your setup. This will allow you to more easily adjust their distance and orientation. If stands are not an option, consider decouplers, which isolate monitors from the surface they're placed on, or isolation pads, which will help absorb vibrations and mitigate resonances.
Additionally, try to maintain a minimum distance of 20-30 cm (8-12 inches) between the monitors and walls to reduce sound waves reflecting back to your listening position. For near-field monitors, a maximum distance of 60-90 cm is recommended.
The distance between your monitors and the side and back walls should be different to avoid creating corners in your listening position. A good rule of thumb is to place your monitors 40-60 cm away from the back walls and 60-90 cm from the side walls.
By following these guidelines, you can minimise the impact of hard surfaces on your studio monitor setup and improve the accuracy of your listening experience.
Texas Ankle Monitors: Surveillance and Freedom Constraints
You may want to see also
Frequently asked questions
The ideal setup for correct stereo imaging is to position your listening point and monitors to create three points of an equilateral triangle, with the monitors facing in towards your ears at a 30-degree angle. You should also avoid placing your setup facing a corner, as this will cause sound reflection problems.
The distance between your monitors is a big issue but there are rules of thumb to help you. Use triangles: tilt each monitor 60 degrees so you can listen to everything while sitting in your target area. Use the science route: scientists found that most studio monitors are optimised when there is a 67.5-inch distance from tweeter to tweeter.
In most home studios, keeping your monitors at ear height is best as it focuses the sound on you. Many casual recording artists like this option as it is easy to work with and you don't need to worry about tilting your monitors.


