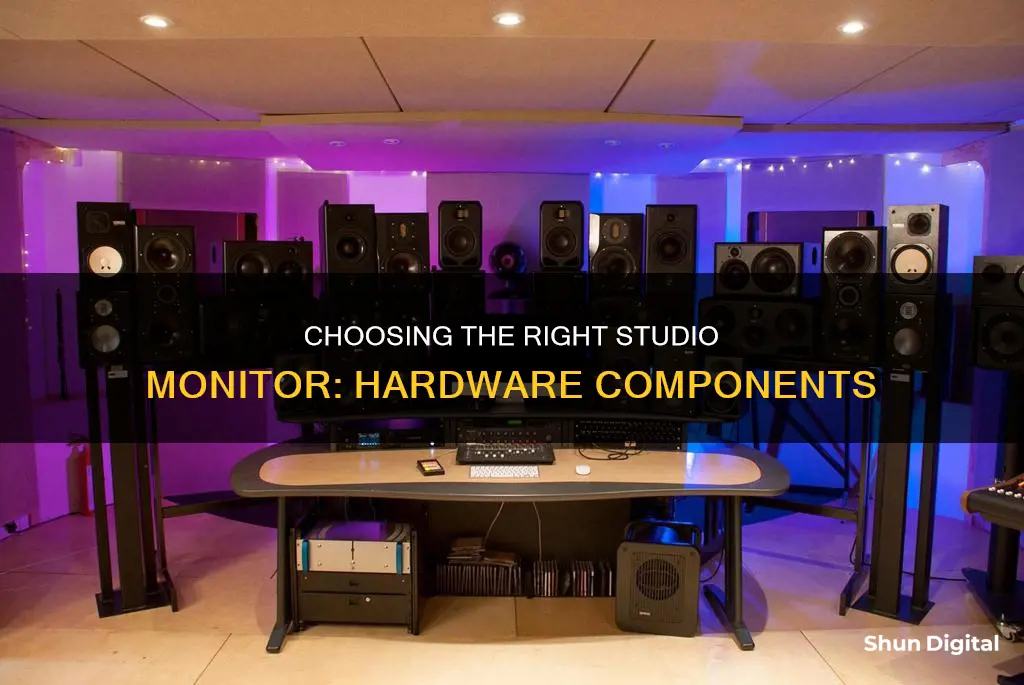
Studio monitors are loudspeakers designed for professional audio production applications. They are used in recording studios, filmmaking, television studios, radio studios, and home studios, where accurate audio reproduction is crucial. Studio monitors aim to produce a flat frequency response, resulting in an accurate and uncoloured representation of the source audio. This means that all frequencies are played at the same volume level, without any emphasis or de-emphasis on specific frequencies.
The hardware components of a studio monitor include the cabinet, drivers or speakers, and electromagnets. The cabinet, typically made of metal, wood, or plastic, houses the monitor's electronics. Most studio monitors have two drivers: a tweeter for producing high frequencies and a woofer for low and mid-range frequencies. Some monitors also feature a third driver, a mid-range speaker, for enhanced frequency response.
Behind each driver is an electromagnet that rapidly pulses on and off, causing the driver to vibrate and reproduce the complex audio signal. This vibration creates sound waves, allowing us to hear the audio. Studio monitors can be passive or active, depending on whether they require external amplification or have built-in amplifiers.

Monitor Speakers
When choosing monitor speakers, there are two main types to consider: passive and active. Passive monitors require an external amplifier to amplify the input signal before it enters the monitor, while active monitors have built-in amplifiers. Active monitors are generally more convenient, especially for home studios, as they don't require additional equipment and are designed to match the built-in amplifiers with the drivers. However, passive monitors offer more flexibility as you can choose an external amplifier that best suits your needs.
Another consideration is the power handling of the monitor speakers, which affects not only the volume but also the dynamic range and headroom. Higher wattage means you'll have more headroom and be able to hear more transient detail, making it easier to make precise adjustments.
The layout of the monitor speakers is also important. They should be placed so that they form an equilateral triangle with your head when seated in the mix position. This will result in the most accurate frequency response and clearest stereo image. Additionally, it is recommended to have the tweeters at ear height when seated.
When it comes to size, bigger monitor speakers can output more power and bass frequencies. However, the size of your room and the acoustics should also be considered when choosing the right size. Smaller rooms may not be able to handle the bass frequencies produced by larger monitors.
In summary, monitor speakers are designed to provide an accurate representation of your audio mix, with a flat frequency response. When choosing monitor speakers, consider the type (passive or active), power handling, layout, and size, ensuring they suit your specific needs and studio setup.
Opening LCD Monitors: A Step-by-Step Guide
You may want to see also

Amplifiers
When choosing an amplifier for passive monitors, it is important to consider the power requirements, which depend on factors such as monitor sensitivity, volume preference, listening distance, and room size. A typical power requirement for passive nearfield monitors in a small studio space is around 50W per channel into 8Ω. However, this can vary depending on the specific setup and usage.
In addition to power, other important specifications to consider when choosing an amplifier include distortion and impedance. Distortion specifications are not as critical, as modern amplifier design techniques have made it possible to achieve remarkably low distortion levels. Impedance, on the other hand, is significant, as amplifiers are generally happier driving higher impedances, which require less current. Therefore, it is important to consider the impedance curve of the monitors and choose an amplifier that can handle the load effectively.
Some practical requirements to look for in an amplifier include balanced inputs, reliable speaker terminals, and convection cooling. Balanced inputs are preferred as they help minimise noise and interference, especially over long distances. Reliable speaker terminals, such as 4mm sockets, combined 4mm sockets/binding posts, or Speakon sockets, ensure a secure connection and reduce the risk of signal loss and interference. Convection cooling is also preferable to fan cooling, as it avoids the distracting noise of a fan and potential masking of low-level mix details.
When it comes to amplifier configurations, there are three main options: single-amp, bi-amp, and tri-amp. Single-amp is the simplest setup, commonly used in computer speakers, where a single amplifier powers both the left and right speakers. Bi-amp configurations, on the other hand, provide greater control over frequency response and more precise sound reproduction, as each driver has its own dedicated amplifier. Tri-amp configurations, the most advanced and complex option, offer the ultimate control over frequency response by providing a dedicated amplifier for each driver in a 3-way speaker system.
In conclusion, when choosing amplifiers for studio monitors, it is important to consider the power requirements, specifications, and practical features that suit your specific needs and setup. Active monitors with built-in amplifiers offer convenience, while passive monitors provide more flexibility in amplifier choice. By considering factors such as power, distortion, impedance, and practical requirements, you can make an informed decision that ensures accurate and reliable audio reproduction in your studio.
Removing Ants from LCD Monitors: A Step-by-Step Guide
You may want to see also

Speaker Placement
Symmetry and Room Layout
Place your monitors symmetrically in the room, forming an equilateral triangle with your head when seated in the listening position. This means that the monitors should be as far away from you as they are from each other. This setup will result in the most accurate frequency response and a clear stereo image. Position the monitors along the shorter wall of the room, avoiding corners, to minimise early reflections and improve accuracy. For music production, place your setup in the front third of the room, while for film production, the rear third is recommended.
Height and Angle
Adjust the height of the monitors so that the tweeters are at ear level when you are seated. This ensures that your ears are directly in front of the speakers, receiving the most consistent sound. Angle the monitors slightly downwards if they are placed higher than ear level. Always aim the monitors towards the listening position.
Reflections and Isolation
Avoid placing monitors near hard, reflective surfaces such as windows, drywall, or mirrors. Reflections from these surfaces can interfere with the direct sound, causing comb filtering and altering the sound. Use speaker stands with isolation pads to reduce vibrations and improve sound quality. If possible, treat reflective surfaces with sound-absorbing material.
Subwoofer Placement
If you are using a subwoofer, place it along the front wall, slightly off-centre from the middle axis of the room. Using two subwoofers, positioned along the side walls, can help to achieve a flatter response. Ensure the subwoofer(s) are placed close to walls to excite room mode resonances.
Distance from Walls
Maintain a distance of at least one metre between the monitors and the walls to avoid pressure maxima and reduce the impact of wall reflections. If possible, avoid placing monitors where immediate side wall, ceiling, or floor reflections travel towards the listening position.
Disable Microphone Monitoring in FL Studio: A Step-by-Step Guide
You may want to see also

Speaker Isolation
Studio monitor isolation is the process of reducing the impact of room acoustics on the sound produced by studio monitors. It involves using various techniques and equipment to minimise sound reflections, vibrations, and resonances that can affect the accuracy of the listening experience.
One common method of studio monitor isolation is the use of isolation pads, which are placed between the monitors and the surface they are resting on. These pads are typically made of high-density acoustic foam and help to create separation between the speakers and the surface, reducing the transfer of vibrations and unwanted audio resonance. Isolation pads can also be angled to optimise the sound quality and direct the sound towards the listener's ears.
Another approach to studio monitor isolation is the use of speaker stands, which help to improve the sound of monitors by reducing sound reflections from the desk or mixing console. Stands also allow for height adjustment, ensuring that the monitors are positioned at ear level for the listener. Additionally, placing a small mirror on any hard surface surrounding or between the listener and the monitor can help identify surfaces that may reflect sound and cause acoustic distortions.
The choice of studio monitor isolation technique depends on various factors, including the size and shape of the room, the type of monitors being used, and the listener's specific needs and preferences. Near-field monitors, for example, are typically placed closer to the listener (around 2-3 feet away) and are less affected by room acoustics, making them a popular choice for home studios. Far-field monitors, on the other hand, are placed further away from the listener (around 10 feet) and rely more on room acoustics to impact the sound.
In summary, studio monitor isolation is crucial for achieving accurate and precise sound reproduction in a studio environment. By using isolation pads, speaker stands, and strategic placement, engineers can minimise the impact of room acoustics and improve the overall listening experience.
Monitoring Retail Performance: Big Business Strategies Revealed
You may want to see also

Monitor Controllers
When choosing a monitor controller, it's important to consider the specific needs of your studio setup. For example, if you require multiple audio sources or need to route talkback systems and headphone mixes, a more advanced monitor controller with comprehensive routing capabilities may be necessary. Additionally, the number of input and output channels, as well as the type of connections (analog or digital), should be factored into your decision.
For those seeking a straightforward solution, passive monitor controllers provide an affordable and effective way to control volume levels without the need for external power. In contrast, active monitor controllers with built-in amplifiers offer convenience and performance, ensuring the amplifier is specifically matched to the speakers for optimal sonic performance.
Whether you're a beginner or a professional, a monitor controller is an invaluable tool for managing your studio monitors and ensuring a seamless workflow during the recording, editing, mixing, or mastering process.
Ankle Monitors: Surveillance and Freedom in Question
You may want to see also
Frequently asked questions
Studio monitors are speakers designed for use in recording studios, radio stations, and other professional audio environments. They are used for mixing music, dialogue, and sound effects during the recording, mixing, and mastering processes. Studio monitors aim for a flat frequency response, meaning all frequencies are played at the same volume level, allowing for accurate mixing and mastering.
Studio monitors can be categorized into passive and active monitors. Passive monitors require an external amplifier, while active monitors have built-in amplifiers. Another distinction is near-field and far-field monitors, which differ in their placement relative to the listener. Near-field monitors are typically placed closer to the listener (around 2-3 feet away), while far-field monitors are placed further away (around 10 feet away).
When choosing a studio monitor, consider the size of your room, the type of work you will be doing, and your budget. The size of the monitor should be appropriate for the size of your room. If you are mixing in a small space, smaller monitors are usually more suitable. Additionally, consider the specifications of the monitor, such as power handling, driver types, cabinet design (ported or closed), and extra features like EQ and room correction.


