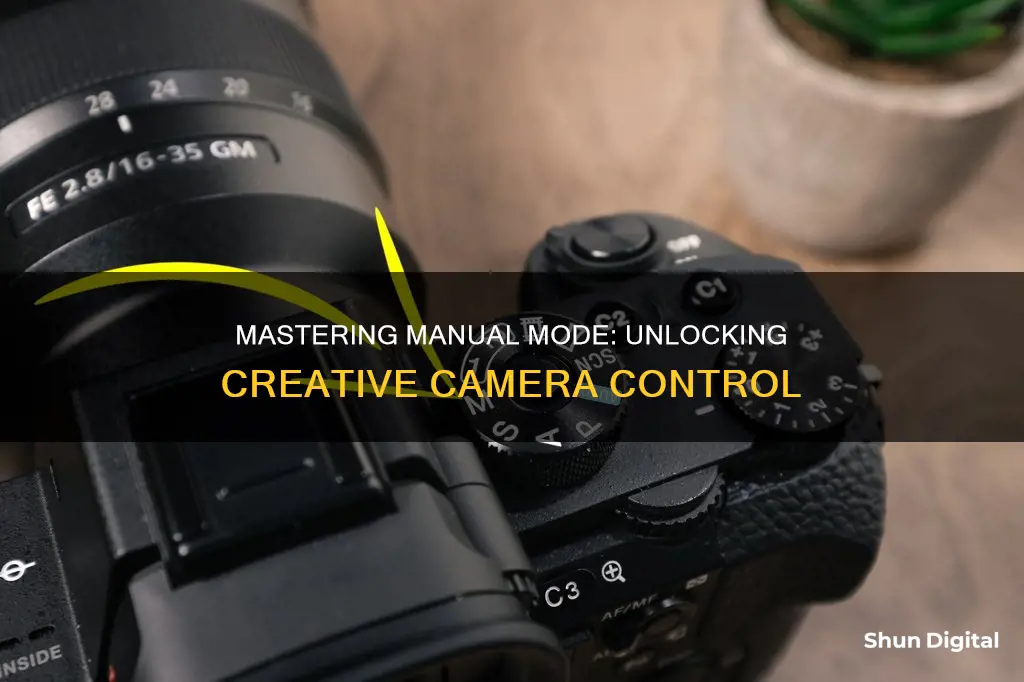
Manual mode on a camera gives the photographer full control over the settings, allowing them to adjust the shutter speed, aperture, and ISO to their desired values. This gives the photographer creative control over the final image, including its brightness, sharpness, depth of field, and overall quality. While shooting in manual mode can be intimidating for beginners, it is an excellent way to learn about your camera and gain more control over your images.
| Characteristics | Values |
|---|---|
| Control | In manual mode, the photographer can control the camera's settings. |
| Flexibility | Manual mode offers a lot of flexibility that other camera modes cannot match. |
| Creative control | Manual mode gives photographers creative control over how the final image looks. |
| Exposure | Manual mode lets photographers determine the exposure of an image by letting them select an aperture value and a shutter speed value. |
| Image quality | Manual mode lets photographers control the image quality by adjusting the ISO, which affects the smoothness, contrast, and colour rendition of the image. |
| Lighting | Photographers can adjust the aperture and shutter speed to control the amount of light that enters the lens and reaches the sensor. |
| Focus | Photographers can adjust the focus ring to ensure that the subject is in focus. |
| Shutter speed | Photographers can adjust the shutter speed knob to control how long the lens shutter will be open. |
| Image brightness | Photographers can adjust the aperture, shutter speed, and ISO to control the brightness of the image. |
| Image blur | A wider aperture produces more background blur, while a slower shutter speed can create a deliberate blur effect. |
What You'll Learn

Manual mode gives you complete control over your camera settings
Manual mode gives photographers complete control over their camera settings. This means that the photographer can adjust each and every setting their camera offers.
Manual mode gives you control over the three key exposure variables: ISO, aperture, and shutter speed. Together, these three variables determine the overall brightness of your photos (i.e., the exposure). They also affect your photos in other key ways: by adjusting the sharpness, depth of field, and overall quality of your files.
ISO controls your camera’s sensitivity to light. Aperture is the opening in the lens that lets light fall on the sensor. The wider the aperture, the more light it lets in, and the brighter the resulting exposure. The aperture is also responsible for controlling the depth of field – the window of focus within the photograph. The larger the aperture, the smaller the depth of field, and the narrower the window of focus. Shutter speed is the exposure time of an image; that is, it refers to how long the shutter stays open to allow light to hit the sensor. The faster the shutter speed, the less light that hits the camera sensor and the darker the final image.
Manual mode is great for photographers who want to have complete creative control over their images. It is also useful for shooting in extreme lighting situations, such as when there is a very bright area in the frame, or when there is rapidly changing light due to weather conditions. It is also useful for shooting panoramic images, as it ensures that every image has the same brightness.
Charging VHS Camera Batteries: A Step-by-Step Guide
You may want to see also

It lets you adjust the three key exposure variables: ISO, aperture, and shutter speed
When you put your camera into manual mode, you gain control over three key variables: ISO, aperture, and shutter speed. These three variables are the components of the exposure triangle, and they work together to determine the exposure (brightness) of your photograph.
ISO
The ISO controls your camera's sensitivity to light. A higher ISO will produce a brighter image, but it will also increase the amount of noise in your photograph. In general, it's best to leave your ISO at its base value (often ISO 100) and only increase it when you're shooting in low-light conditions.
Aperture
The aperture is an opening in the lens that lets light into the camera. A wider aperture (a lower f-stop number) will let in more light and give you a shallower depth of field, resulting in a blurry background. A narrower aperture (a higher f-stop number) will let in less light and give you a deeper depth of field, resulting in a sharper background.
Shutter Speed
Shutter speed refers to the length of time that the shutter is open and allowing light to hit the camera's sensor. A faster shutter speed will let in less light and freeze motion, while a slower shutter speed will let in more light and create motion blur.
By adjusting these three variables, you can ensure that your photographs are properly exposed (neither too bright nor too dark) while also achieving the desired depth of field and level of motion blur. Manual mode gives you the flexibility to make your photos appear exactly as you want them to, but it can be tricky to get the hang of, so don't be afraid to start with semi-automatic modes like Aperture Priority or Shutter Priority.
Unlocking Camera Raw: A Guide to Activating the Feature
You may want to see also

It's useful for creating a shallow depth of field
Manual mode on a camera gives you complete control over your camera settings. You can adjust the three key exposure variables: ISO, aperture, and shutter speed. These settings determine the overall brightness of your photos and their sharpness, depth of field, and overall quality.
Depth of field refers to the area of a photo that appears to be in focus. A shallow depth of field is when only a small portion of the image is in focus, with the rest blurred out. This is a popular technique used by photographers to add a narrative or artistic dimension to their images.
Manual mode is useful for creating a shallow depth of field because it allows you to adjust the aperture and, therefore, the amount of light entering your camera. A wider aperture lets in more light and creates a shallower depth of field, with the background appearing blurry. This is often a stylistic choice made by photographers to separate the subject from the background and make it stand out.
To create a shallow depth of field, you can manually set your camera to a low f-number or f-stop, typically between 1.4 and 5.6. This will increase the amount of light entering your camera and reduce the depth of field. Additionally, using a longer lens and getting closer to your subject will also help achieve a shallower depth of field.
It's important to note that while manual mode offers more control over your camera settings, it may not be the best option for all scenarios. Other camera modes, such as Aperture Priority or Shutter Priority, can be more suitable in certain situations, especially when dealing with fast-paced conditions or changing light.
Sync Color Correction in Adobe Camera Raw Like a Pro
You may want to see also

It's good for low-light photography
Manual mode is a powerful setting on your camera that gives you full control over your camera settings. It allows you to independently adjust the three key exposure variables: ISO, aperture, and shutter speed. These settings collectively make up the exposure triangle, which determines the overall brightness and quality of your photos.
Manual mode is particularly beneficial for low-light photography as it provides you with the flexibility to adjust these settings to compensate for the lack of light. Here's how each of these settings can be manipulated to enhance your low-light photography:
ISO
The ISO setting controls your camera's sensitivity to light. Increasing the ISO value boosts the camera's light sensitivity, resulting in brighter images. This is particularly useful when shooting in low-light conditions as it allows you to capture more light and create brighter images. However, it's important to note that higher ISO values can introduce noise and graininess to your photos, so it's generally recommended to use lower ISO values whenever possible and only increase the ISO when necessary.
Aperture
Aperture refers to the opening in your lens that controls the amount of light entering the camera and the depth of field. It is measured in f-stops, where a lower f-number represents a wider aperture, allowing more light to enter the camera and creating a shallower depth of field. In low-light photography, it is often advisable to use a wider aperture (lower f-number) to let in more light and ensure your images are adequately exposed.
Shutter Speed
Shutter speed refers to the amount of time the shutter remains open, allowing light to hit the camera sensor. A slower shutter speed means the shutter remains open for a longer duration, capturing more light. This is advantageous in low-light photography as it enables you to gather more light to brighten your images. However, slower shutter speeds can also result in motion blur if there is movement in your scene or if your hands are unsteady. Therefore, it's crucial to find the right balance between a slow enough shutter speed to capture sufficient light and a fast enough speed to avoid unwanted blur.
By understanding and manipulating these three settings in manual mode, you can significantly improve your low-light photography. You will be able to capture clearer, brighter images while also having creative control over the depth of field, motion blur, and overall image quality.
ADT Doorbell Camera: Battery-Powered or Not?
You may want to see also

It's ideal for shooting panoramic images
Manual mode on a camera gives you complete control over your camera settings. You can adjust the ISO, aperture, and shutter speed to determine the overall brightness of your photos. These settings also affect the sharpness, depth of field, and quality of your images.
Shooting panoramic images in manual mode is ideal because it allows you to maintain consistency across multiple exposures. When shooting a panoramic image, you will likely be taking multiple shots of the same scene, and using manual mode ensures that each shot has the same shutter speed and aperture. This is important because it ensures that all the images you are trying to put together have the same brightness.
For example, if you are shooting a landscape with a very bright area, your camera might incorrectly guess the exposure and either overexpose or underexpose the rest of the image. In this case, you can set your camera to manual mode and then evaluate the amount of light in darker and brighter areas, allowing you to override the exposure with your own settings.
- Take a test shot in aperture priority mode to identify the correct exposure settings. Set the aperture to f/11 and take a test shot of the brightest part of the scene.
- Check the test shot for sharpness in the foreground and background. If it is not sharp enough, increase the aperture value to f/16 and take another test shot.
- Ensure there are no blown highlights in your test image. If there are, you can either increase the shutter speed or adjust the camera's exposure compensation setting to -1.
- Once you are happy with the test shot, make a note of the aperture, shutter speed, ISO, and exposure compensation settings.
- Switch to manual mode and set your aperture, shutter speed, and ISO values based on the values you identified in your test shot.
- Keep the focal distance and white balance settings the same for each shot to ensure consistency.
- Shoot with your camera positioned vertically to give you more flexibility when merging the photos together.
- Take multiple photos with an overlap of about 30% between each shot.
By following these steps and shooting in manual mode, you can create stunning panoramic images with consistent exposures and sharpness.
Charging Your GoPro: A Step-by-Step Guide
You may want to see also
Frequently asked questions
Manual Mode gives you complete control over your camera settings. You can adjust the three key exposure variables: ISO, aperture, and shutter speed.
Manual Mode lets you make your photos appear exactly as dark or light as you want. You can also ensure perfect sharpness, create different depth-of-field effects, and keep your low-light photos looking high-quality.
First, adjust your aperture based on depth-of-field considerations. Second, set your shutter speed for sharpness. Third, set your ISO (and adjust your shutter speed/aperture) for the best exposure.
Manual Mode is good if you're working in unchanging lighting conditions or want complete control over your exposure variables. It's best avoided if the light is changing rapidly or your subject is moving between sun and shade.
Using Manual Mode gives you more control over your images. It can also help you learn how to use your camera better and improve your understanding of photography in general.


