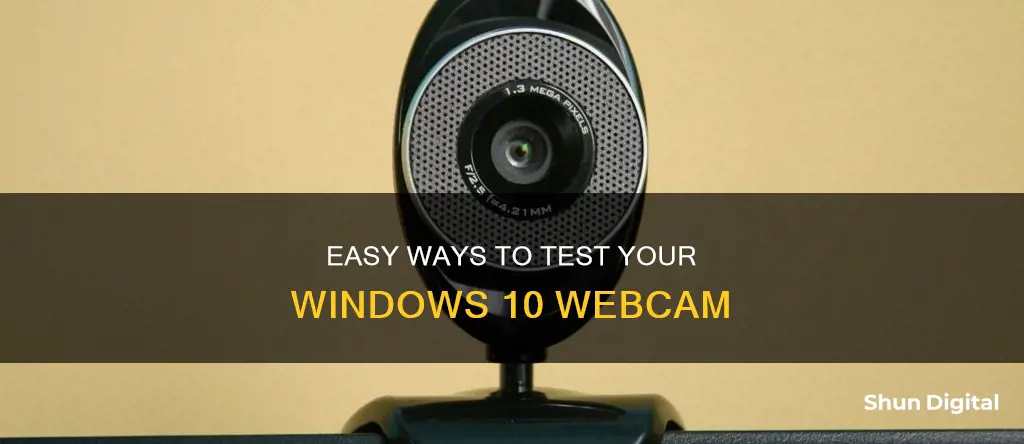
Testing your webcam before a video call is always a good idea. There are several ways to test your webcam on a Windows 10 device. You can use the built-in Camera app, which is available by default, or use a free online webcam test site like WebcamMicTest or WebcamTests. If you plan to use Skype or Zoom for your video call, you can also test your webcam within those programs.
| Characteristics | Values |
|---|---|
| Operating System | Windows 10 |
| Method | Online, Offline, Skype, Zoom, Windows Camera App |
| Online Tools | WebcamMicTest, WebcamTests, WebcamTest |
| Offline Tools | Camera App, Photo Booth |
| Skype | Profile > Settings > Audio & Video |
| Zoom | Account Avatar > Settings > Video |
What You'll Learn

Using the Windows 10 Camera app
The Camera app is a free multimedia application offered by Microsoft. It is available by default on Windows 10.
How to Launch the Camera App
There are multiple ways to launch the Camera app. One of the fastest methods is to use the search function. Click or tap on the search button (or box) from the taskbar and type in "camera". Then, click/tap on the Camera app or select it from the results and press Open on the right side of the panel.
Another way is to use the Start Menu. Click or tap the Start button, go to the All apps list, and click or tap on the Camera shortcut.
Testing Your Webcam
Testing whether your webcam works is straightforward. Launch the Camera app and check whether you see any video from the webcam. If this is your first time launching the Camera app, the application may ask you to allow it to use your webcam, microphone, and location. It is recommended that you enable it to access all these devices and features. If you can see an image of what’s in front of the webcam, then your camera works.
Choosing Your Webcam
If you have more than one webcam connected to your device, you can choose the one you prefer. To switch to your device’s secondary webcam or cycle through all your connected webcams, open the Camera app and click or tap the “Change camera” button in the top-right corner of the window.
Taking Photos and Recording Videos
On the right side of the Camera app, there are a couple of buttons available, granting you access to different camera modes. By default, the selected mode is "Take Photo". To take a picture, click or tap the “Take Photo” button.
To record a video, switch to the “Take Video” mode. Click or tap the “Take Video” button, and then click or tap it once more to start recording. When you want to finalize your video, click or tap the Stop button.
Additional Camera App Features
The Camera app also allows you to set a timer for taking photos, change the flash settings, enable or disable HDR, and zoom your webcam.
Focusing Your Camera: Kindle Fire Tips and Tricks
You may want to see also

Testing a webcam online
- Open your web browser of choice.
- Navigate to a webcam test site, such as webcammictest.com, or use an online tool such as VEED.
- Look for a button labelled something like "Check My Webcam" or "Start Webcam Test" and click on it.
- When prompted, click "Allow" to grant the website or tool access to your webcam.
- Your webcam feed should now appear on the screen. If you see yourself or whatever the webcam is pointed at, your camera is working.
- You can now adjust settings such as brightness and contrast to see how you would look under different lighting conditions.
- Some sites and tools will also provide additional information about your webcam, such as frame rate, resolution, and aspect ratio.
It is important to note that you should always review the privacy policies of any website or tool you use for webcam testing. Ensure that your privacy is protected and that your webcam feed is not being recorded or shared without your consent.
Evolution of Canon Cameras: EOS 1V and EOS 3
You may want to see also

Testing a webcam with Skype
- Launch the Skype app.
- Click on the "Tools" button on the Skype menu bar.
- Click on "Options" to bring up the program options.
- Click on the "Video Settings" link under "General".
- Check if you see a live picture in the "Webcam" section. If you do, your webcam is properly connected and working.
- If you have multiple cameras connected to your device, select the desired camera from the "Webcam" drop-down list.
- If your webcam is not displaying live video, ensure that it is connected to your computer and powered on.
- For external webcams, refer to the user manual for installation and setup information.
- If another program is using the camera, close it. Only one application can use your webcam at a time.
- Once you have a live video feed, click on the "Webcam Settings" button to adjust picture quality settings such as brightness and contrast.
- Launch the Skype app.
- Click on the Skype button in the app's menu bar at the top of the screen.
- Select "Preferences".
- Click on "Audio/Video".
- Check if you see a live picture in the "Webcam" section.
Additional Tips:
- It is recommended to use the latest version of Skype for the best results.
- Ensure that no other programs are accessing your camera simultaneously.
- Verify that your camera is not obstructed and that there are no error messages in your operating system's settings.
Knowing Your Camera's Focus: A Quick Guide
You may want to see also

Testing a webcam with Zoom
Testing your webcam before an important meeting is a good idea to avoid unexpected and disruptive video glitches. Zoom offers its own way to test your webcam and audio before your meetings. Here is how you can test your webcam using the Zoom desktop app:
Step 1: Open the Zoom desktop app.
You can do this by double-clicking the Zoom icon on your desktop or by locating it in your start menu.
Step 2: Click on the Settings gear icon.
This is located in the top right corner of the main screen.
Step 3: Click on Video.
This will allow you to adjust your video settings and turn on your webcam.
Step 4: Turn on your webcam.
A preview of your webcam video should automatically appear at the top of the screen. Ensure the image is clear and adjust any camera settings if needed.
Step 5: Test your audio.
To ensure your audio is working flawlessly, click on the "Check Audio" button. A permission request will pop up, asking for access to your microphone. Click "Allow" to proceed. If the Zoom Audio is working well, you should see a dialogue box alerting you that "Audio is working".
Congratulations! You have now successfully tested your webcam and audio using Zoom and can join your meetings with confidence.
Live Camera Feed: Instant Computer Uploads
You may want to see also

Troubleshooting a webcam
Check Your Webcam is Connected:
First, ensure your webcam is securely connected to your computer. If it's a USB webcam, try plugging it into a different USB port.
Test Your Webcam:
You can use the built-in Camera app in Windows 10 to test your webcam. Launch the app and check if you see any video feed. If it's your first time using the app, allow it to access your webcam, microphone, and location when prompted.
Restart Your Computer:
If your webcam is not working, try restarting your computer. This may seem simple, but it can often fix a variety of issues, including webcam problems.
Check Your Privacy Settings:
In Windows 10, you need to give apps permission to access your webcam. Go to Settings > Privacy > Camera and turn on Allow apps to access your camera. You can also enable or disable access for individual apps in this menu.
Check the Webcam Software:
Some webcams come with their own software that can control settings. For example, the Lenovo Settings app has a Privacy Mode that disables the webcam. Ensure your webcam software settings are not blocking its use.
Check for Windows Updates:
Updating Windows 10 can fix issues and also download firmware and driver updates to improve your webcam's performance. Go to Start > Settings > Update & Security > Windows Update and check for updates.
Check for Webcam Updates:
If your webcam still isn't working, try updating its driver.
- Search for and open Device Manager.
- Expand Imaging devices, Cameras, or Sound, video, and game controllers.
- Right-click on your webcam and select Update driver.
- Choose Search automatically for updated driver software.
- Roll Back the Webcam Driver:
If your webcam stopped working after a recent update, try rolling back the driver to a previous version:
- Open Device Manager and locate your webcam under Imaging devices, Cameras, or Sound, video, and game controllers.
- Right-click on your webcam, select Properties, then select the Driver tab.
- Click on Roll Back Driver and choose Yes.
- Uninstall and Reinstall the Webcam Driver:
If the above steps don't work, try uninstalling and reinstalling the webcam driver:
- Open Device Manager, right-click on your webcam, and select Uninstall device.
- Check the box for Attempt to remove the driver for this device and select OK.
- In Device Manager, click on the Action menu and select Scan for hardware changes.
- Wait for the updated drivers to install, then restart your computer.
- Switch to UVC Driver:
If your webcam is a standard USB Video Class (UVC) compatible camera, you can try switching to the UVC driver included in Windows:
- Search for and open Device Manager.
- Find your webcam in the list of devices under Cameras or Imaging devices.
- Right-click on the webcam, select Update driver, then choose Browse my computer for drivers.
- Select Let me pick from a list of available drivers on my computer.
- Choose USB Video Device and then Next to complete the update.
If none of these troubleshooting steps work, your webcam may be defective and need replacing, or your computer may have a hardware issue.
Viewing Camera Feeds: Monitor Display on Your Computer
You may want to see also
Frequently asked questions
Search for "Camera" in the Start menu and open the Camera app. If you see what your webcam sees, it's working.
You can download an alternative app, such as Webcam Tests or WebcamMicTest, or use an online webcam test site.
Open Skype, click on "Tools", then "Options", and finally "Video Settings". You should see your webcam video.
Open Zoom and click on your account avatar in the top right corner. In the dropdown menu, choose "Settings", then "Video". You should see a live view of your camera feed.
Make sure your camera is plugged in properly and that your antivirus software isn't blocking your webcam. Check if you have the right driver installed and try switching USB ports.


