Cobra surveillance cameras are a great way to enhance the security of your home or business. They offer a range of advanced features, including motion detection, night vision, and two-way audio, providing reliable monitoring solutions. However, sometimes these cameras can develop issues, such as connectivity problems or choppy video, which may require you to straighten them up or reset them. This can be a tricky process, but with the right steps and some troubleshooting tips, you can get your Cobra surveillance camera system working effectively again.
What You'll Learn
- Identify optimal mounting locations, minimising blind spots and obstructions
- Prepare the mounting brackets and mark the mounting points
- Drill holes, attach the camera brackets and adjust the camera angle
- Plan cable routes, cut cables to size and connect to cameras
- Test camera feeds, checking for blind spots and clear footage
![]()
Identify optimal mounting locations, minimising blind spots and obstructions
When it comes to identifying the optimal mounting locations for your Cobra surveillance camera, it's crucial to consider the area you want to cover, the camera's field of view, and any potential blind spots or obstructions. Here are some detailed instructions to help you minimise blind spots and obstructions when installing your Cobra surveillance camera:
Perform a Thorough Security Audit:
Before deciding on camera placement, conduct a comprehensive security audit of your property. Identify vulnerable areas, potential entry points, and critical zones that require surveillance. This will help you pinpoint possible blind spots and plan your camera placements accordingly.
Choose Optimal Mounting Locations:
Select the best locations for your cameras by considering the areas you want to monitor, such as entrances, driveways, or backyards. Take into account the camera's field of view and any potential obstructions, such as trees, walls, or other structures that might block the camera's view. Ensure you comply with any local regulations and laws regarding privacy and surveillance.
Adjust Camera Height:
Install the cameras at an optimal height to avoid obstructions and ensure clear sightlines. Place the cameras above eye level to minimise interference and maintain unobstructed views of the monitored areas. This will help you avoid obstacles like fences, walls, or vegetation that could block the camera's field of view.
Consider Camera Angles:
Fine-tune the camera angles to capture the desired areas effectively. Adjust the tilt, pan, or rotation of the cameras to optimise their field of view. Make sure critical entry points and vulnerable areas are within the camera's line of sight.
Test Camera Range and Coverage:
After mounting the cameras, test their range and coverage to ensure they capture the intended areas. Check the camera's field of view and adjust the angle if necessary to minimise blind spots. Verify that the cameras provide clear and unobstructed views, and consider using camera mounts or extension poles to achieve the desired height or angle.
Consider Weather Conditions:
If you're installing cameras outdoors, make sure they are weather-resistant and provide protection from elements like rain and extreme temperatures. Ensure the cameras are properly sealed and protected to maintain reliable surveillance throughout the year.
Plan Cable Routes:
When deciding on mounting locations, also consider the wiring and cable routes. Plan neat and organised cable routes to ensure tidy cable management and to prevent any potential signal loss or damage to the cables.
Regularly Review and Adjust Camera Placement:
It's important to regularly review and adjust camera placement to accommodate any changes in the monitored area or security requirements. This proactive approach ensures that your surveillance system remains effective and up-to-date, addressing any new blind spots or obstructions that may arise over time.
Understanding DVR Mode on Stealth Cameras
You may want to see also
![]()
Prepare the mounting brackets and mark the mounting points
To prepare the mounting brackets and mark the mounting points for your Cobra surveillance camera, follow these steps:
- Choose the optimal mounting locations: Identify the best spots to install your cameras, considering the areas you want to monitor, such as entrances or backyards, as well as the camera's field of view and potential obstructions.
- Prepare the mounting brackets: Attach the camera to the mounting bracket according to the manufacturer's instructions. Ensure the camera is tightly secured to prevent movement or misalignment. Cobra cameras typically come with mounting brackets included.
- Mark the mounting points: Use a pencil or marker to indicate where you plan to mount the cameras. Double-check the height and angle to ensure the best viewing angles. If installing multiple cameras, use measurements to ensure consistent placement.
- Drill holes: With the mounting points marked, use a power drill to create holes for the camera brackets. Ensure the holes match the size and depth specified by the manufacturer for a secure fit.
- Attach the cameras: Secure the camera brackets to the wall or chosen surface using screws or wall anchors. Ensure the brackets are firmly attached to provide stable support.
By following these steps, you will have prepared the mounting brackets and marked the mounting points accurately, ensuring your Cobra surveillance camera is properly aligned and securely fastened.
Understanding Florida Camera Tickets: What You Need to Know
You may want to see also
![]()
Drill holes, attach the camera brackets and adjust the camera angle
To straighten up a camera on a Cobra surveillance system, you will need to drill holes, attach the camera brackets, and adjust the camera angle. Here is a detailed guide on how to do this:
Drill Holes:
- Identify the optimal locations for your cameras, taking into account the area you want to monitor and the camera's field of view.
- Mark the mounting points on the wall or surface with a pencil or marker. Ensure the height and angle are correct for the desired viewing angle.
- Using a power drill and the appropriate drill bit, create holes at the marked points. The holes should be the correct size and depth to accommodate the screws or wall anchors securely.
Attach the Camera Brackets:
After drilling the holes, fix the camera brackets to the wall or surface using screws or wall anchors. Ensure the brackets are firmly attached to provide stable support for the cameras.
Adjust the Camera Angle:
- Once the camera brackets are in place, mount the cameras onto the brackets. Carefully adjust the camera angle to capture the desired area.
- Utilise a level tool to ensure the cameras are aligned horizontally and vertically for a neat and professional installation.
- Test the camera range and coverage by monitoring the camera feed. Fine-tune the camera angle to minimise blind spots and maximise the field of view.
By following these steps, you can ensure that your Cobra surveillance cameras are correctly positioned and adjusted, providing effective coverage for your security needs. Remember to take your time and make any necessary adjustments to achieve the desired camera angle and viewing range.
Adjusting Tinyhawk Camera Focus: A Step-by-Step Guide
You may want to see also
![]()
Plan cable routes, cut cables to size and connect to cameras
Planning the cable routes is an important step in ensuring a neat and organised installation of your Cobra surveillance system. The route should be as direct as possible, avoiding any proximity to heat sources or high-voltage wires, or lighting fixtures. It is also important to keep the cables at least 6 inches away from existing electrical wiring to prevent signal interference.
When measuring the required cable length for each camera, add a buffer of 5 feet to the total estimated length to avoid having cables that are too short. It is also recommended to use premade cables if possible, as they typically have higher-quality factory fittings.
Once you have planned the routes and measured the required lengths, you can cut the cables accordingly. It is advisable to label the cables or keep a record of which cable corresponds to each camera location for easier identification during the connection process.
After cutting the cables to size, you can proceed with connecting them to the cameras. The Cobra surveillance system typically uses BNC (Bayonet Neill-Concelman) connectors for video signal transmission and power. Ensure that the connections are secure and tight to avoid any signal loss or interruptions.
Planning Cable Routes:
- Identify the mounting locations for your Cobra surveillance cameras, considering factors such as the areas you want to monitor and the camera's field of view.
- Determine the route for each cable, starting from the camera location to the video recorder or network connection. Choose the most direct path, avoiding any sources of heat or high voltage.
- Keep cables away from lighting fixtures, especially fluorescent lights, as the power noise can cause interference.
- Plan to run cables through attics, crawl spaces, or inside walls whenever possible to protect them from the elements.
- If running cables outdoors, consider using conduit, outdoor raceways, or sprinkler pipes to protect the cables from damage and potential tampering.
Cutting Cables to Size:
- Measure the required cable length for each camera, taking into account the distance from the camera to the video recorder or network connection.
- Add a buffer of a few feet (typically around 5 feet) to the total estimated length to ensure you have enough cable and avoid shortages.
- Use premade cables if possible, as they tend to have higher-quality factory fittings.
- If cutting cables from a spool, use specialised tools such as cable cutters or strippers to ensure a clean and precise cut.
Connecting Cables to Cameras:
- Identify the correct connector type for your Cobra surveillance system. BNC connectors are commonly used for video and radio frequency connections.
- Expose the inner core of each wire by carefully stripping away the outer insulation. Ensure you have enough wire exposed to work with (approximately half an inch).
- Connect the exposed wire of the cable to the corresponding port on the camera, following the instructions provided by the camera manufacturer.
- Secure the connection by twisting or locking the connector in place, ensuring a tight fit to prevent signal loss.
- Test each connection to ensure proper functionality before moving on to the next step.
Charging Your Fujifilm Camera: A Step-by-Step Guide
You may want to see also
![]()
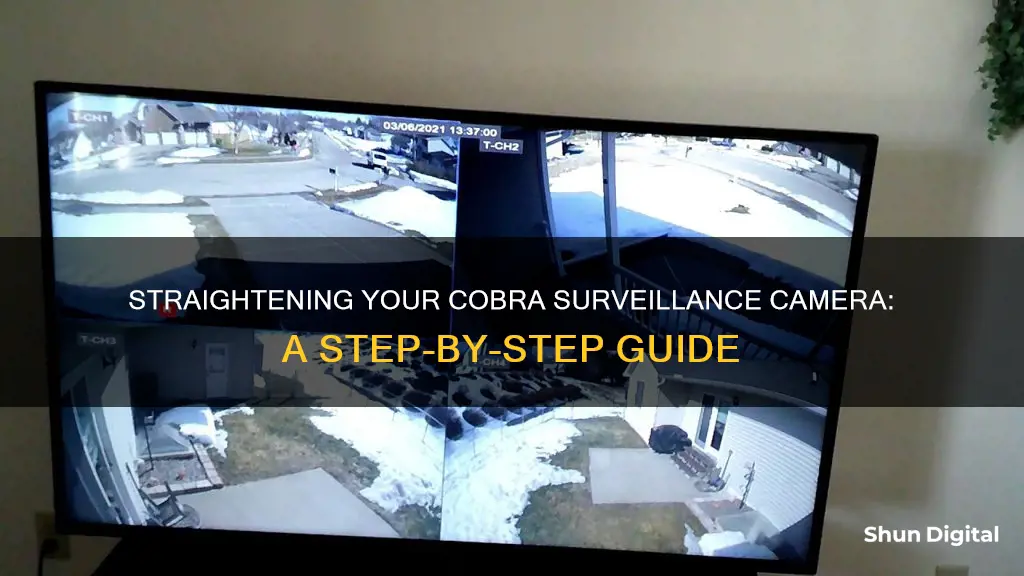
Test camera feeds, checking for blind spots and clear footage
Testing your camera feeds is an important step in setting up your Cobra surveillance system. This step ensures that your cameras are properly positioned, capture clear footage, and do not have any blind spots. Here are some detailed instructions to help you through the process:
Identify Blind Spots:
Start by carefully monitoring the camera feeds on your connected display device. Pay close attention to any areas that may be out of the camera's field of view. Move around the monitored area and check for spots where people or objects might escape detection. Make a note of these potential blind spots so that you can adjust the camera angles or consider adding more cameras to minimize or eliminate them.
Optimize Camera Angles:
Fine-tune the camera angles to improve the surveillance coverage. Adjust the tilt, pan, or rotation of the cameras as needed to effectively capture the desired areas. Ensure that critical entry points and vulnerable areas, such as entrances, windows, and driveways, are within the camera's field of view.
Check for Obstructions:
Look out for any potential obstructions that might block the camera's view or create unnecessary shadows. These could include branches, signs, or walls. By removing or repositioning these obstructions, you can improve the camera's ability to capture clear and unobstructed footage.
Assess Lighting Conditions:
Evaluate the lighting conditions at different times of the day. Ensure that the cameras can adjust to changing lighting conditions, both during the day and at night. Fine-tune the camera settings to optimize image quality under various lighting conditions, and consider adding extra lighting if necessary.
Perform Test Recordings:
Activate the recording function on the DVR and conduct test recordings. Review the recorded videos to ensure that the images are clear and that important details are captured. If needed, adjust the camera settings or positions to enhance the quality of the recorded footage.
Monitor Camera Performance:
Keep an eye on the camera's performance over an extended period. Regularly check for any changes in image quality, connectivity, or surveillance coverage. Inspect the cameras for any signs of wear or damage, such as loose connections or lens dirt. Clean the cameras as necessary to maintain optimal performance.
By following these steps and regularly testing and optimizing your Cobra camera placement, you can ensure effective surveillance coverage and clear footage, ultimately enhancing the security of your property.
The Evolution of Camera Sensors: Materials Used
You may want to see also