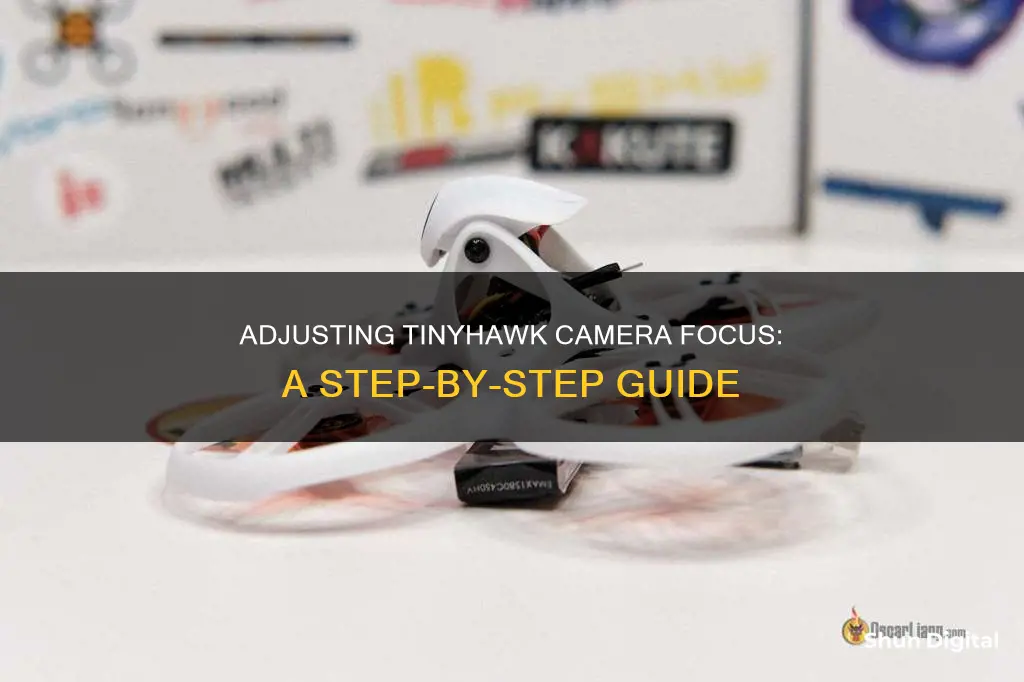
The Emax Tinyhawk camera is a popular choice for indoor FPV drone racing. However, users have reported issues with the camera, including blurry images, black spots, and the camera popping out after a crash. To adjust and focus the Tinyhawk camera, users can try cleaning the lens, tightening the lens lock ring, and adjusting the focus by screwing the lens in or out. If the camera has popped out, it can be carefully pushed back into place, but it's important to be gentle to avoid breaking the tabs that hold it in place.
| Characteristics | Values |
|---|---|
| Camera lens issue | Blurry image |
| Cause of issue | Loosened lens due to vibration or crashes |
| Solution | Screw the lens in or out until you find the sweet spot |
| Adjust the camera focus using a reference object or a focus test pattern | |
| Loosen the lock ring and tighten the lens | |
| Mark the camera case and lens where they meet to help with alignment during tightening | |
| Turn the lock ring towards the camera until it touches the base | |
| Hold the lock ring in place and unscrew the lens slightly | |
| Release the lock ring and turn both the lens and lock ring inward | |
| Check if the lock nut is broken | |
| Clean the lens or replace it if faulty | |
| Heat up the glue to unscrew the glued lens | |
| Use a screwdriver to lever the camera back into the slots in the chassis |
What You'll Learn

Adjusting the lens
Prepare the Camera and Focus Chart
Before you begin, ensure you have the necessary tools. You will need a focus test pattern or chart, such as the Siemens star, which can be printed on a piece of A4 paper. Alternatively, you can use objects with fine details like branches, fences, or tiles as a reference for focusing. Place the focus chart or identify an object to focus on approximately 2-3 metres away from you.
Loosen the Lens and Lock Ring
The next step is to loosen the lens on your Tinyhawk camera. Hold the camera facing away from you and turn the lens clockwise to loosen it. If the lens does not come loose, try loosening the lock ring (also known as the lock nut) first by turning it clockwise. For standard-size cameras, you can use your fingers, while for smaller lenses on micro cameras, tweezers may be more convenient. Ensure that the lens can turn freely by hand.
Adjust the Focus
Now, it's time to adjust the focus. Connect your Tinyhawk camera to a monitor or a pair of FPV goggles to display the image. If you're using goggles, place them on your forehead and then locate the edges of the camera lens blindly. Be extremely careful not to touch the lens with your fingers, as this can affect the focus.
Once you have located the lens, adjust the focus by turning it in both directions while looking at the focus chart or your chosen object. You will notice that the blurry section in the middle of the chart will get bigger and smaller. The goal is to make this blurry spot as small as possible, indicating that the image is in perfect focus.
Tighten the Lens and Lock Ring
After achieving the optimal focus, it's important to secure the lens in place. Hold the lens with one hand and do not move it. With your other hand, turn the lock ring towards the camera until it touches the base. However, the lock ring alone may not be tight enough to hold the lens in position. To address this, hold the lock ring in place and then unscrew the lens back slightly (around 40-50 degrees or 1/8 of a turn). Release the lock ring, and then turn both the lens and lock ring inward so that the lock ring snugs up against the base, bringing the camera back into focus.
Final Adjustments
Even after tightening the lock ring, you may need to make some final adjustments. Check if the camera is still displaying the crispest image possible. If not, you may need to loosen the lock ring and lens again, adjust their positions, and then tighten them once more. Repeat this process until you achieve the perfect focus. Ensure that the lock ring fits tightly against the base to prevent it from moving during flight or crashes.
By following these steps, you should be able to successfully adjust and refocus your Tinyhawk camera lens.
Camera Battery Strategy for Wedding Photographers
You may want to see also

Using a focus test pattern
- Print the Siemens Star Chart: You can find a printable version of the Siemens star chart online. It is recommended to print it on standard letter-sized paper using the highest print settings available.
- Set Up the Chart: Place the printed chart on a wall approximately 2-3 meters away from your camera. Ensure that the wall is vertical and straight, and the chart is positioned directly across from the camera at eye level.
- Prepare Your Camera: Loosen the lock ring on your camera lens and ensure that it turns freely by hand. Power up your quadcopter, reduce the VTX output power to avoid excess heat, and remove the propellers for safety.
- Adjust Focus with Goggles: Put on your FPV goggles and locate the camera lens. Be careful not to touch the lens with your fingers. Adjust the lens by twisting it back and forth while looking at the focus chart. You will notice the blurry section in the middle of the chart getting bigger and smaller. Adjust until the blurry spot in the centre becomes as small as possible.
- Tighten the Lens: Once you have found the optimal focus, carefully remove your goggles without bumping the lens. Tighten the lock ring towards the camera case, then tighten both the lens and lock ring together by about 1/8th to 1/4th of a turn.
- Final Checks: Put your goggles back on and double-check that the camera image is still crisp and clear. If not, adjust the lens position and repeat the tightening process.
By following these steps, you will be able to achieve the best possible focus for your TinyHawk camera using a focus test pattern. This will enhance your FPV flying experience and ensure that you have a clear and accurate view of your surroundings.
Charging the Heimvision Camera: A Step-by-Step Guide
You may want to see also

Fixing a loose camera
If your Tinyhawk camera is blurry, it may be because the focus is off. The lens on FPV cameras can often get loosened due to vibration or crashes. To fix this, you can try adjusting the focus by screwing the lens in or out until you find the "sweet spot". Here is a step-by-step guide:
- First, check if the lock nut is broken. The lock nut is a ring at the base of the lens that stops it from moving once secured. If it is broken, your camera will become out of focus again as the lens loosens.
- If the lock nut is intact, loosen the lens from the camera by turning it clockwise. For standard-size cameras, you can use your fingers, but for smaller lenses on Micro cameras, you may need a pair of tweezers.
- Find a good reference object to help you focus. Look for something with fine detail like branches, fences, or tiles, or use a focus test pattern printed on a piece of A4 paper.
- If using a test pattern, place it about 3 meters (10 feet) away. If using an object, stand about 10 meters (30 feet) away.
- Connect your camera to a monitor or a VTX and display the image through a pair of FPV goggles. It is best to do this outdoors in good lighting.
- Loosen the lens a couple of full turns, and turn the lock nut slightly away from the camera.
- Now, slowly tighten the lens. You should see the image getting clearer until it reaches a point where it starts to become blurry again. Stop at the point where the image is in perfect focus.
- Hold the lens with one hand and mark the camera case and lens where they meet to help with alignment during tightening.
- Turn the lock ring towards the camera until it touches the base.
- Hold the lock ring in place with one hand and unscrew the lens back up just a bit (40-50 degrees or 1/8 of a turn).
- Release the lock ring and turn both the lens and lock ring inward so that the lock ring snugs up against the base, bringing the camera back into focus.
- If the focus is still not right, repeat the above steps until you get it just right.
If adjusting the focus does not work, your camera may be faulty. The lens or image sensor may be damaged, or there could be dust or water trapped inside the lens. In this case, you may need to try cleaning the lens or replacing it.
To clean the lens, you can try heating up the glue a bit to loosen it, or use a small amount of rubbing alcohol to break up the glue. Be careful not to damage the camera or get any liquid on the lens itself. If you are unable to clean the lens successfully, you may need to contact the seller for a replacement.
Mobile Camera Focus: The Science Behind It
You may want to see also

Cleaning the lens
Before attempting to clean your Tinyhawk camera lens, it is important to note that some users have reported that the lens is glued in place. If this is the case, you can try heating the glue to break it down or use a small amount of rubbing alcohol to dissolve it. However, be careful not to damage the camera or lens during this process.
Once you have accessed the lens, use a dust blower or compressed air to remove any large particles of dust and debris from the lens surface. This will help prevent smearing or grinding any particles into the glass when wiping the lens.
If there are any remaining particles, use a soft-bristled brush to gently sweep away the dust. Be careful not to push down too hard on the brush, as this may scratch the lens if a large piece of dust gets stuck in the bristles.
For a more thorough clean, use a lens cleaning solution and lens cleaning tissues or paper. Apply a few drops of the cleaning solution to the lens tissue and gently wipe the lens surface using a side-to-side motion. Then, use a clean, dry lens tissue to remove any remaining moisture.
Finally, use a soft, fine-weave microfiber cloth to polish the lens and remove any remaining streaks.
It is important to note that you should not use household soaps, detergents, or cleaning products such as Windex to clean your camera lens, as these may damage the delicate lens surface.
Unlocking Adobe Camera Raw 9: Unveiling the Power
You may want to see also

Checking the lock nut
Before attempting to adjust the focus of your Tinyhawk camera, it is important to check that the lock nut is not broken. The lock nut is the component that holds the lens in place and keeps it in focus. If it is broken, the camera will soon become out of focus again as the lens loosens.
To check if the lock nut is broken, follow these steps:
- Loosen the lens from the camera by turning it clockwise. Both the lens and the lock nut should come loose at the same time. If they don't, try loosening just the lock nut by turning it clockwise. You can use your fingers for standard-sized cameras, while tweezers might be more suitable for smaller lenses on Micro cameras.
- Once the lens and lock nut are loose, carefully inspect the lock nut for any signs of damage or breakage. Look for cracks, chips, or other abnormalities that could indicate a problem.
- If the lock nut appears intact and undamaged, proceed to adjust the focus of the camera.
- If the lock nut appears broken or damaged, do not attempt to adjust the focus. A broken lock nut will need to be replaced or repaired before you can accurately adjust the camera's focus.
Remember, the lock nut is crucial in maintaining the focus of your Tinyhawk camera. Taking the time to inspect it before adjusting the focus can save you from further issues down the line.
Bridge Cameras: Manual Focus Control for Creative Photography
You may want to see also
Frequently asked questions
First, check if the lock ring is broken. If it's intact, loosen the lens a couple of turns, then slowly tighten it until the image is clear. You can use a focus test pattern or an object with fine detail as a reference point. Once the image is clear, tighten the lock ring.
Try cleaning and adjusting the lens. If that doesn't work, the vibration during flight may be causing the lens to move. Try using a small amount of adhesive to secure the lens, taking care not to get any on the lens itself.
If your lens has black spots, it may be dirty. Try heating the glue to remove the lens, or use a small amount of rubbing alcohol to break up the glue. Clean the lens, then follow the steps to refocus the lens.
The camera is attached by two plastic tabs that can snap during a crash. Remove the four screws that fasten the battery holder, slide out the rubber grommets, then use a screwdriver to lever the camera back into place.


