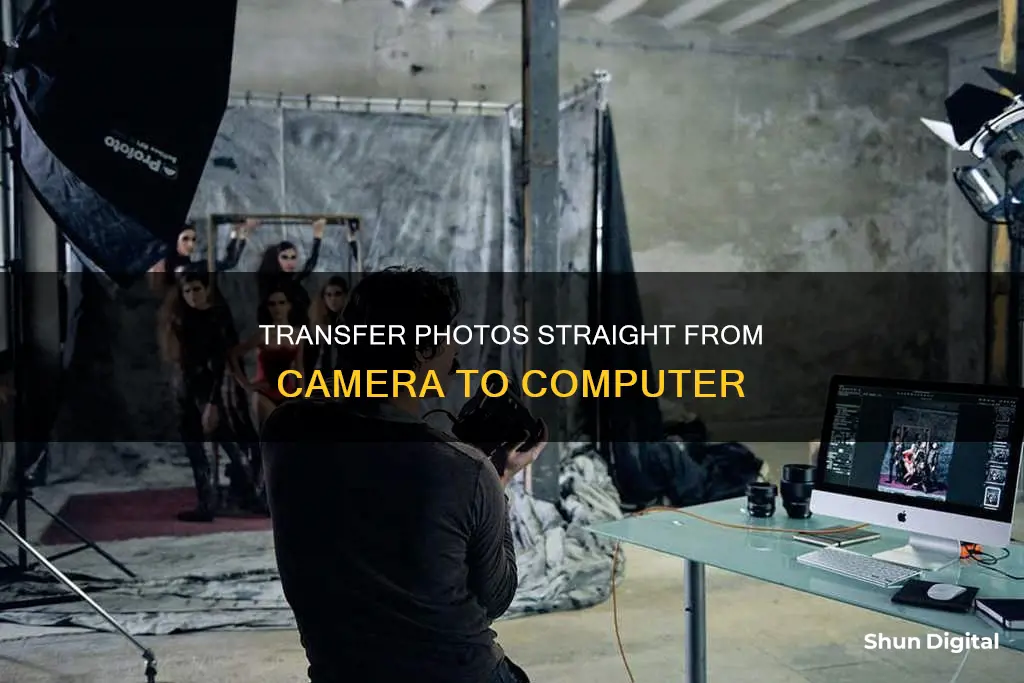
Tethered photography is a process that involves connecting your camera to a computer, tablet, or smartphone via a cable or wireless app. This allows you to instantly view and assess your images on a larger screen as you shoot, making it easier to spot issues with focus, lighting, composition, and more. By tethering your camera, you can also adjust camera settings and take photos remotely, ensuring you get the perfect shot without the need for retakes. While it may not be suitable for all types of shoots, tethering can be a valuable tool for studio photography and commercial shoots that require meticulous attention to detail.
| Characteristics | Values |
|---|---|
| Connection type | Wired (USB cable) or wireless (Wi-Fi) |
| Camera compatibility | DSLR, newer cameras with Wi-Fi capabilities |
| Computer compatibility | Requires tethering software (e.g. Adobe Lightroom, Capture One, Canon EOS Utility) |
| Image transfer | Instant, high-resolution image transfer directly to a designated folder on the computer |
| Image display | Images can be viewed on a larger computer or tablet screen |
| Image editing | Ability to adjust lighting, camera settings, and apply edits using tethering software |
| Camera control | Remote triggering and control of camera settings from the connected device |
| Power consumption | Higher battery consumption for both the camera and connected device |
| Equipment | Requires extra equipment such as long USB cables, laptop, and cable management accessories |
What You'll Learn

Tethered photography: connect your camera to a computer or device
Tethered photography is the process of connecting your camera to a computer, tablet, or smartphone via a cable or wireless app. This allows you to see your images on a larger screen in real-time as they are captured and saved directly onto your computer's hard drive in the folder of your choice.
Benefits of Tethered Photography
- View images on a large monitor as you shoot
- Instantly see images at full resolution
- Check critical focus, composition, lighting, posing, or styling
- Adjust lighting and camera settings more quickly and easily
- Control camera settings and trigger the shutter from the connected device
- Share images with clients or collaborators on-site or remotely
- Back up files to a hard drive while shooting
- Reduce the chance of image loss
Equipment for Tethered Photography
- Camera that supports instant image transfer
- Compatible cable to connect your camera to your computer (e.g. TetherPro USB cables)
- Cable management accessories (e.g. TetherGuard, TetherBlock, Tether Arca Cable Spacer)
- Tethering software (e.g. Adobe Lightroom, Capture One, Canon EOS Utility)
- Laptop or desktop computer with a large monitor and at least 2GB of RAM
Steps to Set Up Tethered Photography
- Connect your camera to the computer using a compatible cable. Ensure your camera is turned off before connecting the cable.
- Open your tethering software and configure the settings, including the session name, file naming template, file destination, and metadata.
- Turn on Live View, if available, to see what your camera is seeing in real-time.
- Adjust your camera settings, including exposure, white balance, and focus.
- Start capturing images and review them on the connected device.
Night Mode Camera: ZTE Axon 7 Mini's Secret Feature
You may want to see also

Wired vs wireless tethering
Tethering is a great way to improve your photography skills and collaborate with your clients. It allows you to transmit images directly from your camera to a laptop or tablet, where you can preview and adjust your shots on a larger screen. When deciding between wired and wireless tethering, consider the following advantages and disadvantages of each approach.
Wired Tethering
Wired tethering involves connecting your camera to a computer or tablet using a USB cable. This method offers several benefits:
- Speed and reliability: Wired tethering provides the fastest transfer between camera and computer, with minimal delay between capturing an image and viewing it on screen.
- Simplicity: It is easy to set up; simply plug the cable into your camera and computer, and you're ready to start shooting.
- File ingestion: Wired tethering allows you to ingest files in real time, saving you the step of managing post-shoot uploads. You can also make multiple real-time onsite backups.
- Cost-effectiveness: Wired tethering is generally cheaper than wireless tethering, as it does not require additional equipment or software.
However, there are also some drawbacks to wired tethering:
- Cables: The cable can be cumbersome and easily disconnected, causing interruptions to your workflow. It can also be a trip hazard, especially in busy or outdoor shooting locations.
- Limited mobility: The cable restricts your movement and shooting range, making it less suitable for certain types of photography that require more flexibility and dynamic compositions.
Wireless Tethering
Wireless tethering, on the other hand, uses a wireless network to transmit images from your camera to your computer or tablet. Here are some advantages of this method:
- Mobility and portability: Wireless tethering eliminates the need for cables, giving you greater freedom of movement and allowing you to shoot from a distance.
- Camera positioning: You can control your camera settings remotely, enabling you to place the camera in hard-to-reach locations or positions that would not be possible with a cable.
- Client collaboration: Wireless tethering makes it easy to collaborate with clients. You can hand over your device to clients to preview images in real time without giving them control of your camera.
However, wireless tethering also has some disadvantages:
- Speed: Wireless tethering is generally slower than wired tethering, with a noticeable delay between capturing and viewing images. The transfer time depends on the file size, with larger RAW files taking longer to transmit.
- Reliability: Wireless connections can be less reliable than wired connections, with potential issues such as blocked WiFi signals, dropped connections, and faster battery drain.
- Cost: Wireless tethering often requires additional equipment and software, which can increase the cost of your setup.
Both wired and wireless tethering have their advantages and disadvantages. Wired tethering offers speed, simplicity, and reliability, while wireless tethering provides greater mobility and flexibility. Ultimately, the best method depends on your specific needs and shooting environment. For studio photography or controlled environments, wired tethering may be preferred, while for outdoor or dynamic shoots, wireless tethering could offer more freedom and convenience.
Benz-Gant Camera: Battery-Operated or Not?
You may want to see also

Cable management
There are several types of cable management options available, with Tether Tools offering a few popular solutions, including:
- TetherGuard
- TetherBlock
- Tether Arca Cable Spacer
These products are designed to keep your cables organised and secure, preventing damage to your equipment and ensuring a smooth workflow.
In addition to cable management tools, there are some general best practices to keep in mind. Firstly, always handle your cables with care, avoiding sharp bends or twists that could damage the wires internally. Keep cables away from sources of heat, such as radiators or direct sunlight, as this can degrade the insulation over time. When unplugging cables, always grip the connector, not the cord, to avoid placing strain on the internal wires. Finally, when not in use, store your cables neatly coiled and secured with cable ties to prevent tangles and knots.
Osiris Camera Straps: Real Gold or Gilded Glamour?
You may want to see also

Tethering software
There are a variety of tethering software options available, ranging from free basic programs to more advanced paid options. Some cameras may come with free tethering software, while others may require the purchase of specialised software. It is important to check the compatibility of the software with your specific camera model and computer operating system.
One popular free option for Nikon DSLR owners is digiCamControl, which offers full access to almost all camera controls, including shutter speed, aperture, and shutter release. It also provides features such as live view, manual or automatic focus, and remote shutter trigger. Additionally, it supports wireless control from tablets or smartphones.
Another factor to consider when choosing tethering software is the level of functionality and control it provides. Some software may offer basic functionality, allowing you to control essential camera settings, while others may provide more advanced features for specific shooting requirements. For example, some software enables you to shoot a series of bracketed shots with custom settings or create time-lapse sequences.
When setting up your tethering software, you will typically need to connect your camera to the computer via a USB cable. Some programs offer auto-connect, while others require a manual connection process. Once connected, you can trigger the camera to start capturing images, and the images will be transferred directly to the computer for viewing and editing.
Testing Canary Surveillance Cameras: A Step-by-Step Guide
You may want to see also

Adjusting camera settings
Adjusting your camera settings is a very personal matter. It depends on what you shoot, which features you use, and how you like to work. However, there are some common settings that all photographers should consider adjusting. Here are some tips on how to adjust your camera settings for shooting straight from the camera to a computer:
- File Format: The first thing to consider is whether to shoot in RAW or JPEG format. RAW files contain all the original capture information in an image, giving you greater flexibility in post-processing. JPEG files, on the other hand, are smaller and more convenient but lack the same level of detail and flexibility. Most cameras allow you to shoot in either format, and some even offer a RAW+JPEG option.
- Diopter Adjustment: Adjusting the diopter will ensure that you have a clear view through the viewfinder, making it easier to compose your shots.
- Autofocus Settings: Depending on your camera, you may have various autofocus settings to choose from. For still subjects, Single Area Focus Mode is a good option, while for moving subjects, Continuous/AI Servo Focus Mode will help keep your subject in focus. Some cameras also offer a hybrid mode that automatically switches between the two.
- Metering Mode: Matrix/Evaluative Metering takes the whole scene into account and typically does a better job of exposing your subjects.
- Aperture: Aperture not only affects the depth of field but also the amount of light that enters the lens. In low light conditions, using a wider aperture (e.g., f/1.8) will allow more light to enter the lens. For landscapes or other situations where you want a sharp image throughout the frame, a smaller aperture (e.g., f/5.6) is optimal.
- Shutter Speed: Shutter speed will depend on what you are trying to capture. For example, to capture a blurry effect in running water, a slow shutter speed is needed, while to freeze a subject in motion, a fast shutter speed is required.
- ISO: It is generally best to shoot with the lowest ISO to minimize noise in your images. However, in low light conditions, you may need to increase the ISO to maintain a fast enough shutter speed.
- Auto ISO: Many modern cameras offer an Auto ISO feature that automatically adjusts the ISO depending on the lighting conditions. This can be a handy tool for beginners.
- Image Stabilization: Don't forget to take advantage of image stabilization offered by your camera or lens. This will help reduce blur when shooting handheld. Remember to turn it off when shooting from a tripod.
Mastering Edits: Clear Adjustments in Adobe Bridge and Camera Raw
You may want to see also
Frequently asked questions
The process is called tethered photography. It involves connecting your camera to a computer, tablet, or smartphone via a cable or wireless app.
Shooting straight from camera to computer allows you to preview each photo on a large monitor as you shoot, making it easier to spot issues with focus, lighting, posing, or composition. It also enables you to organise your images as you go along, adding notes, star ratings, keywords, etc.
You will need a camera that supports instant image transfer, a compatible cable to connect your camera to your computer, and software to receive the images.


