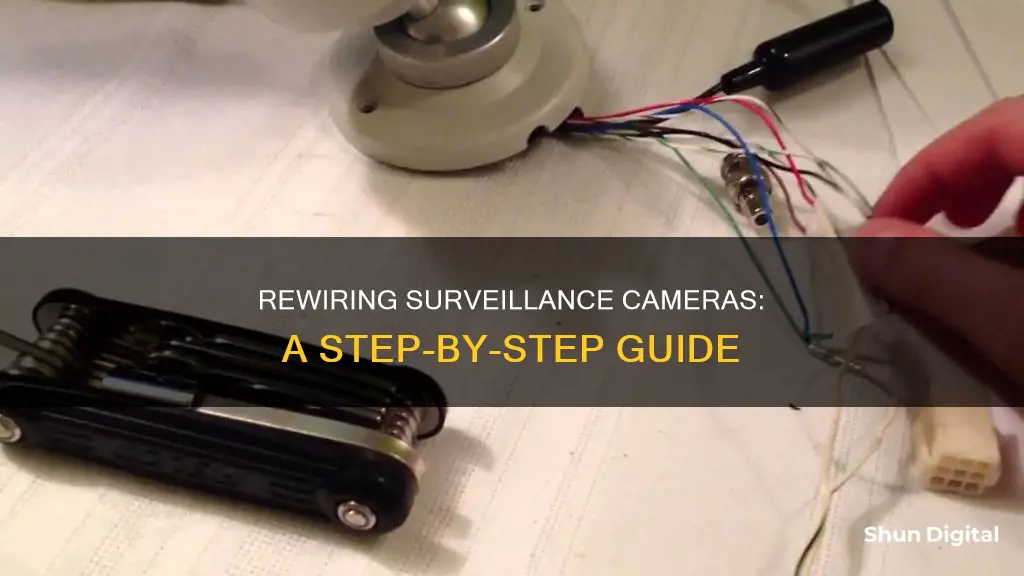
Rewiring a surveillance camera is a complex task that requires careful planning and execution. The process involves understanding the different types of security camera systems and their specific wiring requirements. Analog cameras, known for their simplicity, typically use a 3-wire system, while IP cameras utilize a more advanced 5-wire system, enabling higher resolution and remote viewing capabilities. Before initiating the rewiring process, it is crucial to gather the necessary tools and materials, such as security camera cables, wire strippers, crimping tools, cable testers, and power drills. The installation process itself entails planning the camera locations, turning off the power for safety, drilling access holes, running wires through walls, splicing and securing cables, mounting cameras, and final checks to ensure proper functioning. For outdoor installations, additional steps include planning the wiring route, using burial wires or conduit pipes, and concealing wires to protect them from the elements.
Rewiring a Surveillance Camera
| Characteristics | Values |
|---|---|
| Types of Security Camera Systems | Analog Cameras, IP (Internet Protocol) Cameras |
| Wiring Requirements for Analog Cameras | 3-wire system: power, video, and audio cables; RG-59 or RG6 coaxial cables for video transmission and 18/2 power cables |
| Wiring Requirements for IP Cameras | 5-wire system: Ethernet cables (Cat 5e or Cat 6) for video and power; additional wires for audio, pan/tilt/zoom controls, and alarm inputs/outputs |
| Essential Tools and Materials | Security Camera Cables, Wire Strippers, Crimping Tool, Cable Tester, Power Drill, Screwdrivers, Cable Clips and Ties, Tape Measure, Ladder, Wire Connectors, Power Supply |
| Steps to Install and Conceal Security Camera Wiring Indoors | Plan installation, gather tools and materials, turn off power, drill access holes, run wires through walls, secure cables, splice security camera wires, mount cameras, conceal wires, power up, final checks |
| Techniques for Running and Concealing Security Camera Wiring Outdoors | Plan the wiring route, prepare conduit pipes, mark drilling points, bury pipes, run security camera cables |
| Wiring an IP Camera System | Cat5/6 security camera wires, fish tape (optional), POE injector (for longer cable runs) |
| Wiring Security Cameras Through Walls | Drill a hole in the wall or use a wall plate, attach cables to fish tape, consider using security camera wire protectors |
| Wiring Security Camera System Outdoors | Drill a hole from the outside, run the cable back to the NVR, use wire guards to hide and protect the cable, conceal wire holes with silicone or duct seal |
| How to Safely Bury Security Camera Cable | Bury cables with PVC, wire guard, or metal conduit pipe; bury PVC conduit about 18 inches underground, consider drip holes to prevent water from reaching power outlets |
What You'll Learn
![]()
How to run security camera wires through walls
To run security camera wires through walls, you will need to gather the right tools and materials and follow a careful step-by-step process. Here is a detailed guide to help you with the task:
Tools and Materials:
- Security camera cables: RG-59 Siamese cables (for analog systems) or Cat5e Ethernet cables (for IP systems).
- Wire strippers
- Crimping tool
- Cable tester
- Power drill
- Screwdrivers (Phillips and flathead)
- Cable clips and ties
- Tape measure
- Ladder
- Wire connectors
- Power supply (12V for IP systems if Power over Ethernet is not feasible)
Step-by-Step Guide:
- Plan the Installation: Identify camera locations and determine discreet wiring routes. Consider running wires through walls for a neater appearance.
- Gather Tools and Materials: Ensure you have the appropriate security camera cables and splicing tools, wire connectors, and a cable tester.
- Turn Off Power: For safety, turn off power to the areas where you will be working.
- Drill Access Holes: Use a power drill to create holes for cable entry and camera mounting brackets.
- Run Wires Through Walls: Carefully thread the cables through the drilled holes, ensuring a clean and concealed pathway.
- Secure Cables: Use cable clips and ties to fasten the wires along their route, minimising visibility.
- Splice Security Camera Wires: Use wire strippers to expose wire ends, then use crimping tools and connectors for secure splices. Test each splice with a cable tester.
- Mount Cameras: Securely attach cameras in chosen locations using appropriate screws and brackets.
- Conceal Wires at Camera Locations: Use cable management techniques to hide wires near cameras, ensuring they are not easily accessible or visible.
- Power Up: Connect power sources according to the system requirements. Test each camera to ensure proper functioning.
- Final Checks: Inspect the installation to ensure everything is secure and neatly concealed. Restore power to the areas if it was turned off.
Additional Tips:
- When drilling holes, ensure they are not too big, as larger holes will be harder to fill and keep waterproof.
- Use outdoor-rated cables for exterior wiring.
- Measure twice, drill once! Make sure you drill into hollow spaces in the wall and not through studs.
- Use silicone caulking to fill holes and keep them waterproof. Ensure cables are anchored before filling to prevent them from being pulled out.
- If you have an attic, it may be easier to run wires through it rather than drilling through walls.
The Evolution of Underwater Photography: First Underwater Camera
You may want to see also
![]()
How to wire an outdoor camera
To wire an outdoor camera, there are a few different approaches you can take. The first is to use a wired connection, which offers a more stable connection but requires more effort to install. The second is to use a wireless connection, which is easier to install but may not be as reliable. Here is a step-by-step guide on how to wire an outdoor camera using both methods:
Wired Connection:
- Plan the installation: Identify where you want to place your camera outdoors and determine the route for the wiring. Consider factors such as ease of installation and the length of the cable.
- Gather the necessary tools and materials: You will need a power drill, wire strippers, a crimping tool, a cable tester, screwdrivers, cable clips, ties, and tape.
- Turn off the power: For safety reasons, turn off the power to the areas where you will be working.
- Drill access holes: Use your power drill to create holes for the cables to enter and for mounting the camera.
- Run wires through walls: Thread the cables through the drilled holes, ensuring they are secure and concealed.
- Splice security camera wires: Use wire strippers to expose the wire ends, then use crimping tools and connectors to create secure splices. Test each splice with a cable tester.
- Mount the camera: Securely attach the camera to your chosen location using screws and brackets.
- Conceal wires: Use cable clips and ties to minimise the visibility of the wires.
- Connect the power: Follow the system requirements to connect the power source and test the camera to ensure it is functioning properly.
Wireless Connection:
- Choose a wireless camera: Select a surveillance camera with wireless capabilities, such as Wi-Fi or Bluetooth.
- Place the camera: Position the camera outdoors in a spot that has a clear view of the area you want to monitor. Ensure it is within range of your wireless network.
- Mount the camera: Follow the instructions provided with your camera to securely mount it in the chosen location.
- Connect to a power source: If your wireless camera requires a power cable, plug it into a power outlet or use a battery.
- Connect to the wireless network: Follow the manufacturer's instructions to connect your camera to your Wi-Fi or Bluetooth network.
- Test the camera: Ensure that the camera is properly functioning and that you can access the footage on your desired device.
Mastering Camera Lock Modes in League of Legends
You may want to see also
![]()
How to hide security camera wires inside your house
There are several ways to hide security camera wires inside your house. Here are some detailed, direct, and instructive methods:
Paint the wires
One way to hide security camera wires is to paint them to match the colour of your walls. This method is straightforward and inexpensive. You can use spray paint or regular paint, but make sure it is safe for use on plastic. Before painting, disconnect the cable and ensure the paint is dry before reconnecting to minimise any risk.
Use a cord cover or raceway
If you don't want to paint, you can use a cord cover or cable guard. These are easy-to-mount fixtures with adhesive backing that can protect all wire types. Choose one that matches the colour of your wall, fasten it to the wall, and place the wires inside.
Hide wires within the baseboards
If you have enough doorways in your home, you can remove the baseboards and feed the wires through the gap between the wall and the floor. This method effectively hides the wires from view.
Run wires through walls or ceilings
If your security camera's power source is on the other side of a wall or ceiling, you can drill holes and thread the wires through, concealing them from view. Before drilling, ensure you turn off the power source to stay safe and avoid damaging your camera.
Use large furniture to conceal wires
You can use large furniture or decorative items such as tall potted plants, mantels, carpets, or bookshelves to hide security camera wires. Position the wires behind or underneath these items and use zip ties or cable clips to secure them in place.
Use flexible plastic tubes
This method is similar to running wires through walls but uses flexible plastic tubes to conceal the wires. First, locate the wall studs and drill holes large enough to accommodate the tubes. Insert the tubes, then feed the security camera wires through. This method provides effective concealment and protects the wires from damage.
Surveillance Cameras: Catching Criminals in the Act
You may want to see also
![]()
How to wire an IP camera system
Wiring an IP camera system involves several steps, from planning the installation to testing the camera. Here is a detailed guide on how to wire an IP camera system:
Planning the Installation:
Identify the locations where you want to install the IP cameras and determine the wiring routes. Consider concealing wires within walls for a neater appearance. It is important to plan the wiring route to be as short and easy as possible, especially if you will be burying the wires outdoors.
Gather Necessary Tools and Materials:
For an IP camera system, you will need Cat5e Ethernet cables (Power and Data) and the appropriate security camera cables. You will also need wire strippers, a crimping tool, a cable tester, a power drill, screwdrivers, cable clips and ties, a tape measure, a ladder, wire connectors, and a power supply.
Turn Off Power:
Before beginning any installation work, turn off the power to the areas where you will be working to ensure safety and avoid damaging your devices.
Drill Access Holes:
Use a power drill to create holes for cable entry and camera mounting brackets. The holes should be larger than the maximum amount of wires you expect to run, and it is a good idea to allow some extra wire for future reorganisation. Label the ends of the cables to avoid confusion later.
Run Wires Through Walls:
Thread the cables through the drilled holes, ensuring a clean and concealed pathway. Use fish tape to guide the wires if needed.
Secure and Connect Cables:
Use cable clips and ties to secure the wires along their route, minimising visibility. Connect the cables to the cameras and other components, following the camera's wiring diagram.
Mount Cameras:
Securely mount the IP cameras in the chosen locations using appropriate screws and brackets.
Conceal Wires at Camera Locations:
Use cable management techniques to strategically conceal wires near the cameras, ensuring they are not easily accessible or visible.
Power Up and Test:
Connect the power sources according to the system requirements. Test each camera to verify proper functioning. Conduct a final inspection to ensure everything is secure and concealed, and then restore power to the areas.
Additional Considerations for Outdoor Wiring:
When wiring IP cameras outdoors, it is important to use weatherproof cables designed for diverse weather conditions. Bury the cables or use conduit pipes to protect them from tampering and damage. Plan the wiring route carefully and follow local safety guidelines for burying cables.
Focus Camera: Where is it Located?
You may want to see also
![]()
How to wire security cameras through walls
To wire security cameras through walls, there are several steps to follow for a safe and effective installation. Firstly, it is important to plan the installation by deciding on camera locations and determining the wiring routes. The wiring route should be discreet, and it is often preferable to conceal wires within walls.
The next step is to gather the necessary tools and materials. For this job, you will need security camera cables, wire strippers, a crimping tool, a cable tester, a power drill, screwdrivers, cable clips and ties, a tape measure, a ladder, wire connectors, and a power supply. It is also important to ensure you have the correct type of cables for your camera system. Analog systems typically use RG-59 Siamese cables, while IP systems use Cat5e Ethernet cables.
Once you have the required tools and materials, it is essential to prioritise safety by turning off the power to the areas where you will be working. The next step is to drill access holes for cable entry and camera mounting brackets. After drilling the holes, carefully thread the cables through, ensuring they are securely attached to the wall.
The next steps involve securing the cables with cable clips and ties, splicing the security camera wires, mounting the cameras, and concealing the wires near the camera locations. Finally, connect the power sources, test the cameras, and conduct a final inspection to ensure everything is secure and properly concealed.
It is worth noting that if you are wiring an IP camera system, you will need to use CAT5/6 cables, and if the distance from the camera to the network video recorder is long, you may need to use a POE injector or switch to increase the distance.
Alternative Ways to Charge Your GH2 Camera
You may want to see also
Frequently asked questions
Analog cameras typically use a 3-wire system, while IP cameras use a 5-wire system. Analog cameras use RG-59 or RG6 coaxial cables for video transmission and 18/2 power cables, while IP cameras use Ethernet cables (Cat 5e or Cat 6) for video and power.
Essential tools and materials include security camera cables, wire strippers, a crimping tool, a cable tester, a power drill, screwdrivers, cable clips and ties, a tape measure, a ladder, wire connectors, and a power supply.
First, plan the installation by identifying camera locations and determining wiring routes. Gather the necessary tools and materials, turn off the power, and drill access holes. Run wires through walls, secure and splice cables, mount cameras, conceal wires, and connect power sources.
Plan the wiring route, prepare conduit pipes, mark drilling points, bury the pipes, and run security camera cables through the pipes. Use weatherproof cables and position cameras strategically for discreet wire concealment.