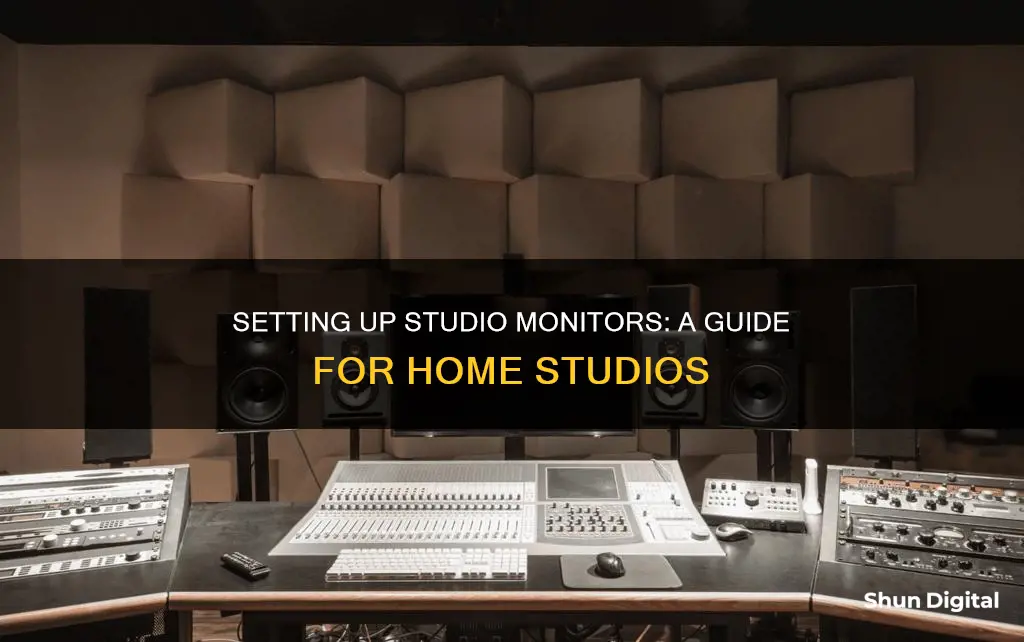
Setting up studio monitors is a crucial step in achieving a good sound. Monitor placement can have an even greater impact on your sound than the monitors themselves. Poor placement can create huge peaks and valleys in the frequency response of your room, destroying any chance of a well-balanced mix. The goal of monitor placement is to create an environment where a natural balance of sounds can exist, uncoloured by room acoustics. The biggest obstacle to this goal is a condition known as room modes, which occur when a room's dimensions are the same length as the sound wave or a multiple of half its wavelength. This results in standing waves that distort the overall balance of the room. To minimise this effect, it's important to position your monitors and listening position to form an equilateral triangle, with the monitors facing towards your head. The height of the monitors is also crucial, with the ideal placement being at ear level or slightly above to direct the sound accurately towards your ears and reduce unwanted reflections from surfaces. Additionally, it's recommended to place monitors away from walls and corners to avoid issues such as acoustic resonance and uneven frequency response.
| Characteristics | Values |
|---|---|
| Speaker placement | Form an equilateral triangle with the listener's head |
| Speaker direction | Point the monitors directly towards the listener's head |
| Speaker height | At ear level or slightly above |
| Speaker distance from walls | 20-30 cm minimum, 60-90 cm maximum |
| Speaker orientation | Angled at around 30-45 degrees towards the listener |
| Speaker type | Front-ported design preferred |
| Speaker stands | Isolation stands or pads to reduce vibrations |
| Acoustic treatment | Bass traps, acoustic panels, diffusers |
| Subwoofer placement | Not within the equilateral triangle, off-centre along the front wall |
What You'll Learn

Place monitors at ear level
When setting up studio monitors, it is important to place the tweeters of your speakers at head height, or ear level. This is so your ears are directly in front of the speakers, allowing you to receive a more direct sound from your monitors, resulting in a richer and more detailed listening experience.
To achieve this, you can use speaker stands to elevate your monitors. If your desk is low down, you may need to invest in stands that are tall enough to bring the monitors to ear level. Desktop monitor stands are a good option for a compact solution, but floor stands are usually larger and better for bigger monitors.
Monitor isolation pads can also be used to raise your monitors. These pads also help to reduce vibrations from the speaker enclosures, which can otherwise transfer through the surface of your desk and make your low-end sound messy.
If you are unable to get your monitors to ear level, you can try using angling stands to raise your monitors and angle them towards you, which can provide a good middle ground.
Monitoring Server Performance: A Comprehensive Guide
You may want to see also

Avoid hard surface reflections
To avoid hard surface reflections, you can use isolation pads or stands with isolation spikes to minimise vibrations and resonance transfer between your monitors and the surfaces they are placed on. This will reduce unwanted coloration of the sound.
You should also ensure that the monitors are equidistant from the front and side walls to maintain symmetry. Avoid placing one speaker too close to a wall or in a corner, as this can cause an uneven bass response.
If possible, invest in acoustic treatment for your room. This includes bass traps, diffusers, and absorbers to control reflections and standing waves.
Additionally, you can use a flat mirror to detect reflections. Position the mirror on a flat surface, such as a wall or desktop, and if you can see the reflection of the speaker face in the mirror, you should apply absorption to that reflective surface.
The Standard 21-Inch LED Monitor Size Explained
You may want to see also

Position monitors along the short wall
Positioning your studio monitors along the short wall of your room is important for a number of reasons. Firstly, it helps to create a balanced stereo image, ensuring that the left and right channels present a clear and precise stereo image. If your monitors are placed along the longer wall, the stereo image may be too wide or too narrow, depending on the exact setup.
Secondly, placing your monitors along the short wall helps to minimise reflections from the sidewalls, which can cause issues in the lower end of the frequency spectrum. This is especially true if your monitors are rear-ported, meaning the port that allows air from the woofer to escape is at the back. Reflections from nearby walls can also cause phase cancellations and other unwanted acoustic interactions, so it's best to keep your monitors at least 20-30cm (8-12 inches) away from walls and corners.
In smaller spaces, positioning your monitors along the shorter wall yields better, more accurate results. Sonic reflections that travel from the speaker to a nearby wall and back to your ear will arrive earlier and with greater intensity than reflections from farther away. This can affect the volume and rate of decay of certain frequencies, distorting the overall balance of the room.
To summarise, placing your studio monitors along the short wall helps to create a more consistent and accurate stereo image, minimises unwanted reflections, and improves the overall balance of the room.
Monitor Speakers: Choosing the Right Ones for You
You may want to see also

Create space between monitors and the rear wall
To create space between your monitors and the rear wall, you should aim for maximum separation between the wall and the monitors. For most rooms, this will be between 1-2 feet. This will help to reduce the strength of the reflections.
Bass frequencies project outward in all directions, and much of that sound travels backward, reflecting off the rear wall of your room. This reflection can cause what is known as the "boundary effect", where "in-phase" frequencies are amplified and "out-of-phase" frequencies are cancelled out.
To solve this problem, professional studios often build their monitors directly into the wall, eliminating all rear reflections. However, this solution is not feasible for most home studios due to cost and space constraints.
Another solution is to use monitors with front bass ports, such as the Adam Audio A7X. These monitors direct a larger portion of the energy forward, away from the walls. They also allow for more flexibility in terms of positioning, as they can be placed closer to the wall in smaller rooms.
In addition to creating space between the monitors and the rear wall, it is important to vary the distances between the monitors and each wall. This helps to minimise the effects of standing waves, which can cause peaks and valleys in the frequency response of your room.
By following these tips, you can improve the sound quality of your home studio and create a more balanced and accurate listening environment.
Monitor Usage: Afterburner's Impact and Performance Revealed
You may want to see also

Find the sweet spot
Finding the sweet spot in your studio is crucial to achieving an accurate picture of your mix. Here are some tips to help you find the ideal listening position:
Avoid the Room's Center
Sitting in the exact center of the room is not recommended. The room's fundamental frequency or its harmonics will create a "null" that causes a dip in the bass response. Place your monitors and listening position between the sidewalls to achieve a balanced stereo image. If your room is narrow, consider placing the monitors along the widest wall to avoid sidewall reflections.
The Equilateral Triangle Setup
Arrange your monitors and listening position to form an equilateral triangle. This setup ensures the best imaging and a mix that translates well to other systems. The ideal distance between your monitors and your head should be equal. Additionally, aim the monitors towards your ears at a 30-60 degree angle.
Monitor Height and Angle
Position the monitor tweeters at ear level. High-frequency content is more directional than low-frequency content, so directing the tweeters at your ears will provide a more accurate representation. You can tilt the monitors slightly to aim the tweeters at your ears if needed.
Distance from Walls
Place your monitors at least 8 inches away from walls to minimize sound wave reflection issues. For large rectangular rooms, consider positioning the monitors along the shorter wall. This allows sound waves reflecting off the rear wall to dissipate before reaching you.
Acoustic Treatment
Use acoustic treatments such as bass traps, acoustic panels, and diffusers to minimize unwanted reflections and improve your stereo imaging. Place bass traps behind the monitors to reduce reflections from the rear wall. Add absorption at initial reflection points, such as above your head and on the sidewalls. If your room has a low ceiling, consider adding a foam square above your mixing board to tame ceiling reflections. Avoid over-treating the walls, as it can lead to a "boxy" or "honky" sound.
Monitoring Hadoop Performance: Key Strategies for Success
You may want to see also
Frequently asked questions
The most important thing to consider is the height and angle of the monitors. The high-frequency drivers of your monitors should be at ear height relative to you. This helps your ears receive more direct sound from your monitors, resulting in a richer and more detailed listening experience. You should also angle the monitors towards your head.
As a rule of thumb, you want to consider a minimum distance of 20 to 30 cm (8 to 12 inches) between the monitors and walls, which is enough to reduce sound waves reflecting back to your listening position. The maximum distance should be between 60 and 90 cm.
The ideal setup is to have your monitors and listening position in the form of an equilateral triangle. This helps create an accurate stereo image and a balanced soundstage.
You should avoid placing monitors directly on a hard surface, like a console or desktop, to avoid unwanted reflections and vibrations. Monitor stands are a good investment as they allow you to separate the monitors from the rest of your setup and more easily adjust their distance and orientation.
You will need an audio interface and two cables to connect monitors to your computer. The audio interface will have at least two outputs, labelled 1 and 2, or L and R, to correspond to the left and right speakers. Depending on the monitors you have, you may need an XLR or a 1/4-inch jack cable to plug into the monitors, with another 1/4-inch jack plugged into your interface’s outputs.


